
Classic car restoration is challenging yet can be a very rewarding process for any car enthusiast. You might feel that you are ready to jump in with both feet, but before you get too ahead of yourself, understanding what is involved before you get started will prevent setbacks from occurring. While you will undoubtedly learn quite a bit more as you move forward with your project, here is a simple restoration guide for classic cars which covers the most important things to consider before restoring a classic car, as we have already discussed how to restore a classic car on a budget, and process for getting your car up and running.
It all depends on your experience and the work you are planning to do. To restore a car successfully it requires careful planning, plenty of research, setting a timeline and deciding if you are going to do it all or source some professionals. What we can say for certain is that it is going to take money and time, a lot of time… and patience.
This car restoration guide provides a simple example of the process of how to restore your car the right way. Keep in mind, this is only a simple guide and should not be followed without thorough research into your specific vintage car and having some sort of DIY mechanical background. Besides setting up a work plan you should also create a thorough checklist for all your work to stay on plan for your car restoration project. However, we will provide you with alternatives if tinkering with complex wiring harness or welding is not your thing.
Step 1: The Plan for A Restoration Guide
The most important part in restoring a car is creating a plan. This will give you a firm understanding of the entire process including how much it is going to cost, how long it is going to take, and how you are going to do it. It is a great opportunity to envision your final product and set out goals on how you are going to achieve your dream car. Here is what you need to consider:
Restoration Guide Budget
What is your final price? Figure out how much you want to spend on the entire project and then break it down into how much you are going to spend on each section of the car. Allocate a little extra for any mistakes or unforeseen circumstances that may arise.
It is important not to cheap out on certain parts as the quality of parts will heavily dictate your final product, as with prospective buyers wanting to have intimate knowledge on the car.
Restoration Guide Goals
What are your plans for the car? Is it a complete restoration or just some minor body work. The more work you plan on doing, the bigger your budget will need to be, the more time you’re going to spend on it.
Work Location
Your vehicle is going to be sitting in one spot for quite some time, so you will need to figure out where you can store it, which way it faces for easy access and where you are going to put all its parts once it has been disassembled. Best practice is to set up two separate areas, one for mechanical and body, and the other for electrical and upholstery.
Document Everything!
Take pictures and video recordings of everything before, during and after the stripping phase, it is almost impossible to remember how everything came apart. Create a checklist of parts and take note of what needs replacing, repairing, or repainting.
Make sure to also label everything as this will save you a lot of time in the rebuilding phase. This can also be a great selling point for prospective buyers who want to know how the work was done.
Restoraion Guide Project Timeframe
Create a timeline of how long this project is going to take and how much time you are prepared to commit. Be realistic with your timeframe and set achievable goals along the way. To make the restoration process easier, you can break down the project into four parts: mechanical, electrical, body and interior/upholstery.
Setup two separate areas with mechanical and body in one section and electrical and upholstery in the other. This will allow you to work on two different things at the same time.
Remember; “Rome wasn’t built in a day.”
Tools Of the Trade
Based on what you have planned, do you have all the right tools for the job? If you must purchase some new tools, can you afford it? Some other options to explore can include renting or borrowing from a friend.
Contact The Professionals
Whether you are doing a complete restoration yourself or seeking professional help, it is always a good idea to get in contact with the experts before you start ripping things apart. Write out a list of companies or people you may need to contact and inform them of your project and timeline so that they can prepare anything that needs to be ordered to prevent any delays.
What Is the Final Product?
This is where you get to plan and envision what your car is going to look like once it is completely restored. Gather inspiration online, check out Pinterest, YouTube, go to car shows, and car browse magazines. It is a good idea to know what features your car is going to have, for example, tinted windows, to avoid last-minute decisions that you might end up regretting.
Step 2: Let’s Get to Work
With all the planning and research done, it is time to get your hands dirty.
1. Strip the interior
Store it somewhere safe and clean where it will not get covered in dirt or dust. If anything is broken, do not throw it away just yet, as you will need it to compare when buying replacement parts. Do not forget to make a note of it on your checklist if it needs replacing.
If possible, remove your dash entirely with instruments mounted, if not, remove each piece and make sure to mark all wire locations.
2. Remove All Wiring
It is important to label all wiring once you have removed it as it can get quite confusing. Take note of any wires that are damaged and need replacing.
3. Take Out the Engine and Transmission
Make sure to drain all fluids out first to avoid creating a mess. An engine lift will make this whole process easier. Remember to label all wires as you take them off the engine and to take photos of each step of the way.
4. Remove External Panels
Including bumpers, wings, trims, and clips, taking extra care not to break any of the clips as they can be difficult to source and replace. Carefully remove the hood and boot lid, then your doors, making sure to scribe around edges of hinges to help remount them later.
5. Remove Window Glass
On most classic cars the windscreens are usually held in place with a rubber seal which dries out overtime and becomes weak. The easiest way to remove them is by slicing the rubber seal using a utility knife as you most likely will not be using the same ones.
Store the windows carefully if you plan on reusing them.
6. Place Car onto a Rotisserie
This part can get a little tricky, especially if you do not have a rotisserie. If you do not, you can remove the rear axle and position the body on top of a couple of jack-stands.
7. Remove Everything Underneath
Remove front and rear suspensions as well as the steering rack, brakes, etc. Make sure to take note of what needs replacing and repairing.
8. Apply Powder Coats
We recommend applying powder coatings for any easily removed metal part that is not rusty including metal bumpers, frame, wheels, and axles for a finer finish that is more durable than paint. Or send them off to professionals for stripping, cleaning, and powder coating.
9. Order Replacement Parts
Take the time to order any replacement parts or contact any of the professionals from the list you made during the planning phase to make arrangements for restoration. To make the whole process easier and cheaper, create a list and try to source your parts from the one location.
Step 3: The Elbow Grease Is Required
This is the phase of the restoraation guide where you get to turn that ugly rust bucket into an eye-catching street machine. It also means you are going to be doing a lot of work. This is where the stripping, sanding, priming, and painting will take place.
1. Strip Off All the Paint
The easiest way to remove the paint is from blasting or acid dipping the entire shell but you may need a professional for this. Otherwise, there are 3 DIY options to explore when it comes to stripping the paint.
Your best option is to use a wire brush on an electric grinder, despite being extremely time consuming.
Your second option is to sand all the paint off but it can be hard to get in between cracks.
The third option is to use paint stripper but this method can get very messy and is not quite as effective as the other methods.
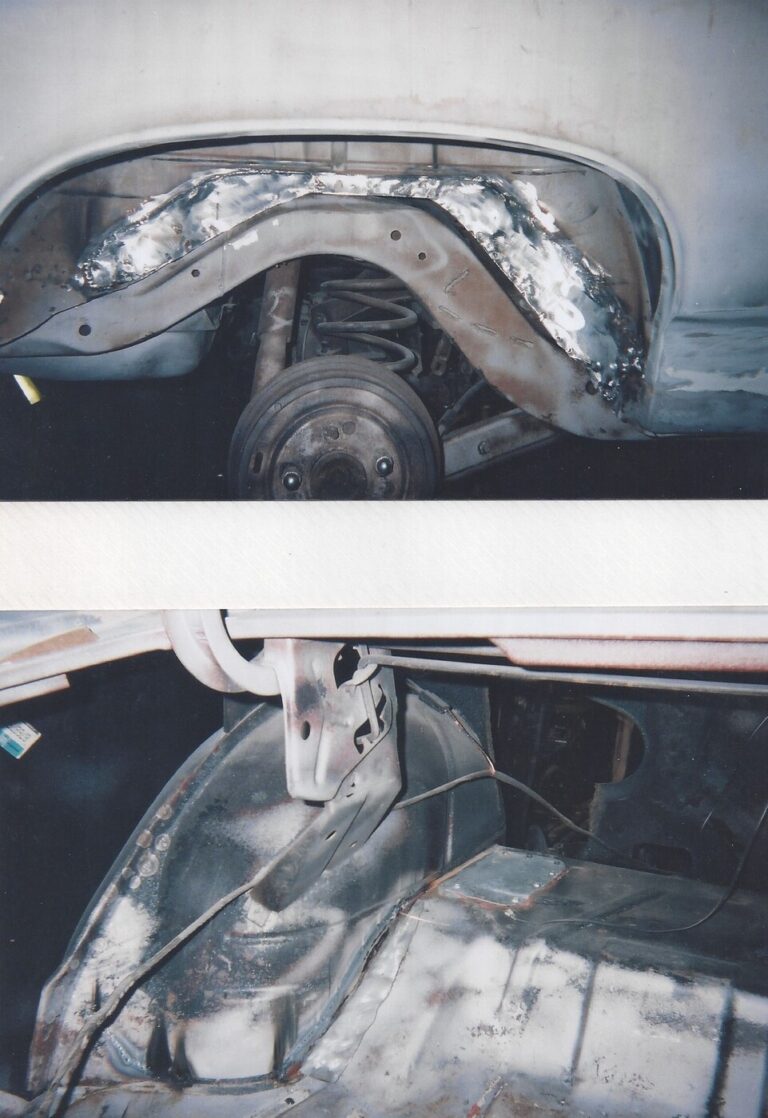
2. Remove Rust and Dents
This can be quite a tedious process but there are 3 ways of dealing with rusty parts.
The best option is also the most expensive option and that is to remove rusted parts and to replace it with freshly welded steel. However, you can choose to DIY, in which case is just as time consuming.
Another option is to replace all removable panels such as spoiler, doors, hood, and trunk lid. The only challenge with this option is being able to source rare parts.
A quick fix option is to strip back the rust and treat it, but this will only delay the inevitable and is not recommended.
3. Sealing Underneath
Not only does undersealing look good but it also provides a durable and UV stable protective layer that protects it from scratches, abrasions, rust, corrosion, extreme temperatures, and chips.
4. What to Do Before Painting
In this stage you will be filling, priming, and sanding before we get to the painting stage.
Where there is welding, there is filling. Fill in any gaps and apply an etch primer to seal the metal and give it a good key. Make sure you wipe down the panels each step of the way to get a smooth professional finish without dust and dirt particles.
Lightly sand the primer with 500 grit sandpaper, making sure not to sand back too much otherwise you will have to repeat the steps above.

Find a professional vehicle painter:
- Take care any of imperfections after painting. Remove dust particles or paint runs with some wet 2000 grit sandpaper and repaint it, making sure not to go overboard.
- Polish the car. Give your car a good detail with a machine polish.
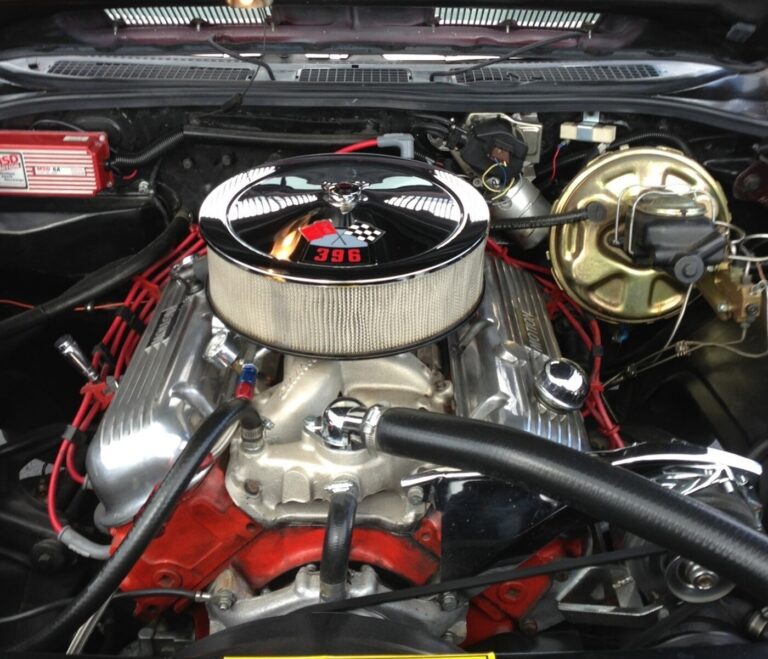
Step 4: The Engine
In this phase you get to put your mechanical skills to the test.
Upgrade Or Engine Swap?
Are you going to be doing engine reconditioning or an upgrade? Based on your budget, you will need to decide on what parts are going to be replaced. At the very least you want to be replacing all external seals and gaskets to prevent any future leaks.
While the engine is out, you may also want to consider replacing the timing belt and water pump for peace of mind, as these parts can be quite expensive and laborious to replace. Other parts to consider also include turbo, fuel pump and intercooler.
If you are doing an engine swap, make sure to do your research when sourcing a new engine with low mileage.
We recommend contacting the professional machine shops or engine builder for this step as mistakes can be quite costly.
Get The Engine Checked
If you are unsure, get an expert to check tolerances, look at the bearings for any wear, worn valves and valve seats.
Remove, Replace or Rebuild All Mechanical Parts
This can include alternator, power steering pump, air conditioning pump, brackets, coolant pipes, radiator, turbo, and manifolds. Also, inspection of axles, transmission, steering, suspension, and gears. Once complete, give them a detail with either wrinkle paint, powder coating or chroming. This is also a good time to evaluate any modifications or upgrades to your classic car whether it is the brakes, steering, suspension, seat belts, and even lighting.
Mount The Engine
For new engines you will either need to fabricate or buy new engine mounts.
Hook The Wiring Up
We hope you labelled and documented all the wiring from Phase 2! Figure out how you want to run the wiring if it is a show car, and you will want to hide your wiring harness. Splicing it may be a quicker process but make sure you know what you are doing to prevent any diagnostic problems in the future. You may also want to replace your entire wiring harness with new to avoid any electrical issues.
Fire Up the Engine
After mounting and wiring the engine, it is time to see if it works. Make note of everything that is not working properly and needs to be replaced. This will give you peace of mind, knowing that the engine works once everything is painted and finalized.
Step 5: Reassemble the Car

With the body freshly painted and the engine running smoothly, it is time to put everything back together. Start with the mechanical parts first and work from the ground up.
- Reassemble your brake system
- Refit your fuel system
- Refit your front and rear suspension
- Install wiring. Test dash instruments as much as possible using a voltage meter
- Install the engine and transmission
- Install the cooling system
- Re-fit the rubber and all windows and glass components
- Refit exhaust system, head and taillights, door glass, door handles, and other exterior trims
- Reattach doors, hood, and trunk
- Fit out interior trim including insulation, carpet, headliner, seats, and accent pieces.
Step 6: The Test Drive
Arguably the most important phase in this entire guide. After many sleepless nights, weekends lost to slaving away in the garage, sweat, blood, and tears, you have finally made it. The classic car of your dreams sits there right in front of you. You open the door, and you are hit with that new car smell, unforgettable.
Keep an eye and an ear out for any small issues that will become apparent when you start using the car. Make sure everything is in working order including the radio, air conditioner, heater, brakes, lights, windows, dashboard, and any other dash instrument.
It is time to take it for a drive.
Finally
Even though restoration projects are often quite vehicle-specific, we tried to provide some general advice that can be applied to practically any vintage car restoration project. Restoring a classic car can be a challenging project, but with some useful tips and planning, you can make it a positive and thrilling experience. There are many reasons why you would choose to restore their vintage vehicle, the main one being a better-looking car as well as enhanced reliability. We hope this basic restoration guide will help you along the way.