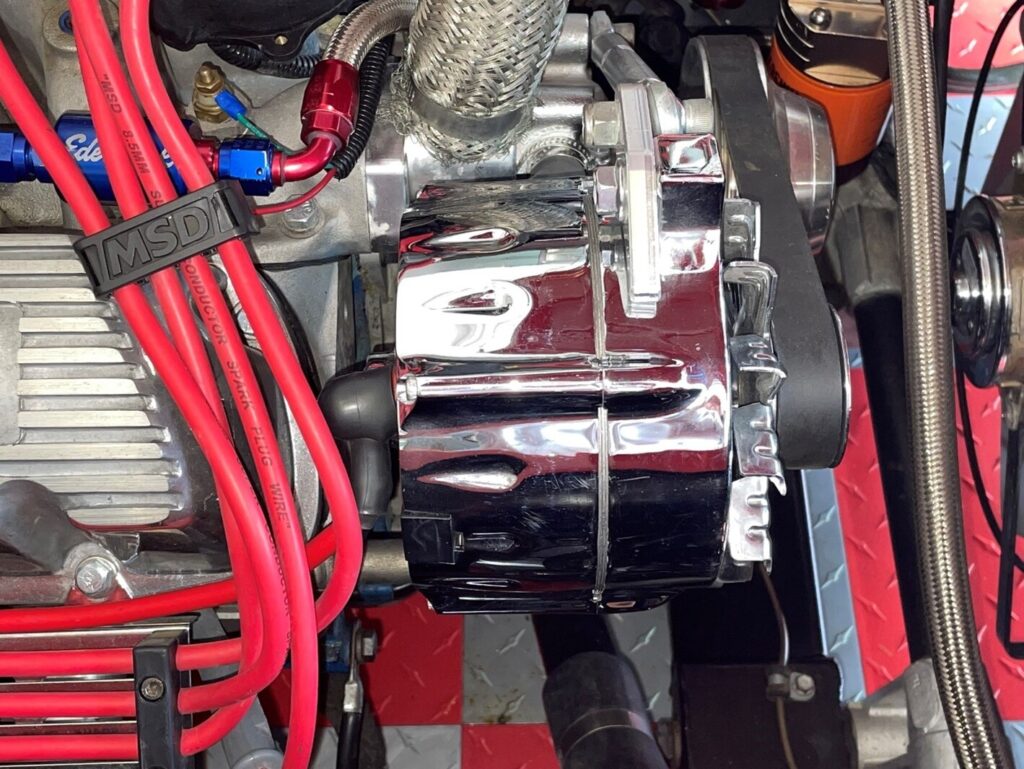
Striking a compromise between functionality and looks is a battle that can arise when it comes to choosing an alternator. The one-wire alternator units offer clean and simple installation with minimally visible wiring.
In the classic car world, many custom car and street rod builders prefer converting to a one-wire alternator because it keeps things clean and uncluttered under the hood. They are also popular with engine swaps, race cars, and about anything else you want to put one in!
One-wire alternators are also a good choice when converting an old car or truck from 6-volts to 12-volts. They are often used to replace generators in old trucks and farm machines. One-wire alternators are small, inexpensive, and extremely easy to wire in. They will also do away with an external voltage regulator, as they have an internal regulator.
How To Install a One-Wire Alternator
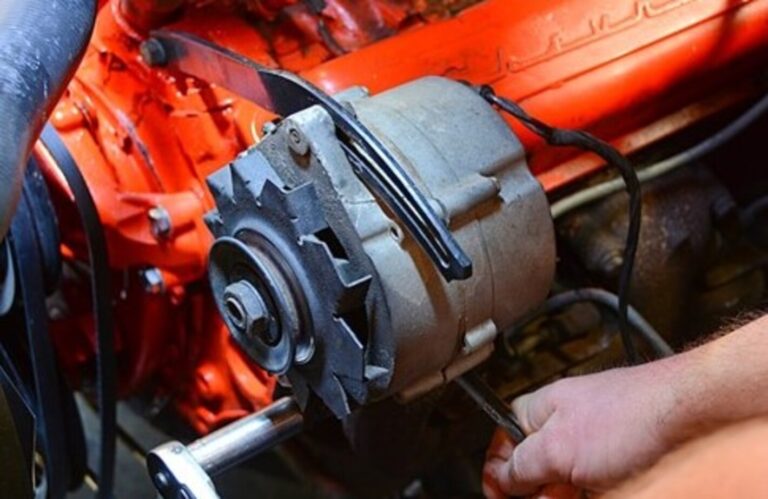
The installation was extremely simple, and we had the new alternator in place after about an hour in the shop. Regular hand tools are all that is necessary for the install, unless you also plan to install a voltage sensor for use with the original battery (generator) warning light or a volt gauge. At that point you might need to crimp a few wires to complete the install, but it is still a very simple process.
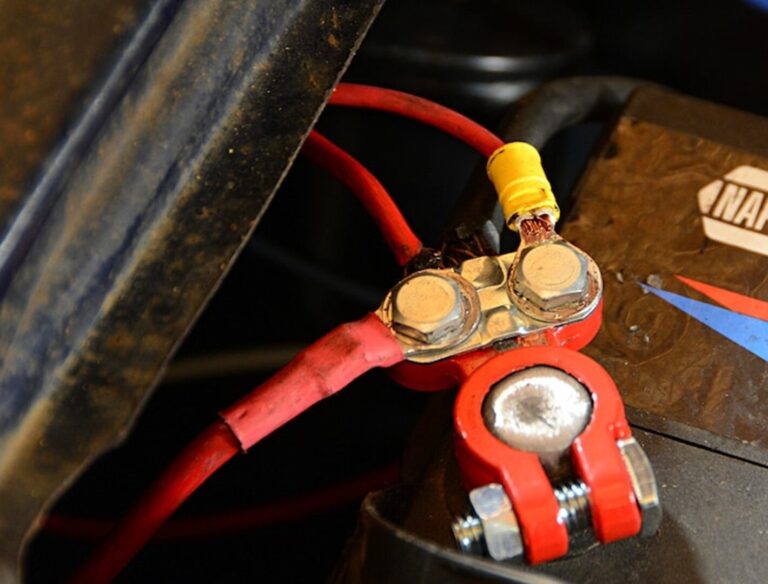
Hooking up a one-wire alternator is ultra-simple. The only wire needed is the “charge” wire, which goes from a terminal on the alternator to a positive battery source. This can be the starter relay, or any positive battery source.
For those who are upgrading from an external voltage regulator setup, once the one-wire unit is installed, you can either remove the extra wires and voltage regulator from the firewall or just leave them in place.
How To Hook Up a One-Wire Alternator
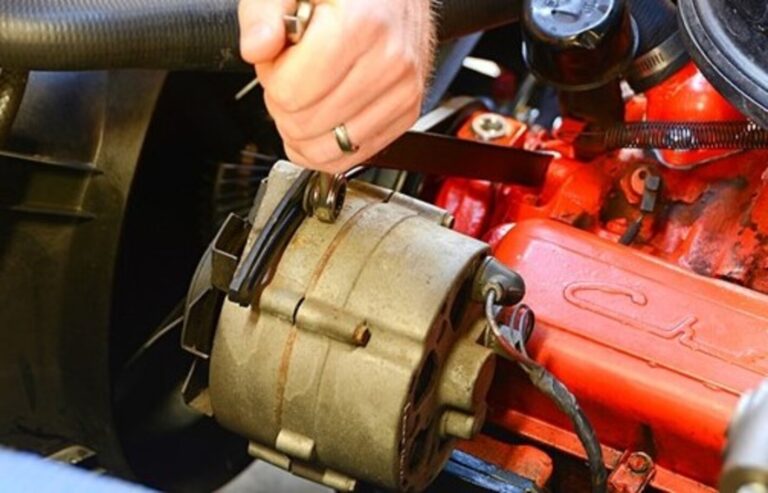
As always, any time you are dealing with the electrical system on your classic Chevy, disconnect the battery. This is also a great time to buy new cables and terminals, as this is cheap insurance against wiring gremlins down the road.

What do you do when the stock alternator was originally externally regulated? It is simple! The only thing you need to hook up on a one-wire alternator is a charge wire from the terminal on the alternator to the positive terminal on the battery (or any positive battery source). The external regulator can either be totally dismantled from the firewall or left in place. If left in place, be sure to disconnect the wiring harness from the regulator. The wiring harness must be disconnected from the regulator or the indicator light on the dash will remain on.
Note: if the vehicle is equipped with an indicator light, the light will no longer be operative.
Most one-wire alternators have a charging point set around 1200rpm or higher. This is the speed where the internal sensory circuit connects the battery voltage to the regulator, thereby turning the alternator on. Once the voltage regulator turns on, the alternator will remain on and charging until the engine comes to a complete stop. If the engine idle speed and pulley ratio combination does not allow the alternator to come to during start-up, the engine will have to increase the RPM to engage the one wire alternator. One exception to this is Tuff Stuff’s heavy duty 140 amp performance alternator rated to charge 80amps at 750rpm.
Popular Choices for Converting to a One-Wire Alternator
Delco 10SI Alternator
Most one-wire alternators are based on the old GM Delco 10SI unit. These were first seen on 1969 Corvettes and were one of the first internally regulated units. Compared to the externally regulated units they replaced, the 10SI alternators proved to be more reliable with less wire clutter. Even by today’s standards, they provide a good amount of output (up to one hundred amps), and work equally well at low RPM and idle speed.
Delco 12SI Alternator
The 12SI alternator was introduced in 1983 and shares the same basic dimensions as the 10SI unit. It is two primary advantages over the 10SI are better cooling capacity and higher amperage.
Pulley Ratio Changes
Changing the pulley ratio on the alternator by slowing it down will keep a one-wire regulator from charging. This can also produce a low voltage problem at engine idle speed depending on the amount of reduction. Alternators are usually tested with a 3:1 pulley ratio. This is the recommended street pulley ratio and is used in most factory applications.
Finally
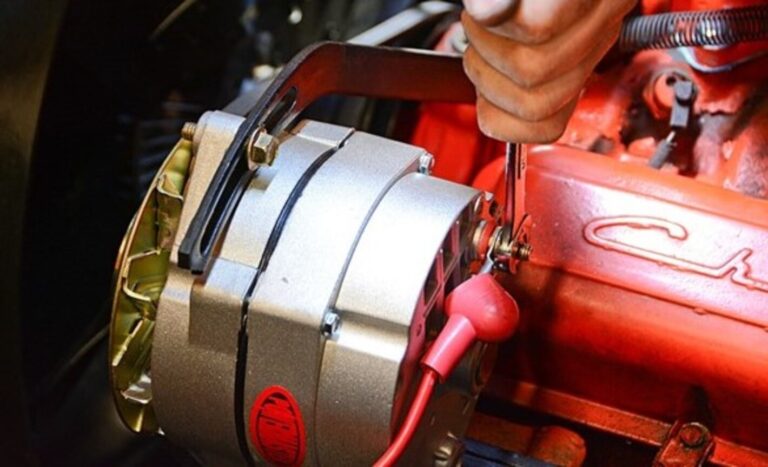
The only thing you need to hook up on a one-wire alternator is a charge wire from the terminal on the alternator to the positive terminal on the battery (or any positive battery source). Once the voltage regulator turns on, the alternator will remain on and charging until the engine comes to a complete stop. With the belt installed and everything tight, we can install the charge wire on the back of the alternator. The one-wire hookup is very simple, and you’ll be ready to hit the road with additional charging power for accessories like air conditioning, fuel injection, electric fans, and more.
Each classic car or custom hot rod may have some different wiring needs or adjustment so there are plenty of DIY “how to” posts for specifics cars available, but what we want you to know is that converting to a one-wire alternator is not a daunting task. Most people can make this conversion work with simple tools.
Hello classicautoadvisors.com administrator, Thanks for the detailed post!
what if your car is positive ground