For classic car owners changing over from 6-volt to 12-volt conversions is one of the easier and cheaper projects to update an old car or old truck. The benefits are easier starting and greatly improved headlights, as well as the ability to add 12-volt accessories.
In 1955, 12-volt electrical systems became an automotive industry standard. The reasons for this were two-fold. First, car manufacturers were producing new, higher compression V8 engines that needed more starting power. Second, new features such as power seats, power windows, etc., were putting more of a demand on your electrical system.
Before converting your 6-volt car to 12 volts, ask yourself a couple questions:
How often do you drive the car?
Is the motor stock or does it have performance mods?
Are you adding power accessories?
Power accessories would include items such as halogen headlights, LED taillights, or an aftermarket radio and amplifier.
Engines built prior to the mid-fifties should not have any problems starting with the original 6-volt system. This is providing the battery and wires (including battery cables) are in good shape, and that the motor has not been extensively modified.
Starting Point
Before you get into this project, be sure to look over your wiring.
If your wiring is frayed, split, or cracked, start over. There is no sense putting all this work into changing over if you are still going to get shorts and take a chance on burning down the car. It is easier and cheaper to do it all once than to change over, fight bad wiring, have problems, then must do it all over a second time…
First, if you are wiring and your switches are in good shape, then so are you!
A 6v wiring system and switches are more than enough to handle 12v. It is heavier because it must carry more amperage. Less volts means more amperage. Changing to 12v cuts the amperage load approximately in half. So, the wiring will live happily with 12v.
Second, figure out if you have a positive or negative ground.
You will be going to a negative ground. So, if you have a positive ground, you need to do a few things first.
Start being reversing the power wires to anything that is polarity conscious. Things like the ignition coil, amp gauge, wiper motor, heater motor, etc.
Also, the battery cables will need to be changed or modified. The ground strap will need to reach and have the correct end to connect to the negative post and the cable to the starter solenoid will need to reach and have the correct end to connect to the positive post of the new battery.
Now, let us focus on the areas that you need to change.
Starter
The starter is usually the easiest area to deal with. 6V starters are fine dealing with 12v and will last a long time.
You will need to change the starting solenoid over to a 12v solenoid. 6v solenoids will work if you need to start in an emergency but will burn out quickly and could lock the starter on or cause a fire.
Usually, 6v positive ground starters work fine being switched over to 12v negative ground. Just change the cable to the positive battery terminal. However, you might find some models will not work and, in that case, take it to an auto electrical shop and have the motor leads reversed if you cannot find a negative ground starter that will interchange. This is rare, however.
Charging System
The first thing you need to do is get a 12v battery of course. Take your battery box measurements and get a battery that will work for your application. Also make sure you have clearance above if you use a top post.
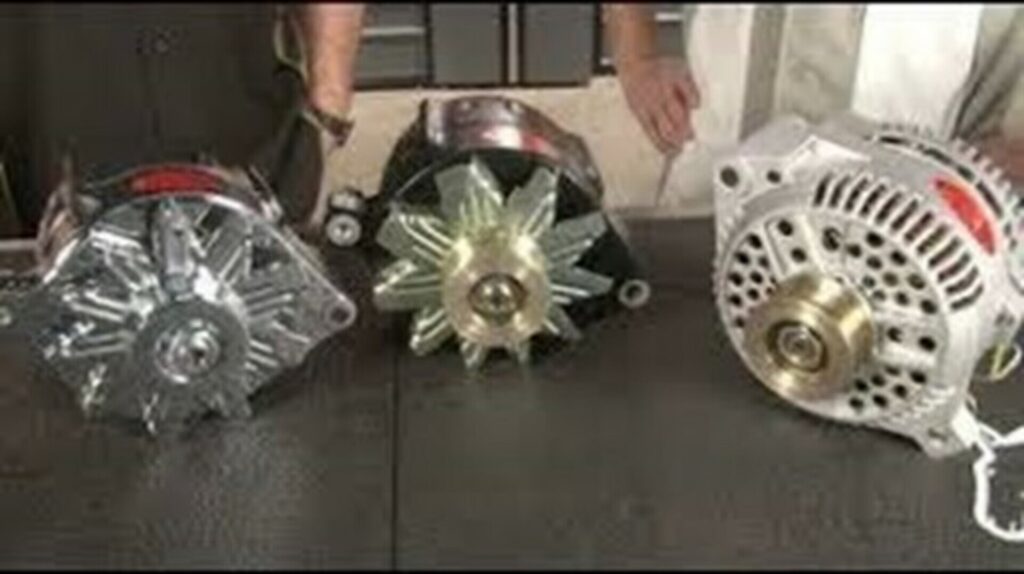
Now you have the option to either switch to a 12v generator or a 12v alternator.
A generator is not used as often, but it is simple to change out. The brackets are usually the same and wiring stays the same. You will have to change out the voltage regulator for a 12v one also.
Most choose to go with a 12v alternator. More specifically, most use a General Motors 10SI alternator. They are tough, small, and cheap, and most places have them in stock. They are also easy to wire in. They also do away with the stock voltage regulator as they already have an internal regulator.
They are not that hard to install as many brackets can be made or modified to install it. Many older 6- and 8-cylinder engines have brackets available that will work because later in life they switched to alternators. There are lots of aftermarket brackets available also. Check in any good hotrod or street-rod magazine for suppliers of brackets. Get creative!
To wire it in, unhook the wires from the voltage regulator, cut the ends and seal them off and tie them out of the way with the rest of the harness. Or you can remove them.
Using a 10-gauge wire, run from the Bat terminal on the alternator to the positive cable end on the starter. Or, if you have an ammeter in the dash, run from the alternator to it and then to the starter. Remember, you must switch the leads on the ammeter if you are changing from positive ground to negative ground or it will read backwards.
Hook up another short 10-gauge wire from the #2 pin on the alternator to the Bat terminal on the alternator. The #2 pin is the one farthest away from the Bat terminal. (You can get the plug for the 10SI alternator with the 2 wires from any auto parts store.)
Connect a 16-gauge wire from the #1 pin on the alternator to an idiot light (a small light you can get from the auto parts store to put on the dash with 2 wires coming off it.) Neither wire of the light goes to ground. Connect one wire to the 16-gauge wire from the alternator, and the other to the ignition switch. Otherwise, your engine may keep running after you shut it off. Now that has taken care of…
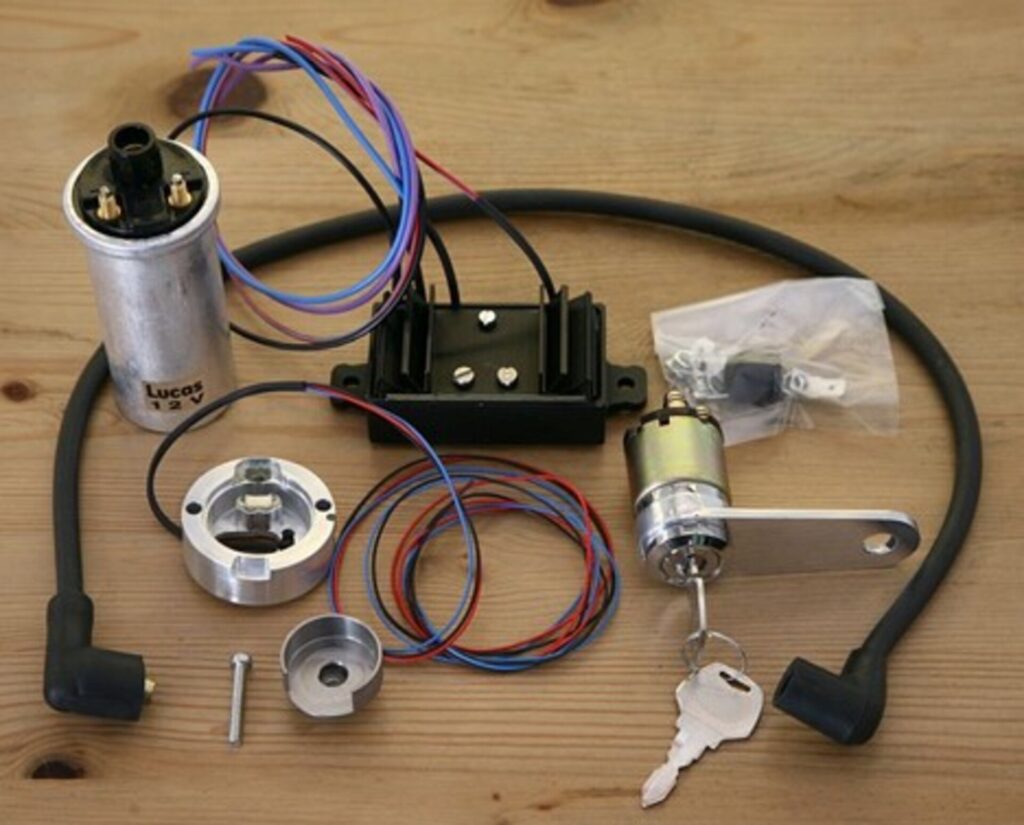
Ignition
Your ignition system needs to be in good working order first. Plugs, plug wires, distributor cap and rotor, etc.
The first thing you want to deal with is the coil.
If you are 6v negative ground going to 12v negative, you can leave the wiring to the coil alone. If you are 6v positive ground going to 12v negative, you need to switch the two wires on the coil. Negative to positive, positive to negative. For a 12v negative system, the ignition switch wire goes to the + terminal on the coil. The wire from the distributor to the coil goes to the – terminal on the coil.
If you are not going to use the car much and just drive it easy, you can get by with the old coil. You just must add a ballast resistor to drop the voltage back down to 6v for the coil. We will cover that in a minute.
If you are going to drive the car more and have some fun with it, switch to a 12v coil. They do not cost that much and are really recommended. They have more windings and live much better in a 12v environment. Some stock 12v coils need a ballast resistor and some do not.
Ballast Resistor
You put it in the wire from the ignition switch to the coil. You want to mount it away from other wires or anything flammable as it will get hot. Normally you mount it on the firewall above the engine. Just cut the wire, add connectors and hook one wire to one prong of the ballast resistor and one to the other.
Points
The 6v points will be fine and are usually just a little tougher than the 12v points. Upgrading to 12-volt will also allow you to convert from points to electronic ignition if you want that modification.
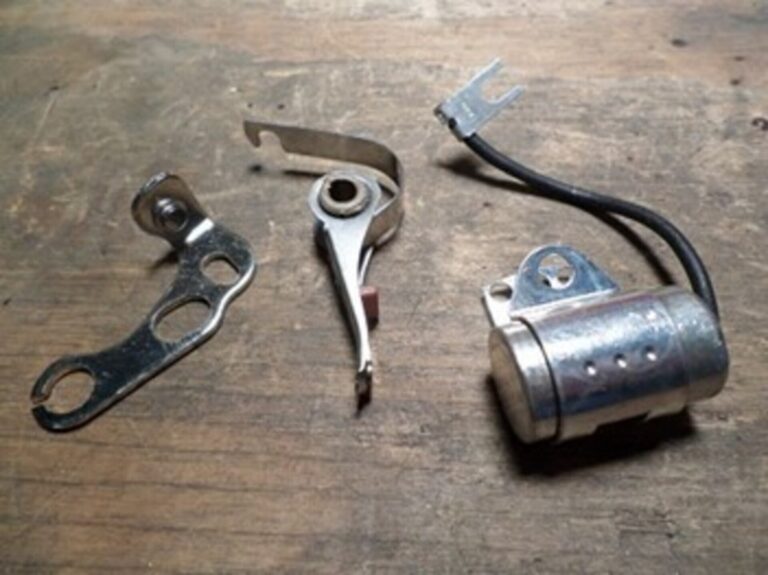
Condenser
You need to change it. Any late model condenser will work. All you really must worry about are the mounting and the ends.
Tip: If you have any trouble at the parts store on these ignition parts or they want a car, just go with late sixties – early seventies Chrysler products. They work very well.
Gauges
Let us make those gauges work.
First, all the bulbs in the gauges and gauge clusters as well as any other bulbs in the dash or interior need to be changed over to 12v. Just take the old ones in and match them up to 12v bulbs.
If your gauges are mechanical, they are fine. If they are electrical, they need a ballast resistor to make them work. If you have idiot lights, you just change the bulbs.
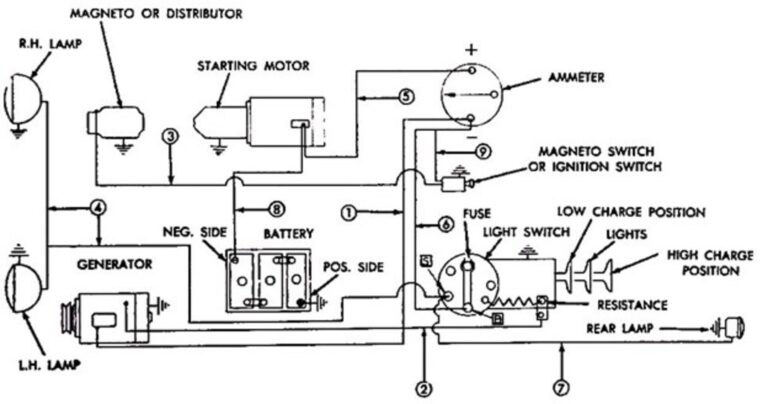
The amp gauge will be fine. However, if going from positive ground to negative ground you just need to switch the wires side to side, or it will read backwards.
Some fuel gauges work fine on 12v while others do not. You will not blow it up, but if it does not read right after switching over to 12v, it probably will need to be run through a ballast resistor. Just put it in the power feed to the gauge.
The rest of the gauges will need a ballast resistor of some kind wired into the power input of the gauges.
This may be the best option. One unit can feed all your separate gauges. Just run a wire from the ignition switch to the unit and another wire from the other side of the unit to one gauge then jump wire to the next gauge and so on.
Remember to mount these ballast resistors where they will not melt any wires or catch anything on fire as they will get warm or hot.
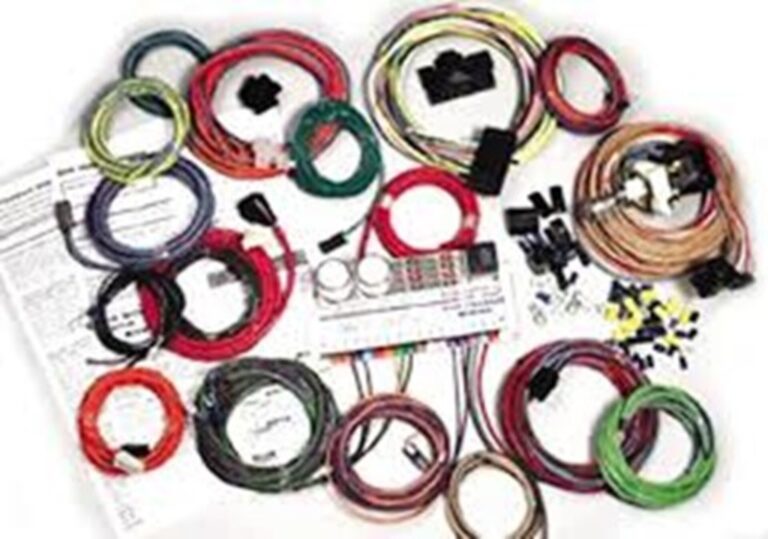
If you do not want to mess with the original gauges, have a rat’s nest of bad wiring under the dash, or after a quick and easy way to wire up gauges the aftermarket is the way to go. Just go with aftermarket gauges and sending units. It is often easier, and you know they will work.
Do not forget the radio. About the only way to convert your radio is take it to an automotive radio repair shop. If you can find one. Probably the best bet is to find one on the internet and send it out. However, it is probably going to cost you. Ballast resistors really do not work on radios as they are extremely specific about power. Replacing with a new system is usually the cheapest.
However, if you want to retain the looks of your radio, a lot of people leave it in and hide a newer radio somewhere within reach. Or look in hotrod or street rod magazines as there are aftermarket options that mimic the look of your old radio or work through your existing radio.
Blower Motors and Wiper Motors
These 6v electric motors will not last long on 12v. They can be made to work usually with a heavy load ballast resistor. However, it may be easier and sometimes less expensive to just change the motors out for 12v ones.
Lighting System
This usually is simple.
You DO NOT need to switch your headlight switch, the brake light switch, headlight high beam switch, the headlight circuit fuse, and the turn signal fuse. They are fine for a 12v system.
You will want to change your turn signal flasher for a 12v unit. Just take the old 6v one in and match up a 12v replacement. The wires connect to the similarly labeled terminals on the 12-volt flasher.
Now just change out the bulbs. Look closely at the sockets and make sure they are clean and not corroded. Usually, you can just take one of each type of 6v bulb you have and find its 12v equivalent. You want to pay attention how the base is made and the size of the bulb. Sometimes you may have to change out the pigtails in a socket to make them work. Pigtails are the bottom terminals that push into a socket and have the wire ends. Or you may just change the entire socket.
Now for some final things you might need to look at...
Do you have any relays? Some older vehicles have them and you need to change them to 12v versions. Look through your wiring. Things like horns might have them. You may not have any at all.
Look at your ground straps!
Almost all electrical problems can be traced to bad grounds. Some weird and seemingly unrelated stuff can happen if you have bad grounds.
You can never have enough ground straps. Especially if you start adding accessories. You should have a cable from the negative post on the battery to the engine block, a strap from the engine to the firewall, a strap from the dash to the body is not a bad idea, a strap from the body to the frame or the battery negative post, and a strap from the frame to the engine block. It sounds like a lot, but if you start looking through your car, you probably have most of them already. Make sure your grounds have clean connections and are not in bad shape. If you are unsure, just put on another one. It is cheap insurance.

And finally...
When you do your electrical work, be neat. It makes things so much easier to work on in the future and looks professional. Remember, you are building skills here… Take pride in your work. Use good materials, stick to the same wire colors, bundle your wires up into looms, fasten wires up neatly out of the way, etc.
Also, this is not the final work on how to do a conversion. Every car is different, and you should look up information for your model. A good thing to do is find a forum on the internet that deals with your car. There you can find lots of specific information on your kind of model and maybe even stuff you never even thought of. A little homework can save a lot of frustration.
Good luck!
nothing about the headlights….6 volt 2 prongs, 12 volt 3 prongs…how do you change these…?
The difference is the 3rd wire addresses the high beam on a dual beam light. If your car did not have high beams originally then you will need to add a high-beam switch to convert to a dual light system (low and high beam in one light fixture). We can address converting light systems in future posts.
This is a rip-off of my article from restore-an-old-car.com. At least give some credit.
can i just make the starter 12volt and leave the rest at 6 volt