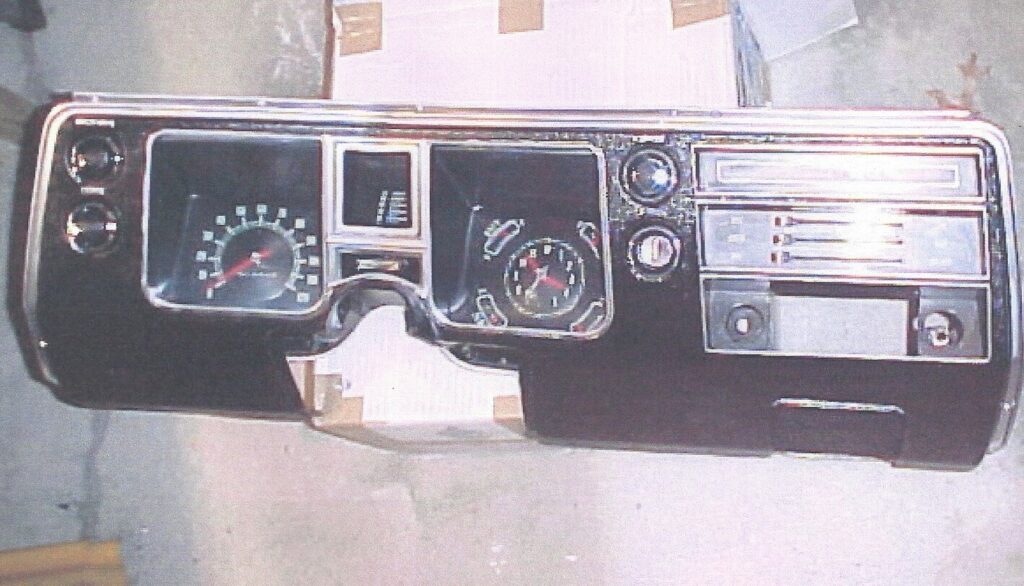
We love the style and character in our old cars’ instrument panels, but time, neglect, and careless add-ons can degrade their operation. You see, few things in a vintage muscle car will stare at you longer than the dashboard. Restoring your vintage gauge cluster is typically not a DIY project for most at home mechanics. There are companies that do gauge restoration, and the cost may run more than you will spend on aftermarket gauges so let explain the process, so you understand what you are getting for your money.
What Is Gauge Restoration?
When you see how much effort, what unique skills are required, the rare old-school processes, and the exacting level of detail that goes into each instrument panel resto.
Some jobs will have a waiting time between 10 and 12 weeks, which is due to the extended time of rehabbing the chromed plastic bezel. If your bezel is in decent shape and you just need the gauges, then eight weeks is more normal. Either way, there is a lot of disassembly, cleaning, diagnosis, repairing, calibrating, lubricating, painting, and reassembly.
When you get your bezel rehabbed, it goes through a major transformation. After being stripped and repaired, they use the original vacuum metalizing process to re-chrome it. This is followed by careful masking and painting of the blacked-out areas, then steady-handed detail painting of the lettering. Transparent plastic lenses are carefully separated from the bezel (they were plastic welded from the factory), cleaned, buffed, polished to like-new, then re-welded to the bezel during final assembly. When you get it back, you absolutely will not believe that it is a 40- or 50-year-old instrument panel.
As for the mechanical operation of the gauges, they disassemble every one of them, acid cleans them, verifies the electrical operation of the bimetallic movement, calibrates them as necessary, re-rivets the restored dial faces in place, cleans, and repaints the pointers, and lubes the switches with dielectric grease and reassembles them. The IP’s circuit board is acid cleaned, checked for continuity, repaired if necessary, and the pins are inspected and replaced if required. In addition to these operations, the speedometer gets extra attention; a new “jewel” is placed in the frame (analogous to the same part used in a hand-made watch), the speed cup gets a magnetic calibration, the pointer is cleaned and airbrushed with new paint, the odometer rolls are inspected, cleaned (and reprinted in many cases), and the speedo dial face is reprinted.
Let us say you are more into doing a perfect chalk-mark restoration. The metal instrument case that houses the gauges can have irreplaceable markings and stamps on the outside, which are often damaged beyond recognition. In those situations, a core in better condition may be required if those markings need to match, otherwise, media blasting to clean the case will permanently obliterate the markings (although the case will work fine).
If you want something unique, such as a distinctive style font, different colors to match your interior, or a different speedometer range, there is an up-charge based on the additional labor for creating the artwork. Printing the dial faces themselves is the same cost as making the stock ones, so the added cost is minimal and easy to justify if you think you want it.
The most eye-opening part of this story is the overwhelming number of small, insignificant parts that make up a vintage factory gauge cluster. Most of these parts are long out of production, or in the case of some switches, are reproduced cheaply—and often inaccurately—overseas. Electrical components such as the voltage limiter are rebuilt to factory specs (upgraded to solid-state circuitry in the case of the voltage limiter), new OE-style bulbs are used, and the external surface of every component is cleaned and/or repainted to look like new.
Restoration Decisions
Before shipping you gauge cluster out for restoration items you will need to address:
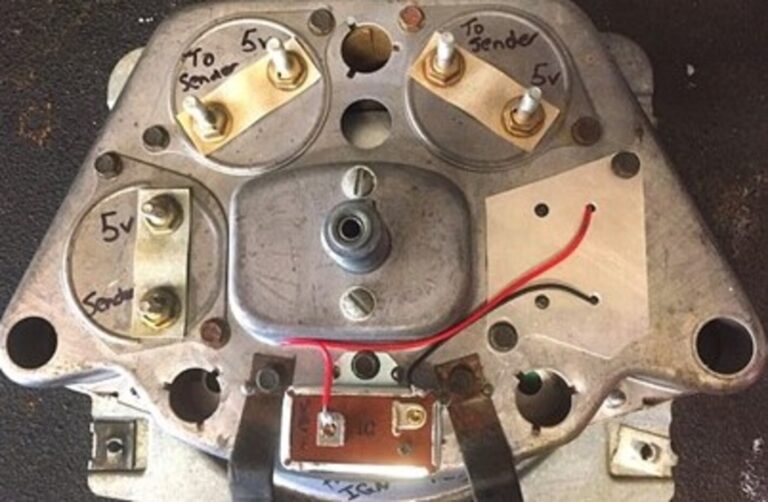
Are you converting your classic car from six volt to 12-volt system? this may affect some of the gauge operations. Vintage gauge clusters are designed for five volts, not twelve. Always use a voltage regulator to daisy-chain the power studs together to reduce the gauge input voltage.
Is the speedometer range correct for your intended use? Some cars came with different high limits on the speedometers depending on engine size such as speedometers with high speeds of 120 mph up to 150 mph.
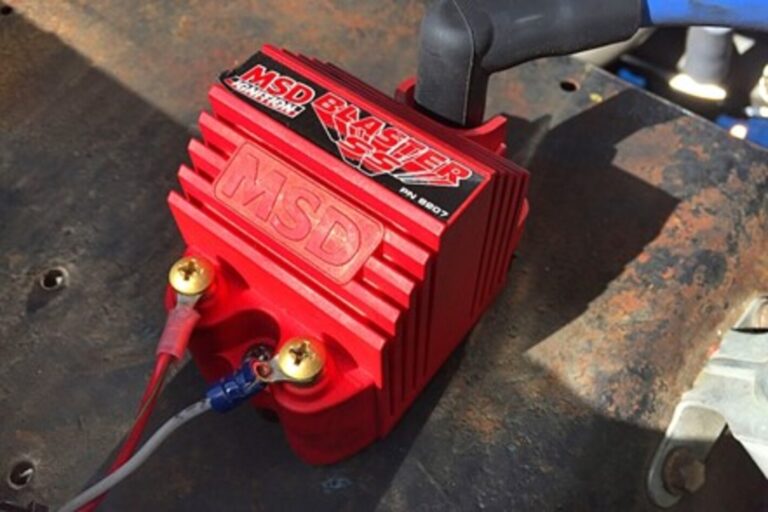
Do you have a factory tach and are planning to convert to an electronic system? If you have a factory tach, it is not going to work with an aftermarket tach signal. It is now possible to convert any factory tach to work with any aftermarket signal using tach adapter and new internals. It is not a DIY job, so send it out.
The Restoration Process

Carefully disassembles the instrument panel; there are no replacement parts for any of this, so every original part must be manufactured from scratch or refurbished. You can begin to see the scope of what is involved with these many parts.
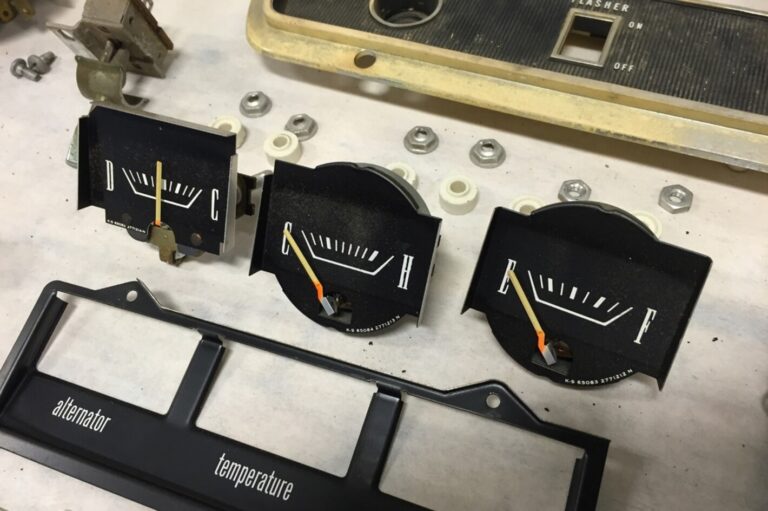
The three left-side stock auxiliary gauges, removed from the IP. The frame in the foreground that they sit behind is called a “badge:” it adds depth to the assembly while screening out any side light that may spill around the gauge faces from the instrument case.
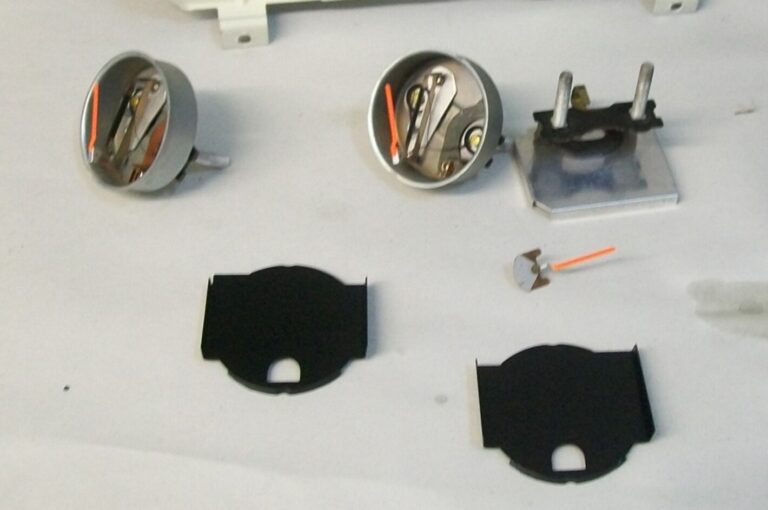
The auxiliary gauges—fuel, temperature, and oil pressure—are all electrically operated. The mechanism is driven by voltage, which warps the bimetallic strip to varying degrees. Gauges are cleaned and recalibrate to be as accurate as possible.
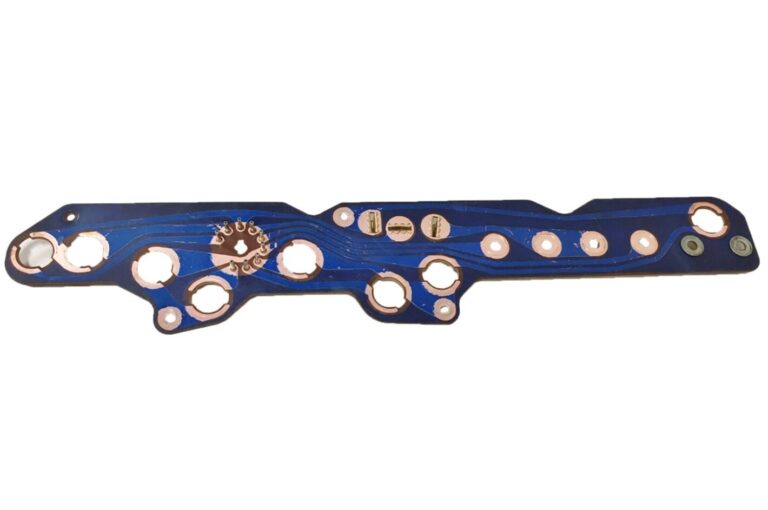
This is the circuit board for the instrument cluster; it is attached to the back of the gauge case. Besides a thorough acid cleaning, the board is inspected looking for delamination of the electrical circuit trace from the fiber backing board, proper electrical continuity, and the integrity of the contact pins. Any problems are corrected.
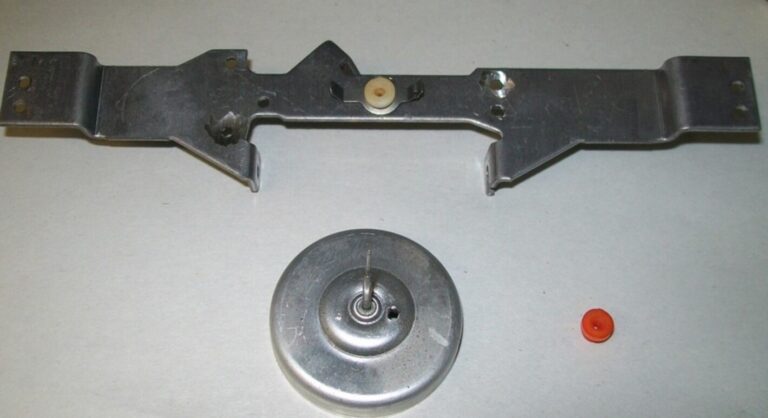
These two things are the speedometer bridge (top), and the speed cup. The speed cup’s needle-like axle rotates in the white cylinder in the bridge—called a jewel. The jewel wears out over time and must be replaced. The small red cylinder on the right is the new jewel.
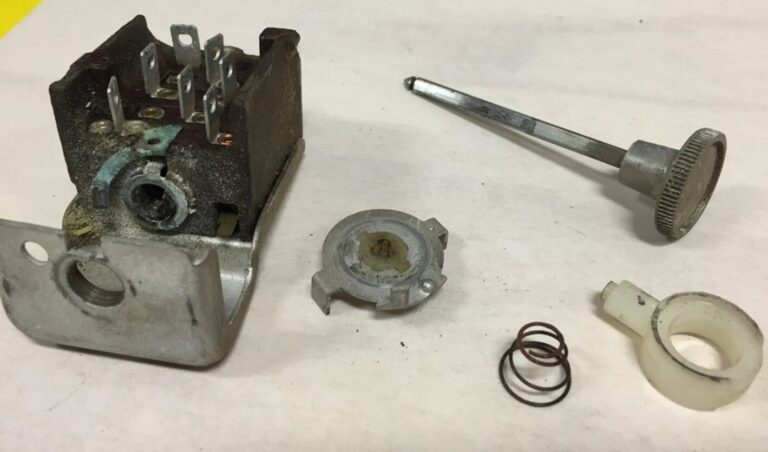
The headlight switch in disassembled form. It is three switches in one: running lights, headlights, and an instrument panel dimmer switch. It is all cleaned, reassembled, lubed with dielectric grease, then electrically checked.
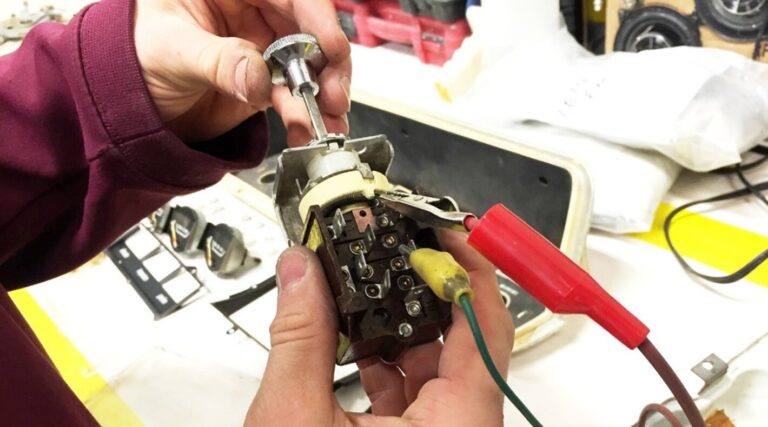
The proper electrical operation of the refurbished headlight switch with test gear.
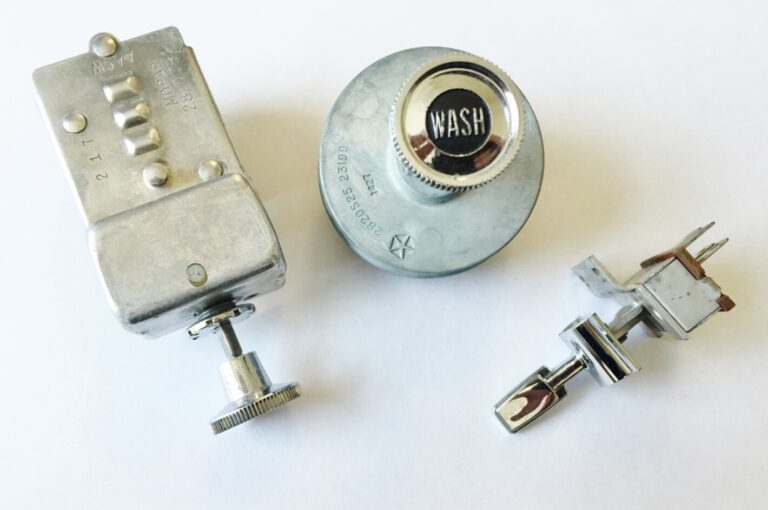
This grouping of restored switches (left to right) is the headlight switch, wiper switch, and flasher switch.
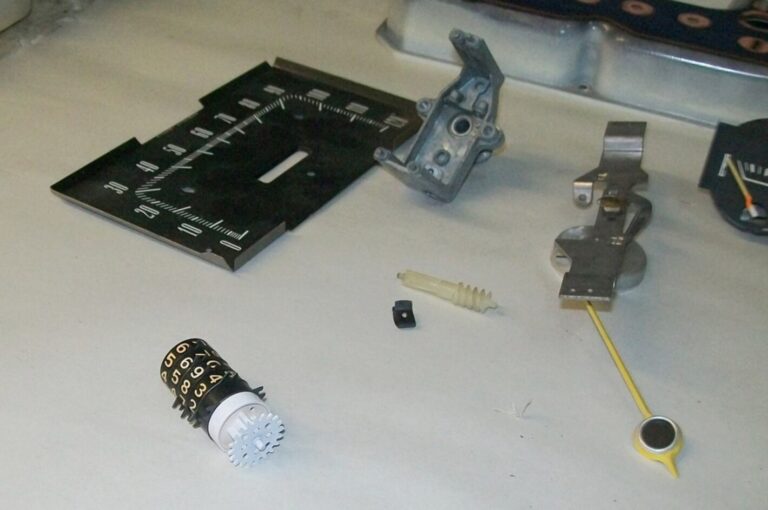
This collection of parts goes with the speedometer and includes (clockwise from upper left) the original 120-mph speedometer dial, the speedometer frame, the speedometer bridge, speedometer needle, and odometer rolls. Note the small white worm gear (center) that drives the odometer wheel.
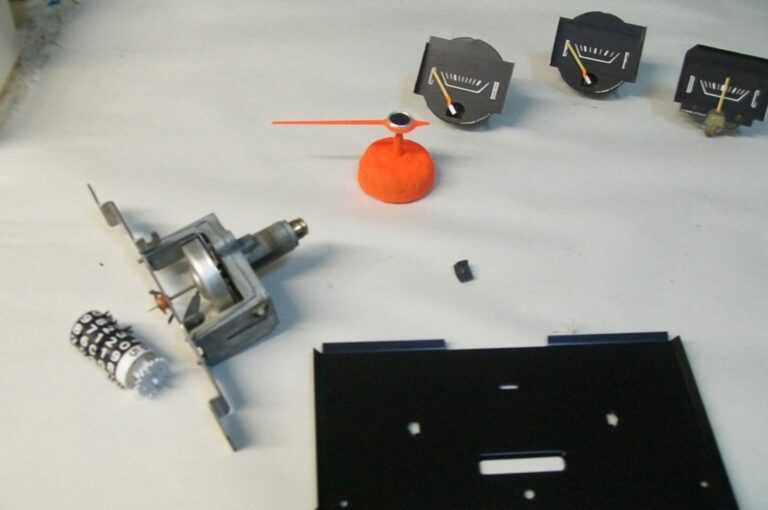
Just to the right of the odometer roll is the refurbished speedometer assembly, consisting of the frame, bridge, and speed cup. To the right of that is the freshly airbrushed speedo needle. Take note of its vibrant new orange color compared to the previous photo.
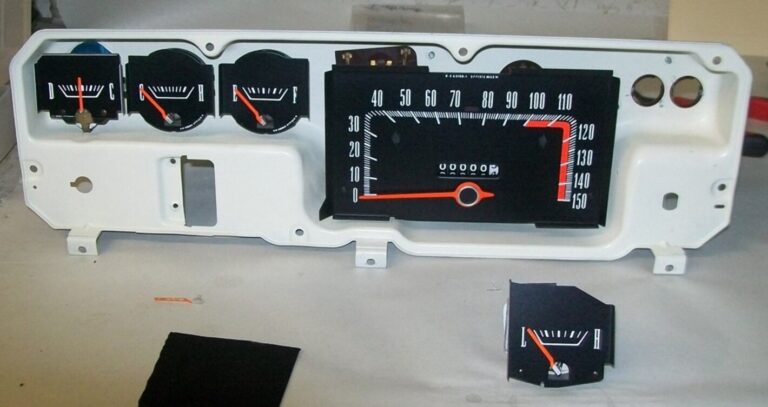
It all looks like this when the new dial is reprinted, attached to the speedometer, and installed in the restored instrument case. Two things to note: See how the instrument case has been cleaned and painted and check out how our low-oil/brake idiot lights have been replaced by a single working oil-pressure gauge (foreground).
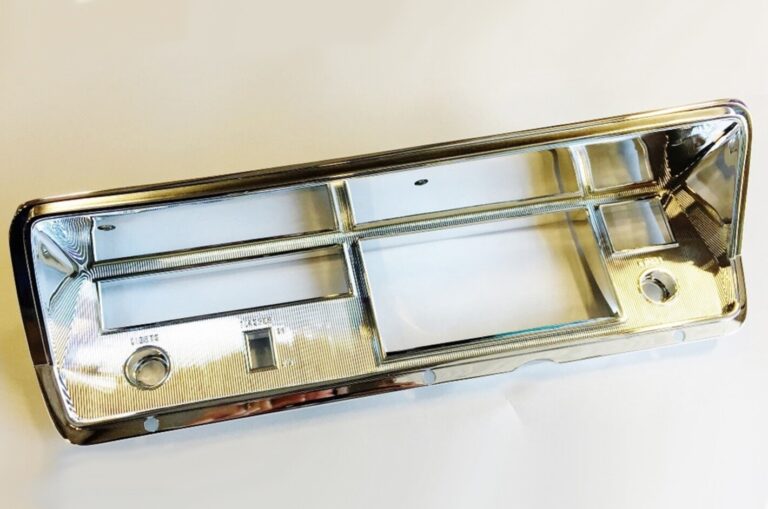
Here is the gauge bezel after it has been re-chromed. Prior to this, it was stripped of its paint and chrome (atomized aluminum) in a proprietary chemical bath, the surface was cleaned and scuffed, imperfections in the plastic were repaired, and given a fresh re-chrome using the factory original vacuum metalizing process. But it is not done yet!
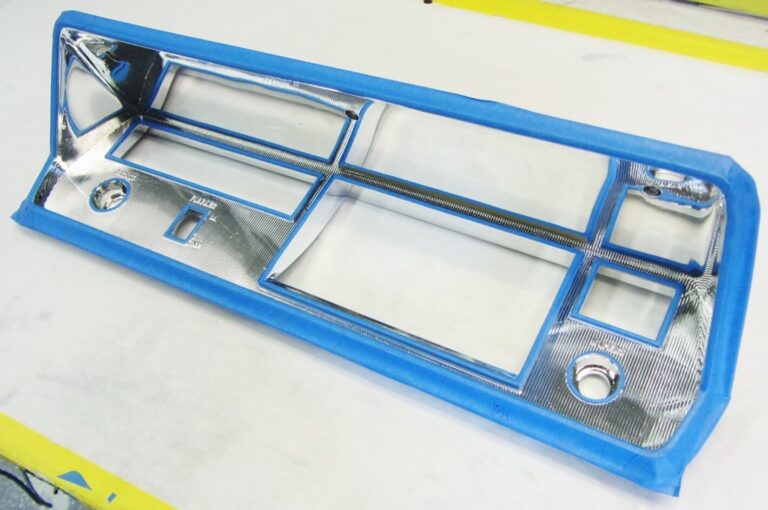
Areas that remain in chrome must be carefully masked off. There are no cutting corners here—this is difficult, tedious work that takes the patience and hand/eye coordination of a watchmaker.
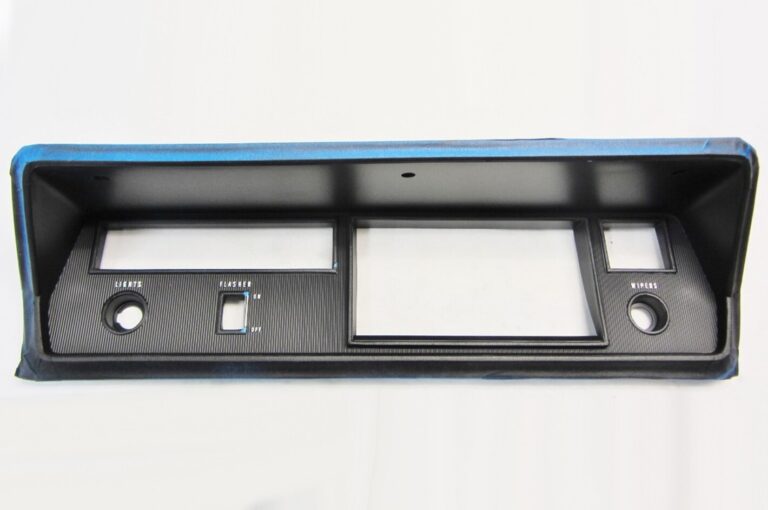
Here is what the bezel looked like after being airbrushed with an antiglare satin black lacquer. Note how a small portion of the chrome mask around the flasher opening has been carefully removed with tipped blade.
The process continues with the lenses. These often look horrible after decades of abuse and exposure, but they can be made like new by carefully being wet sanded (800 grit progressively up to 5,000 grit) then polished.

Finally
The finished instrument panel is ready for shipping to you for installation. Next steps are up to you or your restoration shop to install your restored gauge bezel into your classic car.
Hi mi name is luis and I’m interested in bezel rehabbed can you tell me where can I send it and how much it will be thank you in advance
Jose:
There are a number of companies that work on dash gauges and bezels.
You can find one convenient to you at: https://classicautoadvisors.com/business-directory/wpbdp_category/gauge-and-instrument-restoration/
Thanks for reading our post
Can you restore the dash unit for a 1994 Corvette, LT1, automatic?
Hello; we do not provide that service, but please check our Business Directory to locate a shop that can complete the project for you at: https://classicautoadvisors.com/business-directory/wpbdp_category/gauge-and-instrument-restoration/
Thank you.
Can your technicians restore a 1935 Ford Dual oil pressure/ fuel level gauge?
David; you can find what you are looking for at: https://classicautoadvisors.com/business-directory/
Thans forr finally talking about > Restoring Your Vintage Gauge Cluster – Classic
Auto Advisors post538282