Classic cars until the ’70s have contact-breakers or ‘points’ to optimize the delivery of the spark on each cylinder’s combustion stroke. As we discussed previously there are positives and negatives in operating these systems. A relatively easy conversion is converting to electronic ignition system.
But points need regular adjustment to ensure that they close for the precise duration needed for the coil to charge between the breaks in the low-tension circuit that force the coil to deliver a spark.
Plus, the lower volumes now needed and use of inferior materials has led to poorer component quality and premature condenser failure, which can leave you stranded.
Electronic ignition has fewer moving parts, typically using an optical or magnetic (Hall effect) sensor to detect when the LT current needs to be ‘broken’.
Installation varies: some types bolt under the distributor cap, while others have a separate amplifier.
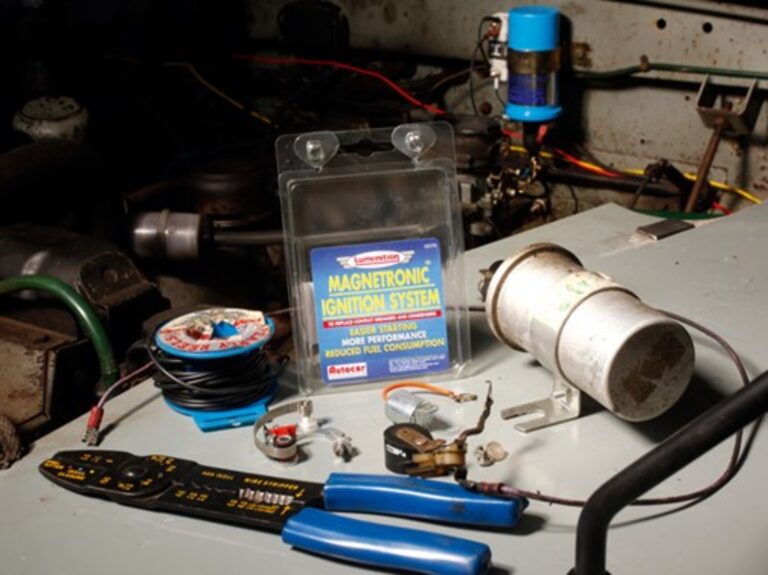
Each kit comes with detailed instructions in changing out the points to electronic controls since each classic car manufacturer distributers can vary as well as for 4, 6, 8, or 12 cylinders. Also, the kits can vary on design as well as output voltage so carefully read the full package before tearing into your classic car’s distributer.
Check the kit is the correct polarity for your car. Ensure the engine is correctly timed (for set-ups not replacing the distributor) and feel for any play in the shaft before starting. Test drive over the same route before and after to check performance. Installation is quite simple.
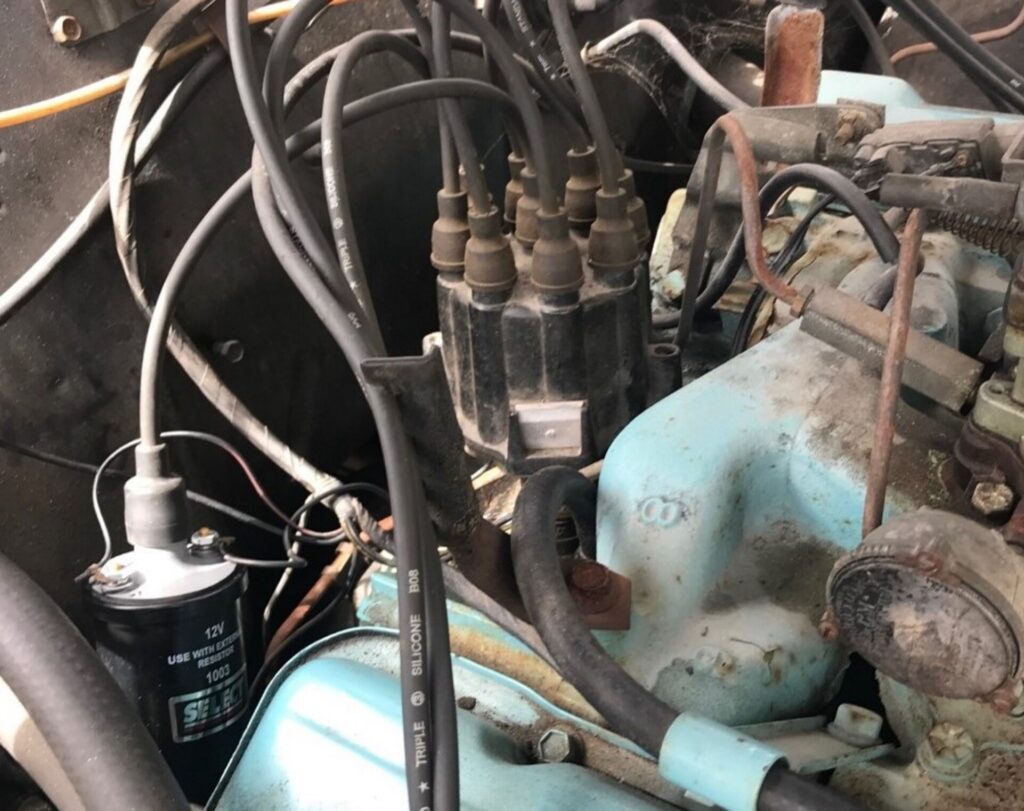
Unclip Distributor Cap
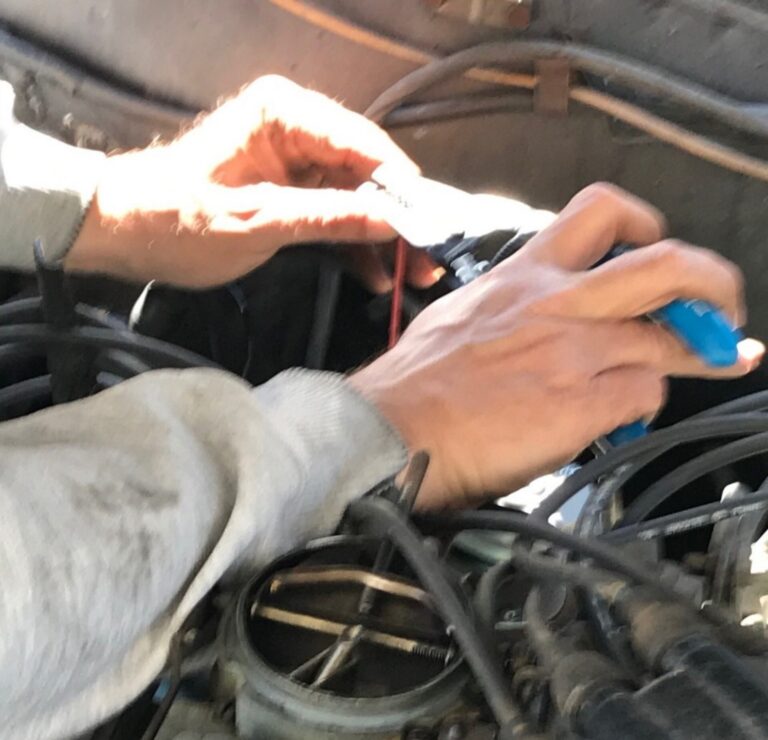
Disconnect the battery then take off the distributor cap and secure it out of the way.
Pull off the rotor arm and then remove the low-tension wire that runs from the distributor to the coil. This wire, along with the plastic insulator plug that sits in the outer wall of the distributor, is no longer needed.
In many cases to get to the points you will need to remove the distributer:
Mark spark plug wire position. You can use popular service information repair manuals for the vehicle or the cylinder numbers printed on the spark plug wires.
Identify the engine cylinders and mark each wire on the distributor by using masking tape or a permanent marker. Label each wire’s corresponding cylinder number so that they can be installed in the correct order.
- Tip: If there is an arrow indicating rotation on the cap, make sure you note which direction the numbered wires should be installed on the cap.
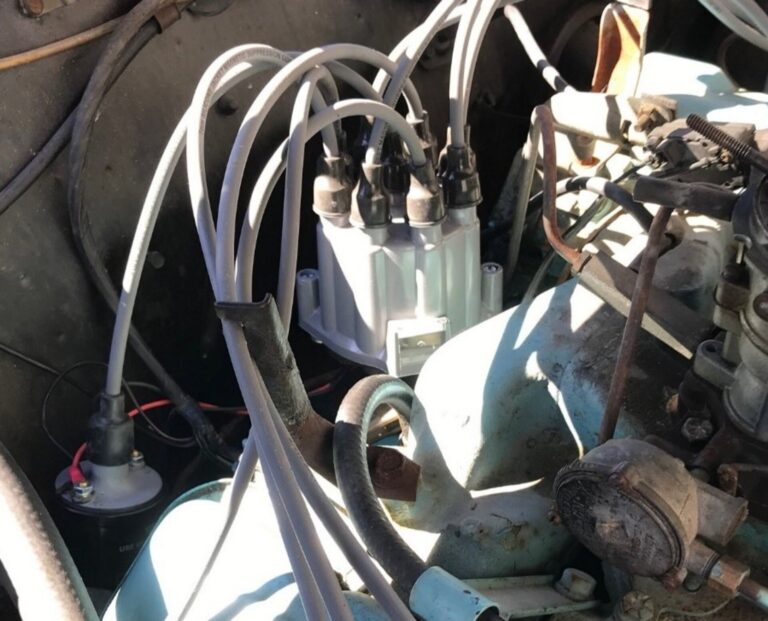
Remove the distributor cap. Distributor caps are typically held in place by clips or screws.
Either disconnect the clips or turn the screws to release the cap from the distributor.
- Note: The following steps are very important for starting the engine later. Once the cap is removed, you will need to make a mark on the engine, fender shield, radiator or some other clean area directly in-line with the direction that the rotor points.
Mark the housing. Make another mark on the distributor housing so you know where the rotor was pointing on the distributor.
Disconnect wiring and/or vacuum lines. Disconnect any primary electrical wiring or vacuum lines the distributor may have.
On a points and condenser type, you may need to disconnect the primary electrical wire coming out of the distributor at the ignition coil.
Disconnect the connector. Remove the connector from any brackets holding it in, and pull the locking tab to disconnect it.
Remove hold down bolt and clamp. The distributor is held in place by a bolt typically called the hold down bolt.
Remove the bolt and the clamp that is under the bolt. When you have removed the bolt and clamp, you can lift the distributor body out of the engine block.
Remove Condenser/Points
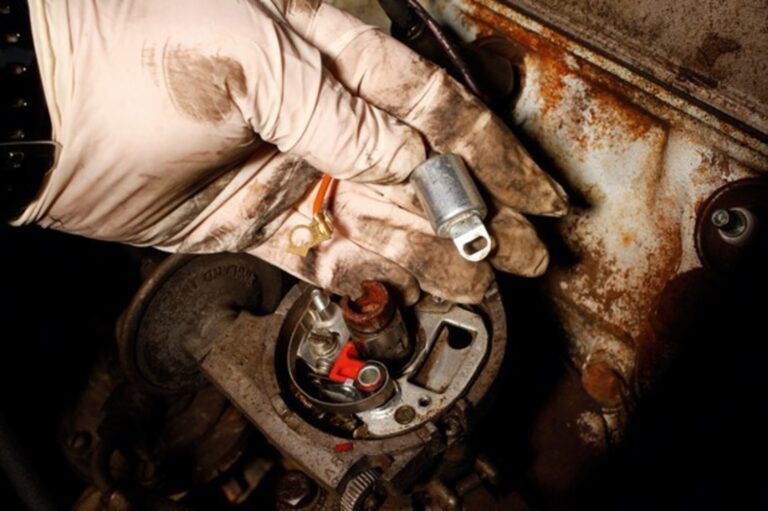
Electronic ignition does away with the need for a traditional condenser and points, so these need to be removed by unscrewing them from the distributor base-plate.
Kits such as these can often be easily swapped over in case of failure, so keep the old parts in your toolkit just in case you need to perform a roadside repair.
Screw In Mounting Plate
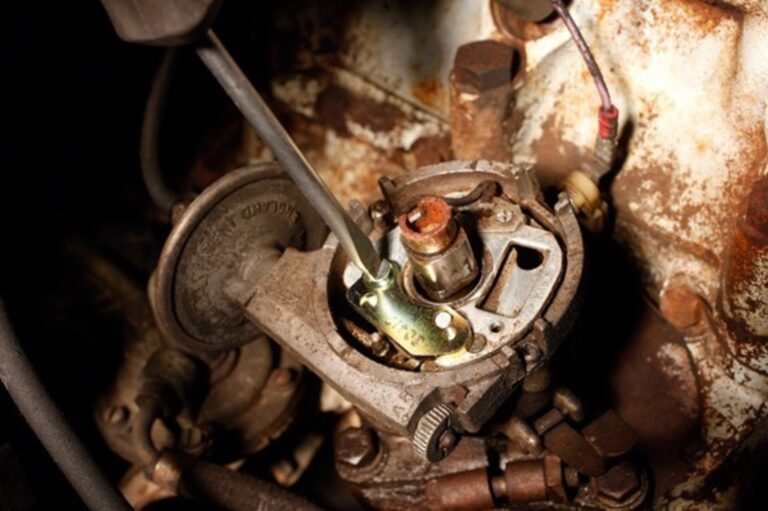
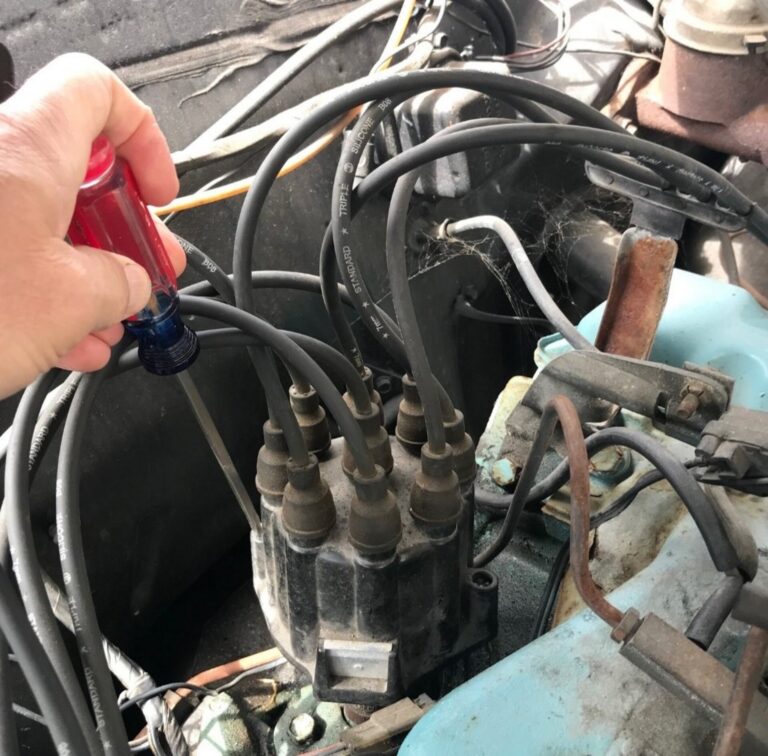
With the points extracted, clean up the distributor and get rid of any excess grease or dirt. This is also a good opportunity to lubricate its shaft with a drop of oil.
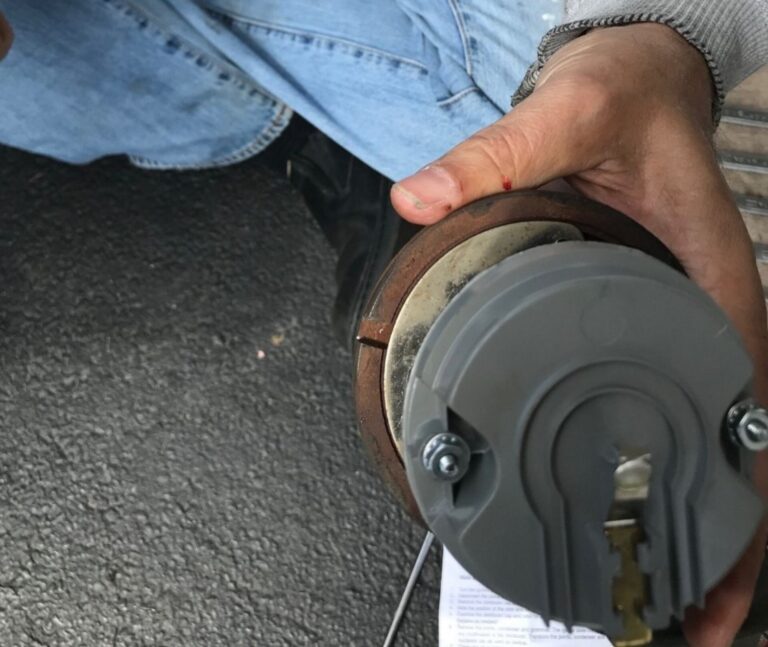
Fit the module mounting plate to the dizzy with the screw provided, making sure that it locates on the brass pin on which the points used to pivot.
Install Ignition Module
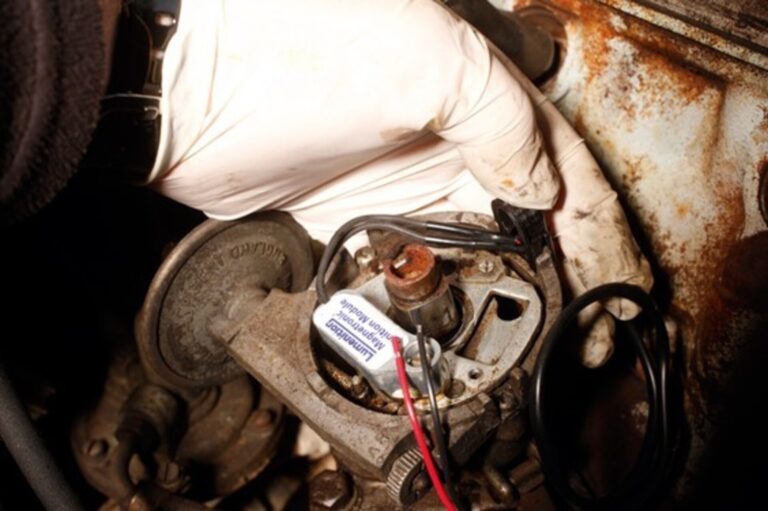
Fit the electronic unit on to the mounting plate with the screw provided. Feed the wires from the module around the inside of the distributor and through the new plastic side plug.
Gently rotate the distributor base-plate to ensure that the wires aren’t pulled tight when the vacuum advance is operating.
Press Trigger Disc On
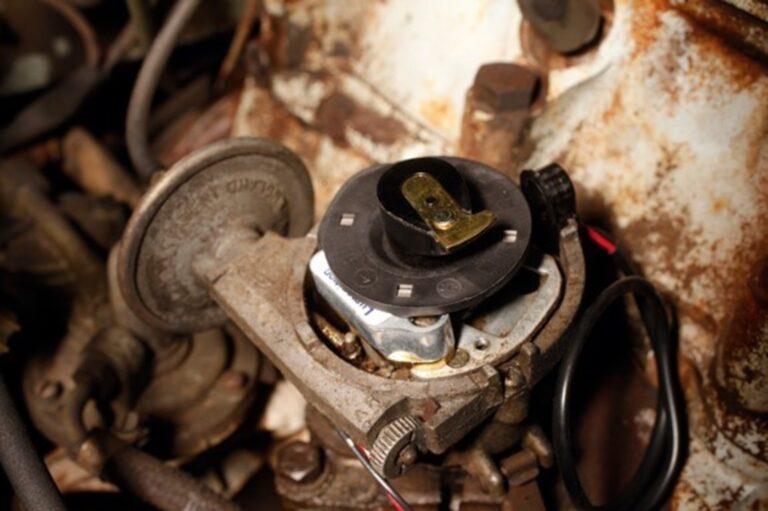
Fit the trigger disc to the top of the distributor shaft. Make a note of which way the rotor arm faces when it is in place and then match this to the indicator mark (a small round dot) on the disc.
Once aligned, push the disc firmly into place, making sure that the wires are not trapped, then refit the rotor arm and cap.
Extend Wiring If Needed
Depending on the location of your coil, you may need to extend the module’s wires. Crimped or soldered terminals are acceptable, but make sure that they are secure.
Also ensure that the wire you use is 5A or more and can handle the current load. Route these safely and away from any potential chafing.
Replace The Old Coil
Depending on the type of electronic ignition system you have purchased for your classic car you may need to replace the coil with a new OEM style or even a high voltage coil.
Fit Ballast Resistor/Coil (If required)

Connect the positive terminal of the coil to one side of the resistor. Attach the ignition feed to the other side of the resistor then the black wire from the ignition module to the coil’s negative terminal.
Connect the red wire to the resistor on the ignition feed side and refit the HT king lead. Connect battery and double check all your wiring connections.
This project is a reasonable job for the DIY classic car mechanic and should only take an afternoon to complete. Remember to read all instructions before you dive-in to converting to the electronic ignition project. Depending on your car you may want to change out the distributor cap, rotor, spark plug wires, and spark plugs. Once complete verify your timing with a timing light and adjust as needed. Then off you go on your test drive.
My question is, will a standard cap and rotor work properly, once I convert to electronic ignition? Thank you.
Jeffrey: In most cases like with Petronix systems the stock cap and rotor will work when modifying the distributer from points to electronic ignition. You should check the system installation instructions prior to installing the system to confirm.
Thanks for reading and your question.