
A slow car battery drain can be immensely frustrating especially when you spent all week dreaming of driving your classic car only to find a dead battery. Sometimes, the problem “sneaks up” on you and leaves you stranded. Other times, you cannot enjoy your vehicle without pulling out your charger or jumper cables. Even though you regularly inspect and maintain your battery; a battery drain can still make your life miserable.
Since diagnosing a slow battery drain is not always easy, we have put together a basic process you can use to try and determine the cause of a slow car battery drain.
Quick Battery Test for Car Battery Drain

There is a first step. Make sure your battery is in good condition and that it is completely charged either with a battery charger or trickle charger. This is sometimes easier said than done, as basic battery testing tools are notoriously unreliable. A simple voltmeter, for example, can often indicate that a failed battery is working properly, as it cannot determine the condition of the cells inside the battery. A load test or (even better) a conductance test is best.
Next, you want to see if there is a drain on your battery somewhere in your system. A quick way of determining if you have such a draw is to remove the negative battery cable from the battery. With everything turned off in the vehicle (including under hood or trunk lights), put a good working 12V test light between the battery post and the cable terminal. If the test lights, there is a draw on the battery.
Process Of Elimination
If you have a drain, you want to use the 12V test light and a simple process of elimination.
- Completely disconnect the alternator wiring, then conduct the same test with your light as described above. If the light is out, there is a problem in the alternator (or the alternator is wired incorrectly). You will want to see what we have written below about properly wiring the alternator if this is your situation.
- If the alternator is not the problem, the next step is to remove one fuse at a time from the fuse block, checking each time you remove one fuse to see if the test light has gone out. When you remove the fuse that makes the test light go out, you have found the circuit that is causing your battery drain.
Proper Alternator Wiring
The way a standard (GM) internal regulator alternator is wired is as follows:
- The large 8-gauge red wire is attached to the threaded stud on the back of the alternator.
- Where the plastic connector plugs into the alternator case, the numbers “1” and “2” are cast into the metal case. The #1 position gets the brown wire. The #2 position you simply loop #2 position to the threaded stud on the back of the alternator with a minimum of a 14-gauge wire.
If you have got the alternator wired up properly and you have got a drain, then there is an internal issue. But often the wiring is to blame, or you have a parasitic battery drain.
What is Parasitic Car Battery Drain?
Parasitic battery drain is essential when your car’s electrical system continues to pull energy from the battery, even when the vehicle is entirely turned off. This is not the situation that occurs when you leave your headlights on or do not entirely close the door, and the light stays on all night. Instead, this is when everything is off, and electricity continues to drain from the battery.
To some extent, this is normal. Electrical components such as computers, the radio, the internal clock, alarm, power mirrors and more will create a slight draw known as parasitic drain. However, when the amount of electricity pulled goes beyond the normal range, it becomes a problem that may affect your battery’s performance and service life.
Diagnosing A Parasitic Battery Drain
To diagnose this problem, you need to use a multimeter. Here is how it works:
Make sure your vehicle is turned off and remove the key from the ignition.
Switch the multimeter to DC Amps and set it to the highest amp level. This will avoid damaging the device.
Next, remove the negative battery cable from your battery terminal. It should be black. Be careful not to allow the wire to touch anything grounded.
Then, connect the multimeter probes to the battery cable. Be careful to do this level with the battery terminal but keep the multimeter off to the side.
Now you can check the reading on your multimeter to see what the parasitic drain is. If no reading shows, slowly reduce the setting until a reading appears.
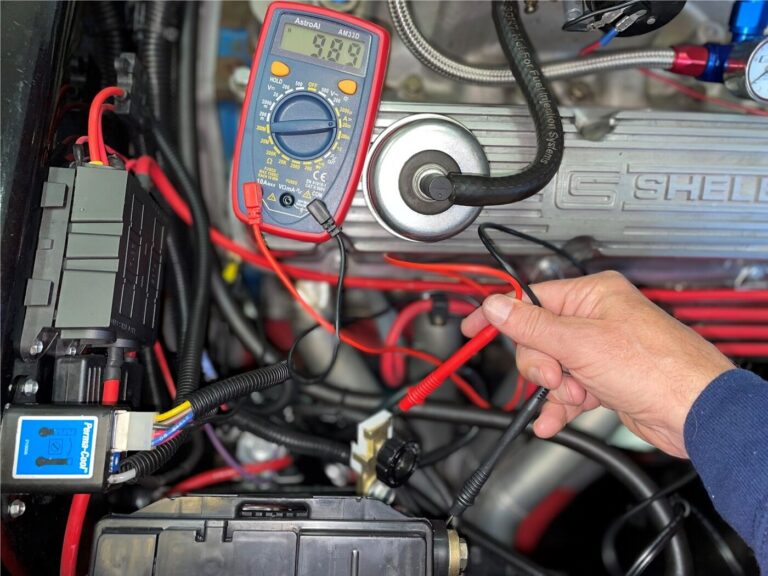
A normal reading for a newer car falls between about 50 to 85 mA. For older cars, an ideal reading is below 50 mA. If your reading is higher than these numbers, you have an electrical problem on your hands that should be looked at by a skilled mechanic or a seasoned DIY mechanic.
What if your parasitic drain is within the normal range? That is great! You should still take precautions to care for your car’s battery. This means ensuring that it has the chance to get fully charged by driving your car regularly and making the occasional longer drive or maintaining the battery on a trickle charger.
Finally
While your first instinct may be to give a piece of your mind to the customer service line of the battery’s manufacturer and make use of that warranty, there could be another cause. Repeat battery failure is often the only sign you will see that your car has parasitic drain.
There could be a malfunction on one of the circuits that power your car’s accessories such as lights, the radio, speakers, or another device. Your mechanic should be able to find the source of the issue and fix the electrical component, so you do not continue to experience this battery drain problem.