Depending on where you live rust on classic cars is either a big issue like in the Northeast US or not really an issue like in the Southwest US; either way ensuring that your classic is properly protected against corrosion should be an ongoing process. Once a year, check the condition of the car rustproofing. If it is starting to flake away, you need to reapply it. Cavity wax can also start to dry up and crack over time, so this will need repeat applications.
The good news with wax is that, once you have sorted out access holes, is an easy process. In an ideal world, you would raise the car on a two- or four-post ramp, using air-fed guns to apply the wax and larger areas of underseal. Not everyone has those luxuries, however.

There are several manufacturers that make these car rustproofing products in an aerosol kit that included rust converter, underseal and cavity wax, and then raising the car on small ramps is all that is needed. This will give you enough clearance to get to all the areas you need.
Bear in mind that rust converter will work on surface corrosion only, and the other treatments that are supplied are for prevention rather than cure. It sounds obvious, but if you find any serious rust or rot, you will need to deal with it before applying anything over that area. Doing bodywork on a classic car is no simple undertaking once rust has set in.
There will be times when you are spraying products upwards, so make sure that you protect your eyes by wearing goggles, and it is also advisable to wear disposable gloves and a mask.
Raise And Support the Car Before Rustproofing

Start with the wheel wells. Raise the car and securely support it on axle stands. Remove the road wheel and cover the hub and braking components – you want to keep the latter free from anything waxy. If you do accidentally get overspray on a disc or caliper, wipe it off using brake cleaner.
Off With the Old Rustproofing
Use a wire brush to remove loose underseal or dirt. You need a good surface for the underseal to adhere to, but you don’t need to worry about going back to bare metal. Jet-washing the arches before you start is a good idea and should leave you with minimal dirt to remove at this stage.
Mask The Work Areas Prior To Car Rustproofing
Masking off all the painted areas that you do not want to apply the rustproofing is key to keeping your paint finish unblemished. Us a lot of tape and paper to protect all the painted areas before applying any products as this will make cleanup much easier and the products only going on the parts you want.
Apply Rust Converter
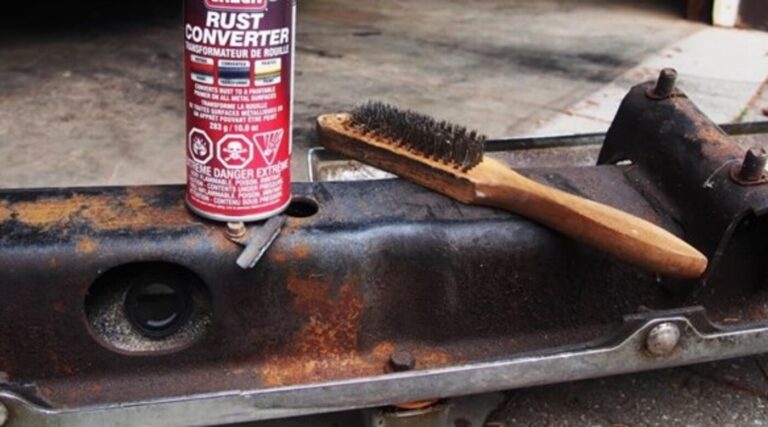
If there are any sections with surface rust, make sure you spray them with rust converter before proceeding any further. Where this is needed, you will need to wait for it to flash off before starting to apply the underseal. Check whether a converter is part of the kit before buying.
Seam Sealer Before Undercoating
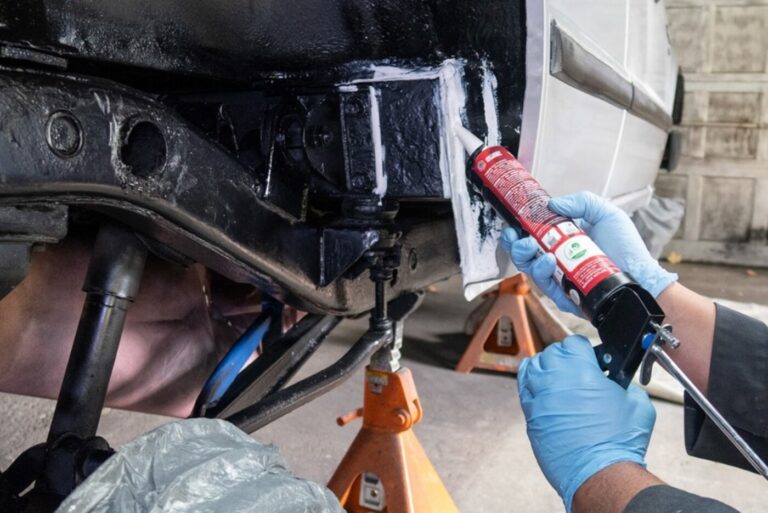
Once salt and road debris get under or in between metal, it is game over. Enter seam sealer. Cars leave the factory with plenty of seam sealer already applied, but after 25-plus years even the best of it has given up. It might look OK but check it to avoid a situation like this, where salty slush had been sneaking around this plug of seam sealer for years. Scrape out the old and lay in some new seam sealer over welds, seams, and crimps. Poor OEM quality control may have resulted in sloppy factory seam sealer application. I have heard stories about handfuls of loose seam sealer, also known as dum-dum, pulled out of cowls, fender wells, and even heater boxes during a restoration.
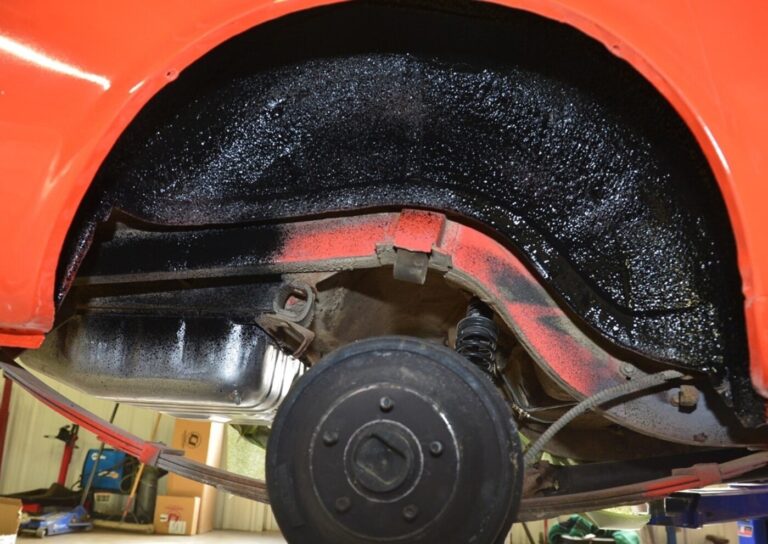
Protect The Wheel Wells
Begin by loading up any seams to guarantee good coverage on those areas, then apply the underseal to the rest of the wheel wells. Ensure that you spray under the lip of the arch. Immediately wipe off any overspray that gets on to external paintwork. Keep shaking the can to achieve the best atomization.
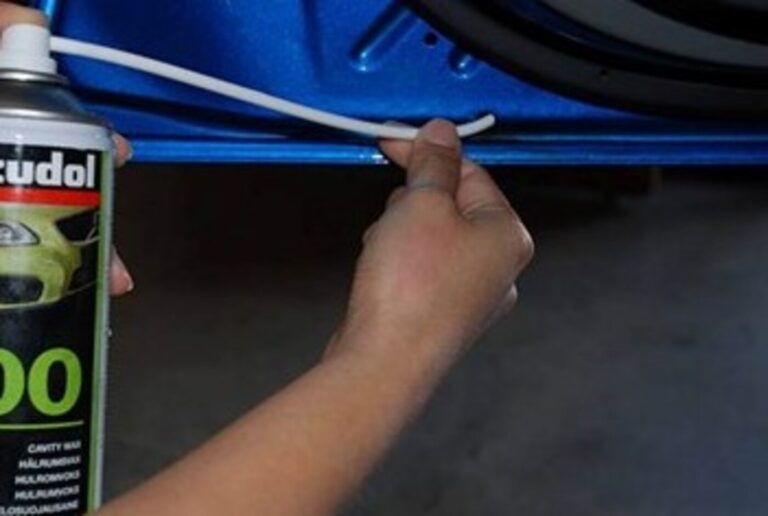
Doors And Posts Rustproofing
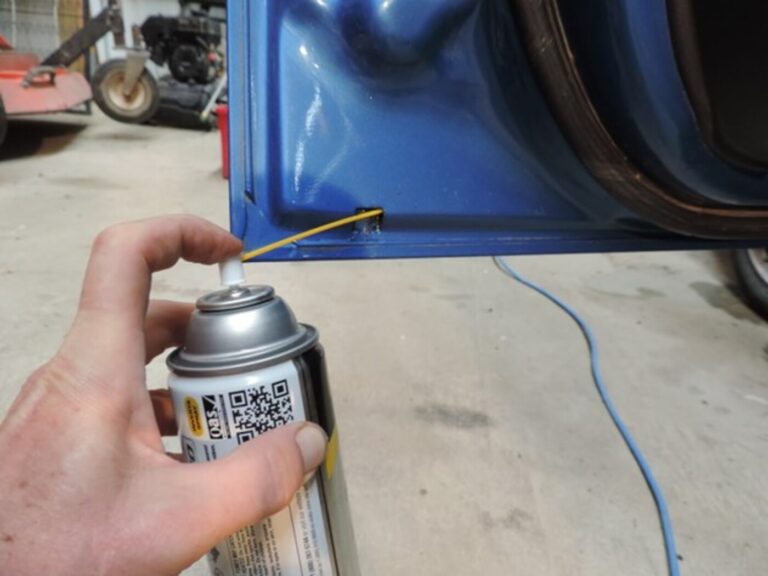
You might have to drill access holes in the doors and posts, too. Mask the area with tape and use a center-punch to mark the exact point you want to drill. This prevents the bit slipping. Fully insert the probe and, again, withdraw it smoothly while spraying. Then plug the hole.
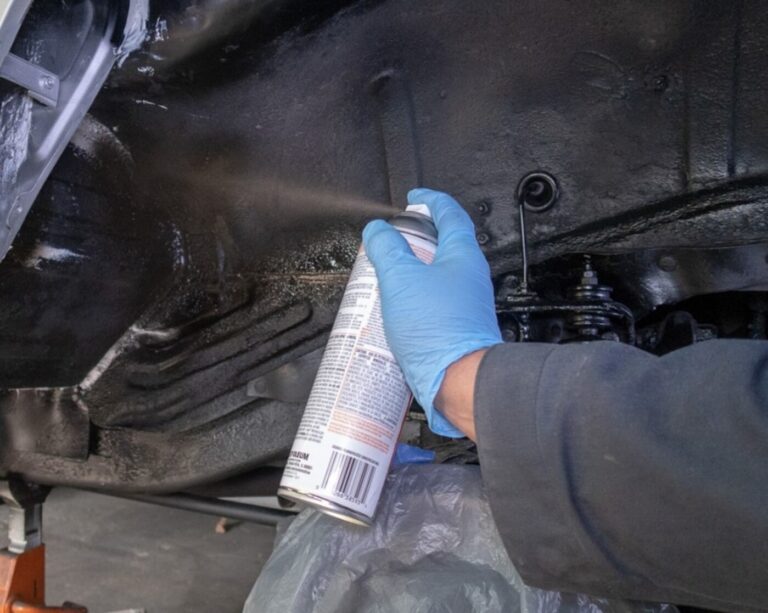
Underbody Rustproofing Protection
The final stage is to coat the floor pans and other major underbody areas. A ramp is obviously ideal for this but, however you gain access, make sure that you have adequate ventilation. Wipe off any excess underseal that finds its way on to the exhaust system.
How Do You Underseal a Car?
For best results, the under-body needs to be spotless before applying any car rustproofing. Not much point is spraying two thick coats of protective sealer over the muck, moisture, or worse, road salt. This would cause the chassis to corrode at an even faster rate, the moisture is now locked in.
The summer is the best time to underseal your classic, dry warm ambient conditions are ideal for under-sealing. Yes, I know the winter suits because the car is off the road anyway, but damp cold weather is going to cause problems down the road.
We can avoid shooting lead in our toes if we take extra care at the preparation stage. This like all painting jobs is crucial.
Power Wash
I recommend getting the chassis, mechanicals and wheel arches power washed, hot preferably, and while it is on a car lift. Not every garage offers this type of service, so you may need to make some inquiries.
After washing and allowing it to dry out thoroughly, next comes the inspection stage. You’re on the lookout for rust holes and areas of heavy corrosion. You will need a car jack, axle stands, creeper, safety glasses, inspection light, and a long flat head screwdriver for probing.
Obviously, if you have a 2 or 4 post car lift, the whole job is going to be a pleasure.
If you are lucky, you will only have rusty patches to deal with, but if you find rust holes, they will need to be patch welded.
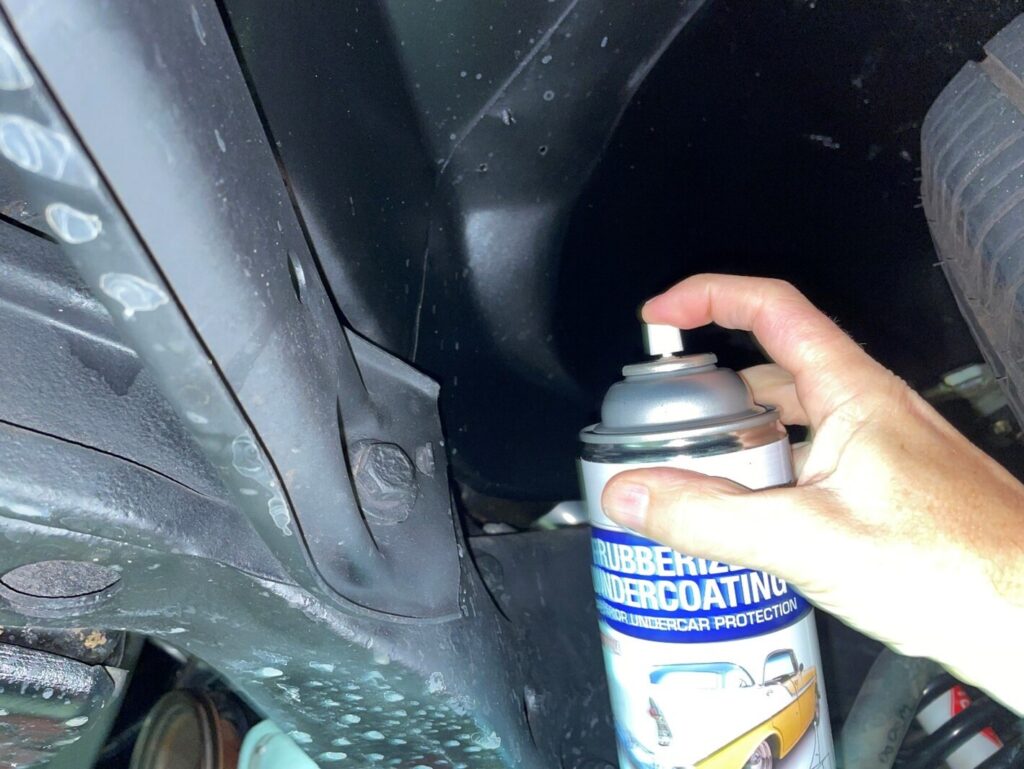
Rubberized Rustproofing
Rubber undercoat falls somewhere in between paint and bedliner. This stuff is best applied over paint and seam sealer where metal gets blasted with salty spray from winter driving. Like bedliner, the rubber spray dries to form a protective layer, and like bedliner it gives up with a good hit from a rock or similar road debris. Because salty water can creep in behind a layer of rubber unseen, it can also trap salt and moisture inside. It is best to check this stuff now and again to avoid ugly surprises that reveal the only thing left of that kick panel is the undercoating. There may also be a noise reduction benefit when you apply rubberized undercoat.
Both original and aftermarket undercoats might look OK for another year of four-season classic motoring, but none of these products were formulated to last for decades. Applying rust proofing and undercoating is sort of like the flu shot. You do not want to get it too early but wait too long or skip the wrong year and it could be a rough winter.
Oils well. Wax on.
Oils and waxes are designed to repel salt water inside and out. Oil undercoat gets in everywhere, but it can also wick back out. Non-drying wax and oil blends stick around longer and are self-sealing. The Montero came from the factory with a non-drying tar-like substance already installed so I blasted everything with a similar waxy black undercoat from Eastwood.
Fluid Film is a proprietary blend full of water repelling lanolin. Sheep swear by the stuff. Choose your weapon. An undercoating gun or aerosol both get the job done. You can also apply oil and wax type products into cavities with a setup like this four-way sprayer tipped hose.
Finally
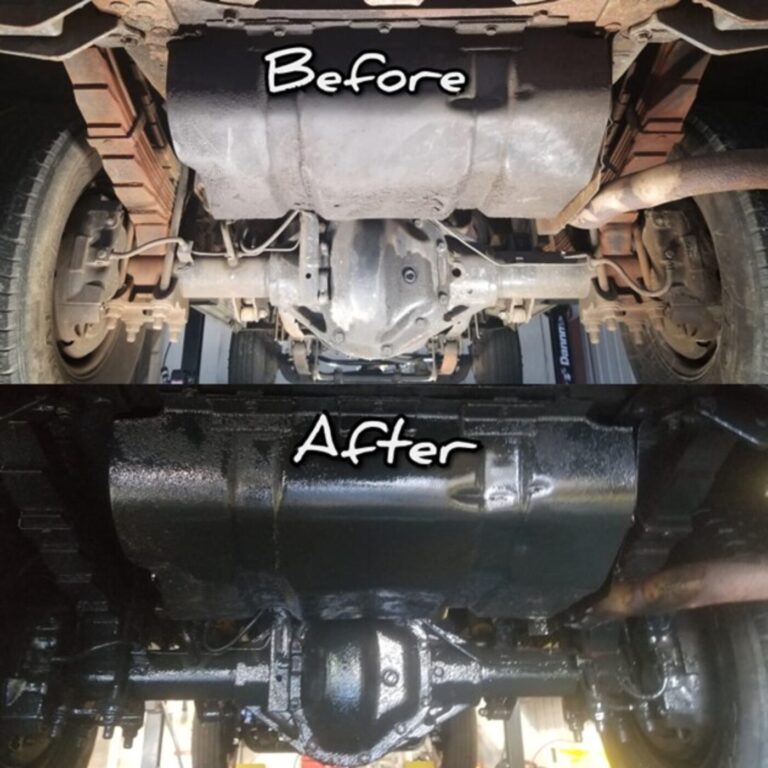
Rust is one the biggest issues for the classic car owner and keeping your car clean goes a long way to prevent rust from forming, but some forms of rustproofing and regular inspections are a must do for any vintage car owner. An underbody coating of some kind is necessary on vehicles because bare metal will quickly begin to rust when exposed to the elements. If your classic car is mostly stock but not riddled with rust, chances are the factory undercoating is still doing its job.
If you are building or modifying a vintage car and leave bare sheet metal or fabrication work exposed, you will need to apply a protective coating to seal it. A basic metal spray paint primer might do the job in the short term, but a more heavy-duty coating will last quite a bit longer.
Dear classicautoadvisors.com webmaster, Great content!
Dear classicautoadvisors.com administrator, Thanks for the informative and well-written post!
To the classicautoadvisors.com admin, You always provide great examples and real-world applications, thank you for your valuable contributions.
Dear classicautoadvisors.com administrator, Your posts are always well presented.
Hi classicautoadvisors.com webmaster, Thanks for the educational content!
Dear classicautoadvisors.com administrator, You always provide clear explanations and definitions.
Dear classicautoadvisors.com owner, Your posts are always well-supported by facts and figures.
Dear classicautoadvisors.com owner, Your posts are always well-timed and relevant.
Dear classicautoadvisors.com webmaster, Your posts are always well-referenced and credible.
Hello classicautoadvisors.com owner, Thanks for the well-researched and well-written post!
Hi classicautoadvisors.com webmaster, Your posts are always well structured and easy to follow.
Dear classicautoadvisors.com webmaster, Your posts are always well-cited and reliable.
Dear classicautoadvisors.com administrator, You always provide useful tips and best practices.
Hello classicautoadvisors.com webmaster, Thanks for the well-researched and well-written post!