In general, the greatest fear of any classic car owner is that four letter word “rust.” We have brought this topic on a number of occasions in the past as it is so important to maintaining your vintage car and its value. For those not seasoned as a DIY mechanic rust repair may seem overwhelming, but as long as rust is caught early it may not be as daunting as you may think.
Rust forms in stages, and knowing where a problem spot is in that decomposition process can help point you to the right solution. Here are the three main stages of rust and how to fix them.
Sure, you can lower your risk of rust and rust spots on your car by frequently washing road dirt from your car especially in those hard to get to areas under the car and in the jambs and waxing your car regularly and/or by applying paint protection film to chip-prone areas like the front edge of the hood. But even then, you are still going to get rust spots.
Car rust repair is not hard, but it is time-consuming (mostly waiting for primer and paint to dry between steps). Plan to spend about $200 on supplies like sandpaper, rust treatment, primer, masking tape and poly sheeting, a tack rag, polishing compound, touch-up paint and clear coat.
Levels of Car Rust
Surface Rust
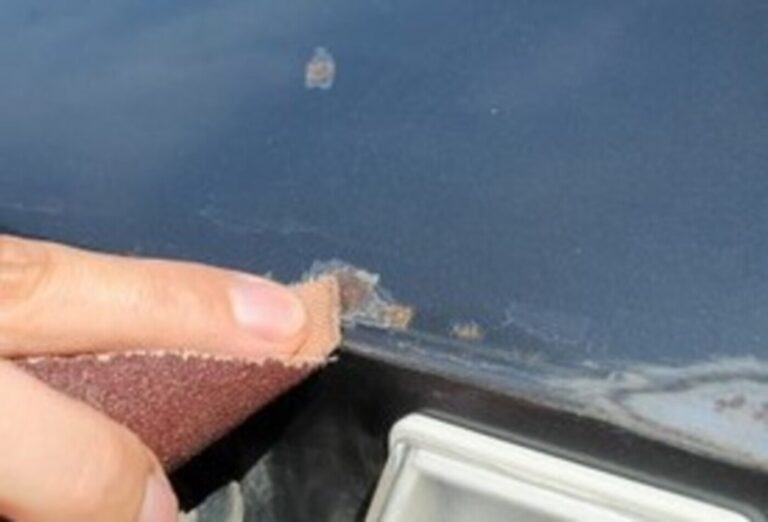
The first signs of a problem pop up in paint nicks, cracks, and scratches. An easy fix.
Surface rust is just that: on the surface. Leave a car with steel disc brake rotors parked for a little while, and you can see surface rust form on the rotors. That is never a threat, however, as that rust is typically wiped off the rotor after just a few stops.
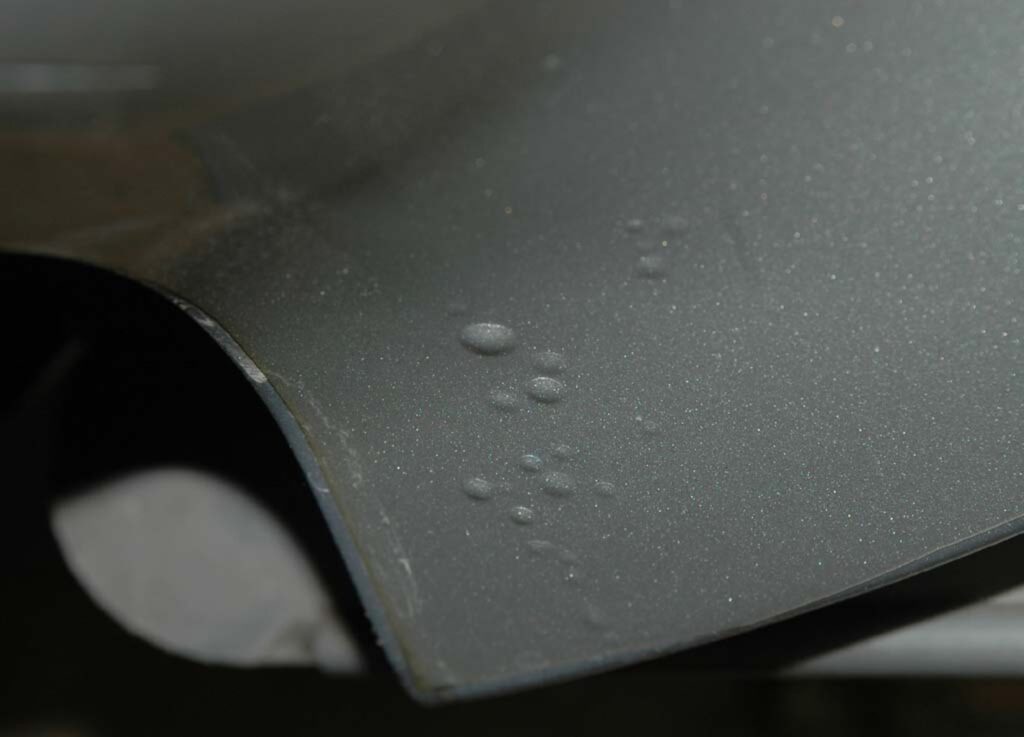
Most surface rust on your car forms when paint breaks down through mechanical or UV damage, which is why even cars in warm, dry climates get it. Structurally, surface rust is not a problem, and depending on the metal’s thickness and alloy composition, a level of “passivation” may even be reached where the surface rust actually guards the metal from further oxidation.
Regardless, it is best to correct surface rust as soon as you see it—just in case. That patina-coated truck from Arizona may become a hole-filled nightmare in the wrong weather. The fix is much like general paint repair. Start by using an abrasive wheel or sandpaper (we used 50-grit) to cut through the paint and corrosion until clean, bright metal is visible. Rough up the surrounding areas, too, so that your body treatments can adhere well to the car.
Next, use a rust inhibitor or converter to impede the tin worm’s progress. Your steel may look shiny after knocking the visible rust off, but there is still some iron oxide there. Rust inhibitors convert iron oxide into a chemically stable, moisture-resistant compound that protects the rest of the metal underneath. For example, the Permatex Rust Treatment we have used contains tannic acid, which reacts with the rust and converts it to iron tannate (which is stable) and 2-Butoxyethanol, an organic polymer that acts as a primer atop the metal. (You can paint over this Permatex version, but we recommend this one for places like the car’s underbody where you do not care how it looks as long as it is not rusting.)
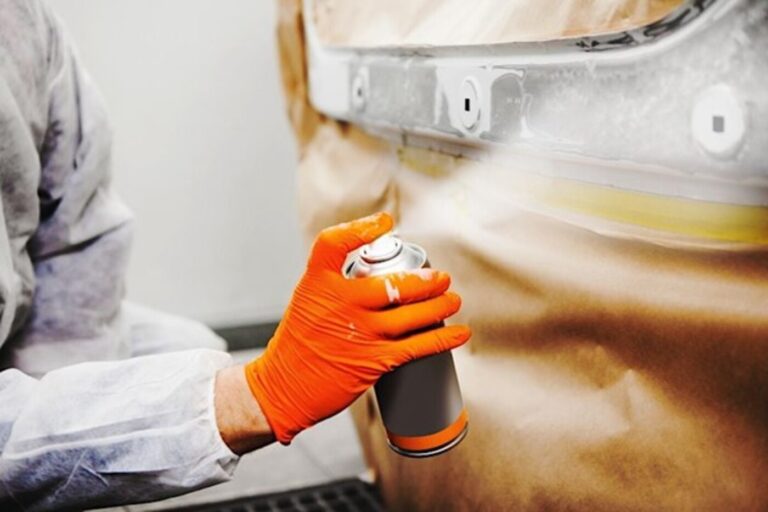
Then put on some rubber gloves and apply the rust converter with a brush or sponge. You will want to pour as much rust converter as you think you’ll use into a disposable container because you can’t double-dip into the bottle. If you get some rust in your container of rust converter, the compounds will start working there instead of on your car’s metal, thus ruining the contents of the bottle. Wipe a thin layer of rust converter onto the metal and wait 15 to 30 minutes for it to dry.
Then add a second layer and wait at least a half hour for it to dry. If you can keep the surface moisture-free for 24 hours, then you could prime it—this Permatex Rust Treatment is not a primer for paint. Follow up that primer with paint and clearcoat, then buff to blend the finishes. Alternately, if it is in a spot where people cannot see, you can just leave it alone after letting the Permatex Rust Treatment (or similar sealing rust converter) dry, secure in the knowledge that your winter beater might last a few more seasons without the bumpers falling off.
Scale Rust
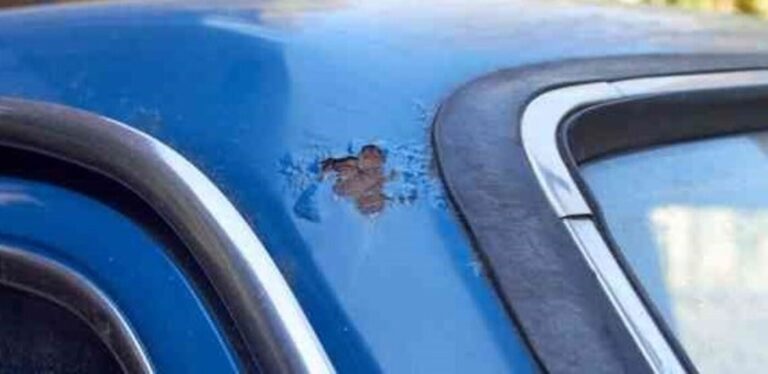
The chemical process corrupts the surface and reduces metal strength.
If you do not correct surface rust and you allow that decomposition to penetrate further into the metal, you may see bubbles start to form in your car’s paint. This is because iron oxide molecules are physically bigger than those of iron or steel. That worsening rust issue self-propagates by expanding and flaking away the outer layers of paint and metal, exposing fresh base metal, which then corrodes.
When rust penetrates into the surface like this, it causes a rough, pitted type of damage called scale. Correcting scale means getting through the rust with a wire brush, knocking down roughness with a grinding wheel and smoothing out the surface with sandpaper. Make sure you are down to bare metal and that there are no big flakes of rust left before sealing it back up, otherwise your sealer or filler could pop right back off. Rough up the area around the bare metal so your next sealants and treatments can stick to it. If it is in a nondescript area such as underneath the car, you can just seal this cleaned-up spot back up with a rust converter and call it a day.
The metal surface may still be rough once you are done sanding the larger flakes off. If it is in a more visible spot, you may want to consider smoothing it out with a body filler such as Bondo before finishing it out with primer and paint. Follow the instructions from the manufacturer of the body filler as it can vary, but generally speaking, you mix it up to a specified ratio depending on your room temperature. Spread it on using a metal or plastic spreader, but leave a little extra on top to sand smooth.
It takes about 30 minutes for Bondo to fully cure and harden. After that, smooth out the extra filler you left on top so the repair matches the contours of the rest of the car. If you have a rust inhibitor that is safe to use with body filler, add this now, but otherwise, you can seal your work with a regular, high-quality primer. As with fixing surface rust, paint and clear-coat your repaired spot, then buff to blend it in with the rest of the car.
Penetrating Rust
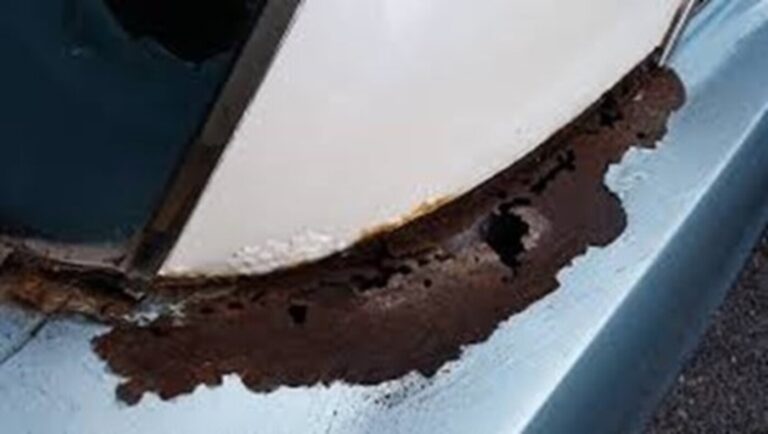
After prolonged exposure, steel is converted to brittle iron oxide and holes form.
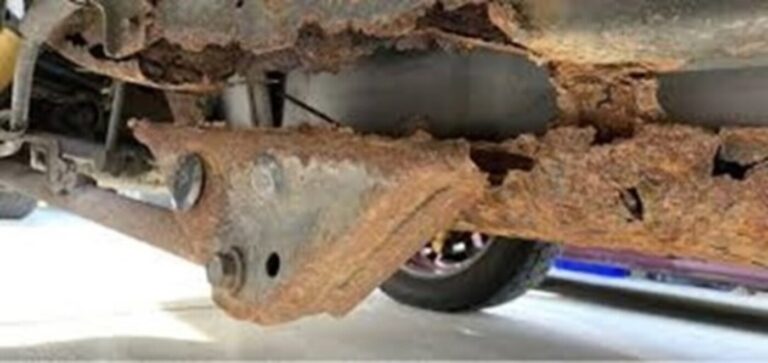
Rust will eventually eat through your car’s metal if left unchecked. This is penetrating rust, and it is the cause of everything from Swiss cheese-style holes in the fenders to more dangerous problems with weakened frames and suspension components.
If you live somewhere with rust-prone conditions, do not wait for bubbles to appear on your car’s body. Take a look underneath the car periodically to inspect for any rough or compromised parts that could be a safety risk on the road if left unfixed.
As scale rust gets worse, the base metal flakes away and leaves holes. Now you have got a bigger problem, and you have got two options to fix it. You can completely replace the affected part or panel (tough), or if it is merely a bodywork issue, you can cut the rotten parts out and weld metal “patch panels” into place (tougher). A reputable body shop should be able to take care of either issue. Welds that hold on patch panels can be smoothed out to look like they were always part of the car by the right set of talented hands.
As tempting as it may be, you should not repair these larger holes with body filler as you would with pits left by scale rust.
That being said, do not attempt to patch your car’s frame back together. A rusted-through frame means the structural integrity of the car is questionable, and it should be inspected and repaired by a qualified repair facility. You really do not want to be in a crash in a structurally sketchy car, so we cannot reiterate this enough: check for rust underneath your vehicle every now and then—before it is too late.
Rust Repair on A Classic Car
Get All the Materials You Need Before Starting a Rust Repair Project
You can buy automotive touch-up paint in pints and quarts to use in a spray gun, in aerosol cans, or in roller ball applicators. Even if you know how to use a spray gun, mixing automotive paint with a reducer to match the temperature and humidity conditions can be mighty tricky. We do not recommend it. Instead, buy aerosol cans for larger repairs and roller ball applicators to fix scratches if your classic car is still in its factory color. Another solution is to remove the rust, prep the surface, and get the area into primer ready for paint, and then go to a good automotive pint shop to blend in the paint color.
Most late-model vehicles were painted with base coat/clear coat paint. The base coat contains just the pigment and binding resins-the clear coat is just the gloss. You will need equal amounts of both. You will also need an epoxy self-etching primer to bite into the bare metal and a lacquer primer to hold the paint. You can also buy automotive paint locally from a professional auto body supplier.
Next, buy 40-, 600- and 1,000-grit sandpaper, a sanding block, grease and wax remover, poly sheeting, painter’s tape, a tack rag and a microfiber cloth.
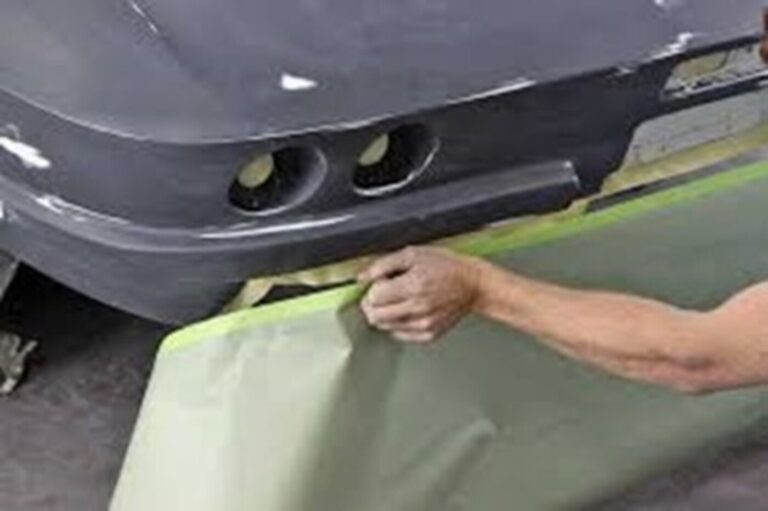
Mask Off the Car Rust Repair Area
Protect the entire vehicle from paint overspray with poly sheeting. If you are painting the hood, spread poly sheeting over the engine and fenders. In door areas, cut poly sheeting to fit the door opening and tape it to the jamb. The final masking must be a foot or two away from the repair area so you will have room to blend the touch-up paint into the good areas.
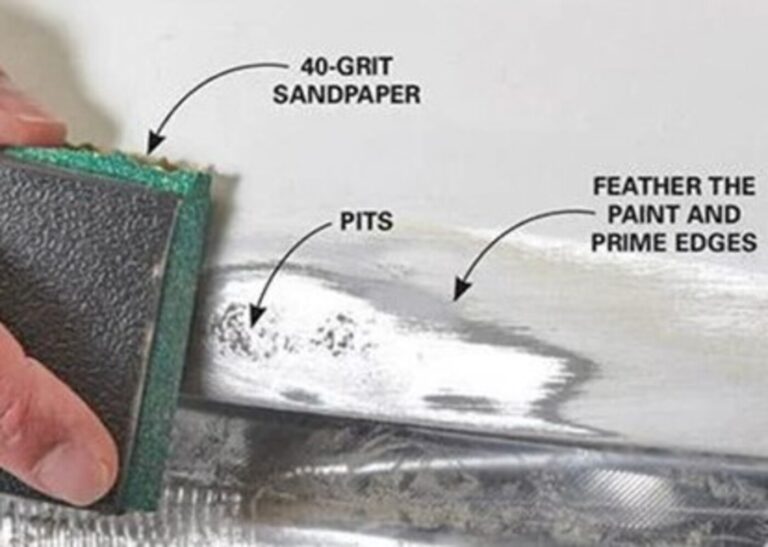
Remove The Rust
Crack off any blistered paint with a scraper. Then sand the rust using 40-grit sandpaper, sanding through the rust spots, down to bare metal. Then enlarge the sanded area so you will have space to feather the edges. Then feather the paint edges using 120-grit sandpaper. Complete the feathering with 220 grit. Use a tack rag to remove particles from the unmasked area. If the rust has created pits in the metal you can fill them now with body filler or wait until the epoxy primer dries and apply multiple coats of filler primer.
Clean With Detergent
Clean the entire unmasked area with a grease-cutting dishwashing detergent, followed by clean rinse water. Let it dry. Then wipe the area one more time with a lint-free cloth to remove any remaining dust or lint. Apply the paint manufacturer’s prep solvent.
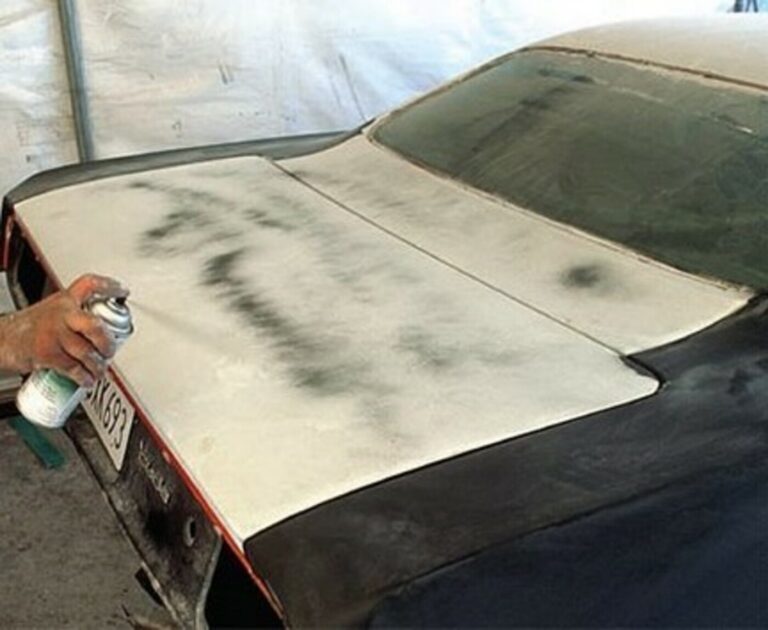
Prime The Surface
Apply epoxy primer, then filler primer. Spray the filler primer in heavier coats to cover the entire repair area. Move the can away from the surface slightly and blend it into the surrounding painted area. Self-etching epoxy primer provides a strong bond to bare metal, so use it as your first coat. Spray two to three medium coats, allowing the recommended wait time listed on the label (usually 15 minutes) between coats. Wait a full hour for the epoxy to dry to the touch (longer if it is humid outside). Sand the epoxy primer with wet 1,000-grit sandpaper. Wash with clear water and let dry. Wipe the dried epoxy primer with a lint-free cloth and apply two to three heavier coats of lacquer filler primer allowing drying time between each coat. Let the lacquer primer dry until it is dry to the touch-at least one hour-before sanding. (Note: Do not the car sit for a prolonged period outside with just primer as primer is not water resistant and will allow the rust to form again.)
Sand The Primer
Sand drips and sags with 320-grit sandpaper. Then final sand the entire repair area. Starting with wet 600-grit sandpaper, smooth the primer and feather the edges. Then switch to wet 1,000-grit sandpaper to final-sand the entire repair, including the blended areas.
Spray The Base Coat
Apply the colored base coat. Start at the bottom of the repair and apply the color coat in left-to-right rows, overlapping each pass by about one-third. Build the color slowly into the repair and surrounding areas in two to three coats, allowing about 10 to 15 minutes between coats. Holding the spray can about 12 inches away from the surface, spray the repaired area. The slower you build the color coat, the better it will look under the clear coat. Allow the base coat to dry, until it is dry to the touch, at least 60 minutes. Do not sand the base coat (especially metallic colors) unless you have created sags. In that case, sand lightly and then respray the touched-up areas.
Spray On the Clear Coat
Apply several coats of clear coat, allowing the recommended drying time between coats. Gradually work the clear coat into the surrounding painted areas to achieve a smooth blend line. This is the hardest part because all clear coats run easily and that will ruin the look of your paint job. If you create a run in the clear coat, you will have to let it dry for at least 48 hours before attempting to fix it with fine-grit sandpaper and polishing compound. Then you will have to respray the sanded area. So practice spraying on a scrap piece of cardboard to get a feel for the nozzle and the speed of application.
Using an old cotton T-shirt or microfiber cloth and buffing compound, hand-buff the repaired area. Do not use a polishing machine for this step. Wait at least 30 days before waxing.
Finally on the Rust Repair Process
If you ignore rust spots on your car, it will spread and turn your sheet metal into Swiss cheese in no time. However, if you deal with rust early, you can stop it from spreading and squeeze a few extra years out of your vehicle. There are areas of your car that rust can be removed without the headache of matching paint like the underside and trunk where corrections are even easier. Rust does not have to be an overwhelming issue and if caught early can be corrected by most DIY mechanics; however, if in any doubt it is recommended to take it to a seasoned professional to remove the rust and correct the paint to match your classic car.
Interesting that the car they show in several rust repair photos are of a C2 corvette! I’ve never ran across rusted fiberglass!