A big part of owning a classic car is taking it out for a drive, and for many of us having music is all part of enjoying the cruise time so having a classic car with a modern sound system can be crucial. Many vintage cars either had no radio or just an AM radio with limited functionality giving us very few choices to get that background music for a road trip.
When it comes to installing a car stereo in a classic car or truck, the actual process is pretty straight forward. Once you have all the speakers wired up and the power and ground wired up, all there is left to do is mount the radio head unit in the dash.
While the basics are simple, there are some details you should pay attention to in order to get the best audio quality out of your new sound system.

Buying a Car Stereo Sound System
Before you can install a stereo, you will need to purchase a stereo. Modern sound systems for classic cars can get pricey so it is in your best interest to shop around for the best deal. Find a few in your price range and listen to the sound quality and look for features that will suit your needs the best. Will you want Bluetooth? Do you want touchscreen control? What type of speakers do you need? A qualified car stereo salesperson should be able to set you up with a system package that will work for you.
Another thing to consider when purchasing a stereo is the size and shape of the stereo head unit and speakers. Most classic cars and trucks have plenty of extra space in the dashboard, but you need to check what space is available to be sure it will fit. Also, for many of us cutting up the dashboard or any part of the interior is not an option so there are choices out there for modern sound systems that will fit you car without major modifications.
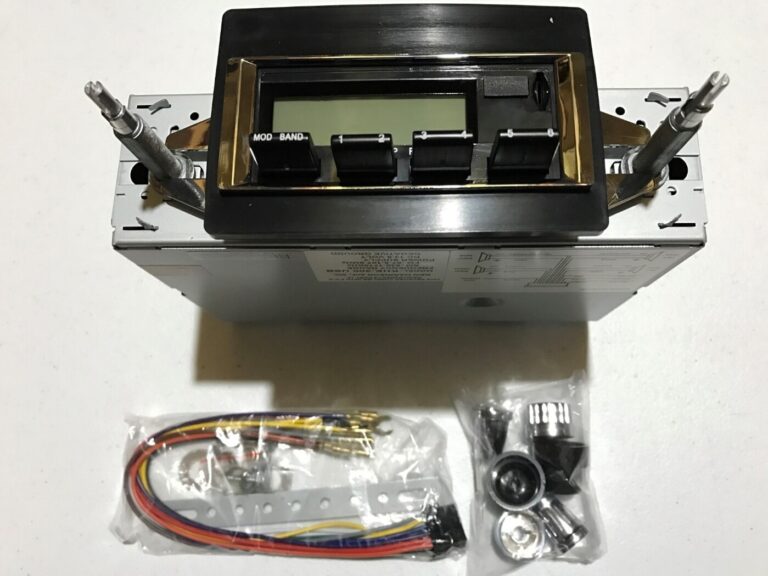
There are many different housing kits available to mount the stereo in the dash and make it look clean. Most car audio stores carry them. Ask your salesperson for the proper kit for your vehicle. Also check to see if your car has an audio wiring harness. A new harness can be wired to the new stereo and then easily plugged into the cars existing power and speaker system. You will not need to wire anything else.
Before buying speakers, make sure you know what size you need and how deep the whole goes behind the mounting opening. For example, the speaker hole in the car door may only be 5 inches deep. A six-inch-deep speaker will certainly not fit. The depth and circumference will need to fit in the available space with ample room to clear any part of the car.
If you are looking for high-end audio results, you might want to consider a sound insulator/deadener such as Dynamat. Many classic cars and trucks tend to have larger engines and exhausts that create a throaty rumble. Not only will a sound insulator help reduce road and engine noise, but it will also improve the acoustics of your car audio system as well. This step will require more time and money, however, is worth it when you hear the outcome.
If your are planning on changing to an aftermarket radio and increasing stereo output, you should also make sure your alternator is capable of the amps needed to run the modern sound system.
Installing a Car Stereo Sound System
To prevent any shocks or damage to the electrical system, remove the negative cable from the battery. Removal of the old car stereo may require the use of a DIN tool. There is a good chance that your old stereo is also attached in the back by one to 4 bolts that are attached to the back side of the stereo’s housing unit. In most cases they can be removed without having to disassemble the dashboard or any other part of the front console.
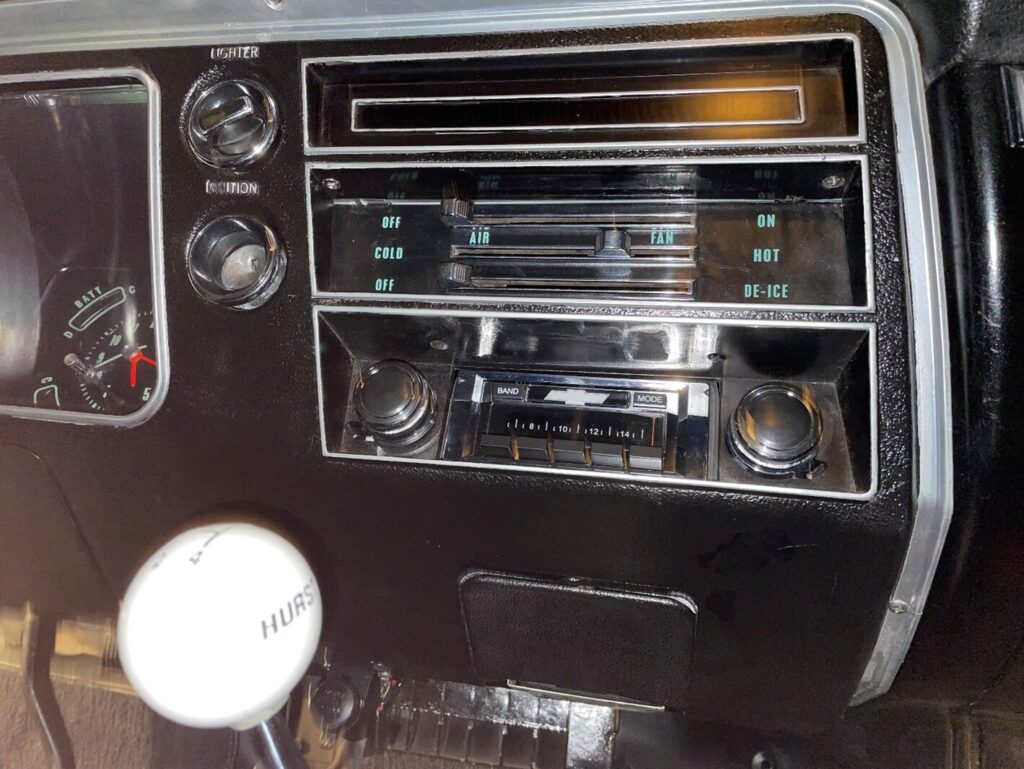
When removing the old stereo, pay close attention to the way it comes out. It is most likely that the new stereo unit will need to be installed in reverse. If you have an old two knob car stereo, you may need to cut a new hole in the dash for the new stereo housing to fit in or consider purchasing a classic 2 shaft style stereo.
After you have removed and unplugged your old stereo head unit and your new stereo’s housing has been mounted, you can begin wiring up the head unit to the power, ground and speakers. If you are lucky, your car will already be wired up with a wiring harness. Simply wire your new head unit to the harness according to the provided diagrams and plug the harness into the car’s existing audio wire harness plug.

Without a harness you will needs to make each of the connections individually. First thing to do is to identify a 12-volt constant power source (for the clock and preset radio stations), a 12-volt switched power source (key ignition switch), and a chassis ground. Depending on your stereo, you may need to find additional 12-volt power sources for other electronic features in your audio system.
A solid ground connection is crucial for your stereo to perform at its best and to rid interference sounds and other unwanted noise. A wiring harness will already have a good ground setup. To wire the ground wire (typically the black one), find a bolt that contacts bare metal of your vehicle’s chassis. Be sure to tighten the wire down with the bolt so the wire is touching bare metal. A poor ground can really cause your system to sound weak and noisy.
There may also be an illumination control wire. You can tie that in to the instrument cluster dimmer switch so you can control the brightness of the stereo lights. Make sure you check your owner’s manual and other online resources to properly located the dimmer switch and the best way to properly install the radio wiring harness into the classic car’s wiring system. Also make sure you are using the proper connectors, and wire sizes for the car and modern sound system.

Please consult your owner’s manual or reliable car club sources to ensure you identify the correct wires to avoid causing any damage.
Before we move on to wiring up the speakers, make sure the car’s antenna is plugged into the back of the head unit. It can easily be forgotten and will cause extra work if you need to backtrack.
Modern Sound System Speakers
Wiring up the speakers is easy. Make sure you have them securely installed in the speaker door mounts, back deck mounts or any other location in your vehicle. Take note of the colors of the wires. They should run from the speaker straight up behind your dash.
A simple way to identify speaker wires is with the use of a 9-volt battery. Take any two speaker wires and quickly touch a wire to each post of the battery. You will hear a small static pop from the speaker you are testing. Knowing which wires go to which speaker is crucial for setting your stereo’s balance and fader options. When wiring your connections, be sure to use quality wire connectors and terminals. A loose wire or wire that shorts out can shut down your entire system.
With the power, ground and speakers wired up, it is time to attach the head unit into position and secure it in place using the instructions for your mounting kit. You can then go ahead and reattach any disconnected battery cables and turn your car key to the “On” position. If all went well, you should be able to turn on your stereo and crank your favorite tune.
Finally
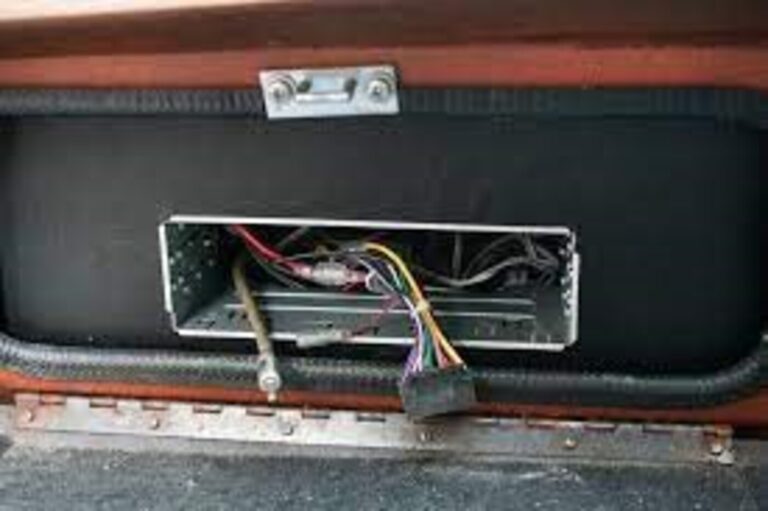
Today’s technology has provided the classic car hobby with the ability to have a modern sound system in a vintage car without doing real damage to the underlying car. There are some classic cars that currently upgraded sound system are not available to easily fit in the car or you may have a car where the radio was intentionally deleted; then not to worry as there are alternatives to this as well utilizing the under-dash glove box or trunk to mount the receiver. These systems generally come wit ha remote to control the modern sound system so you still can take your favorite tunes along with you. These sound systems can be a DIY project for those with some mechanical skills and real patience to make the installation work up to your expectations.
Along with much of the internet, the typing in most cases, like this one, is in some shade of gray, making it difficult and frustrating to read. With some sites I don’t bother reading it because it’s just not worth it. This one isn’t too bad, but black print would be appreciated.
Thank you
Rick, thank you for your suggestion and we will make adjustments going forward.
The article provides an insightful and refreshing perspective on the integration of modern technology into vintage automobiles. The author effectively highlights the benefits and challenges of upgrading the sound system in classic cars, showcasing a keen understanding of both the nostalgia associated with these vehicles and the desire for enhanced audio experiences. The article’s unique approach to bridging the gap between past and present demonstrates a forward-thinking mindset, catering to enthusiasts who wish to preserve the charm of their classic cars while enjoying modern conveniences. It is evident that the author’s passion for both classic cars and cutting-edge audio technology shines through, making this article a valuable resource for anyone interested in enhancing their driving experience.