
For a liquid cooled engine, a working water pump is vital for the engine’s operation; if the water pump is not running, the engine will overheat and stop working. The water pump is attached directly to the engine block and operates by centrifugal force. If the water pump is not working, the coolant will remain stagnant, and the engine will overheat so understanding water pump rebuilding or replacement is critical. Most car engines can withstand slight overheating, but severe overheating can damage it. For the coolant to work properly, it must constantly flow through the engine. Making it work is the job of your car’s water pump.
How Does a Water Pump Operate?

When the car engine is started, the pulley placed on the front of your engine sets the serpentine belts in motion, which in turn moves the other movable components of the engine. The water pump draws water from the radiator to the engine block. The water acts as a coolant and is directed through the engine in order to keep it running at a favorable operating temperature. The supply of the water throughout the engine depends upon the engine’s temperature, which should not be too high or too low.
Why And When to Repair Your Water Pump?
As discussed earlier, the water pump is one of the most important components for your car as it makes sure that your engine operates without interruption under perfect working temperature. It is imperative to keep a watch at its functional value to ensure that your engine does not undergo irreparable damages.
Following are the signs that you should replace your water pump:
- The weep hole of the water pump shows significant amount of oil or coolant leaking from it, you should replace your water pump
- You find the temperature of your engine going higher than normal
- You find yourself adding water to the reservoir more than often
- The green and orange-colored puddle under your car changes into red or brick-red in color
- You start getting an odor inside your engine compartment which was not there before
- You hear a loud whining noise from the engine compartment
Okay, we are fully aware that you can usually buy a new or rebuilt water pump for under $100 for most American cars from the 1950s thru the 1970s however on the other hand, if you happen to own a less common classic car you might find that such a relatively simple component costs a lot of money. Even having a water pump rebuilt by a company could run you into the $100s to have that numbers matching part. We have a list of some of the water pump rebuilding service companies, however if you want to undertake the project yourself there are also water pump rebuilding kits available for many classic cars.
Always flush your cooling system before removing the pump.

Removing The Water Pump
Removing the water pump, once you get to it, is the easy part of the job, unless you run into frozen fasteners. If a bolt is being stubborn, you have to be patient or risk breaking the bolt off in the plate and block.
Spray penetrating oil on the bolt and let it work its way down the threads of the bolt. You may have to repeat this process five or six times over several hours or a day. Work the bolts slowly back and forth as the penetrant works its magic the bolt will turn a little further each time. Hopefully, the bolt will come out. When reinstalling the bolts, put a little anti-seize on the bolt threads to help prevent them from freezing so the next you will not have such a tough time if you ever need to replace the pump again.
Mounting surface preparation: Be sure to completely clean the gasket mounting surface on the engine. You can use parts cleaner to help remove pieces of dirt and gasket that may stick to the block. Dry the area completely or you will not get a good seal when installing the new water pump.
The Water Pump Rebuilding Process
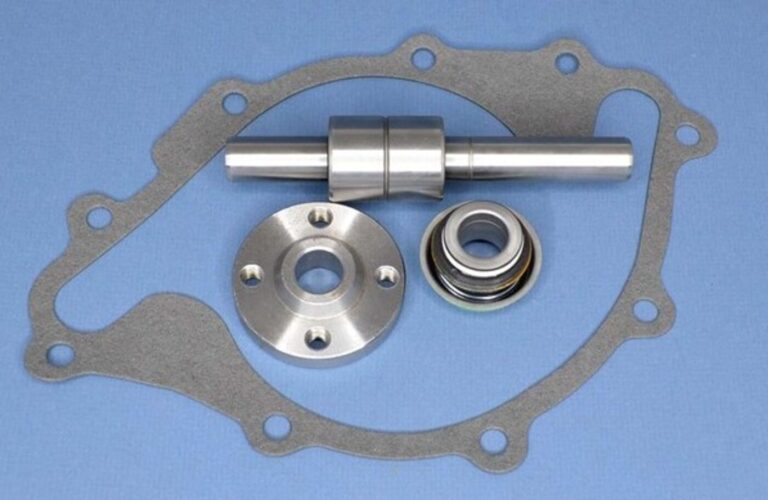
Now, water pumps are water pumps. No matter what they look like, they all work the same way. A central, pulley-driven shaft turns an impeller inside the housing, pumping water in and out. The shaft is suspended in two ball bearings (inner and outer) and there are seals at each end to keep water and dirt out.
Before tearing your water pump apart read all of the instruction that come with the pump rebuild kit as each pump has certain specifics and even tools required to complete the process.
In general, the process will follow the following steps:
Support the fan hub in the press. Now using a 1/2” press bar or 1/2” grade 8 bolt press the water pump shaft out of the hub. Remember to hold onto the water pump while you press it out. They do not bounce well when they hit the floor.
Support the water pump housing at the top and bottom of the housing itself. Make sure that you leave enough room for the shaft and impeller to fall out of the bottom of the housing. Use a 7/8 deep well socket to press the bearing and race assembly. You do not want to press on the shaft. You want to press on the bearing and race. Slowly press the shaft and impeller out of the housing.
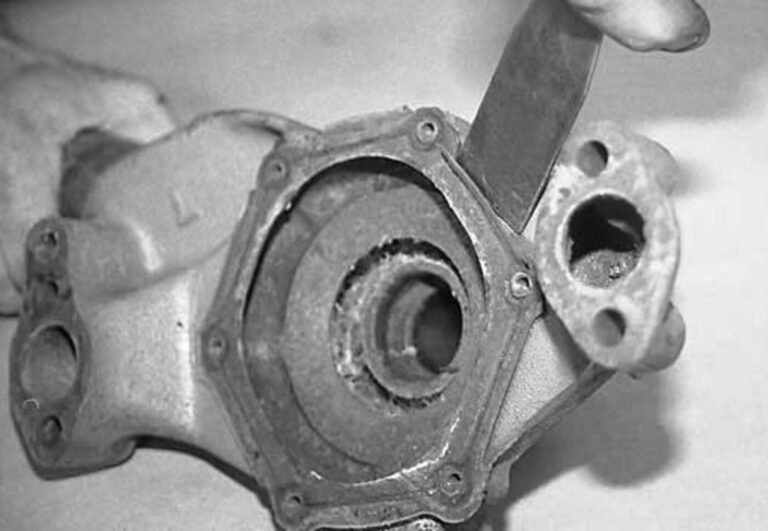
You can now take a scraper and remove all of the old gasket material. Remember to also clean the mounting surfaces on the engine block. Now would also be a suitable time to touch up the front of the block if it is needed.
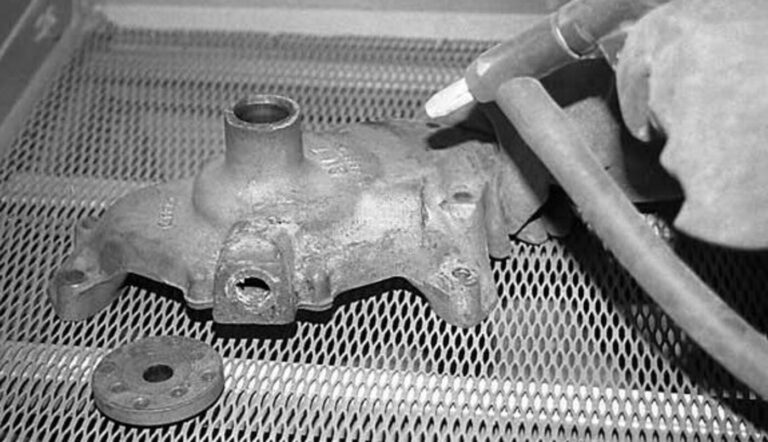
The water pump housing can now be cleaned. Use a paint stripper and remove all of the old paint. Next place the housing in a bead-blast cabinet (you can also use a sandblaster) and clean the entire outer surface. After this is done, thoroughly clean all of the blasting sand or beads out of the inside of the housing. Make sure you inspect the entire housing for any cracks before you begin assembly.
Again, support the pump housing at the top and bottom and press the new bearing/shaft assembly into the housing. The longer grooved end of the shaft goes into the housing.
Take a 7/8” deep well socket and set it against the bearing race. Carefully press the shaft/bearing assembly into the housing. The bearing/race assembly should be flush with the housing when properly installed.
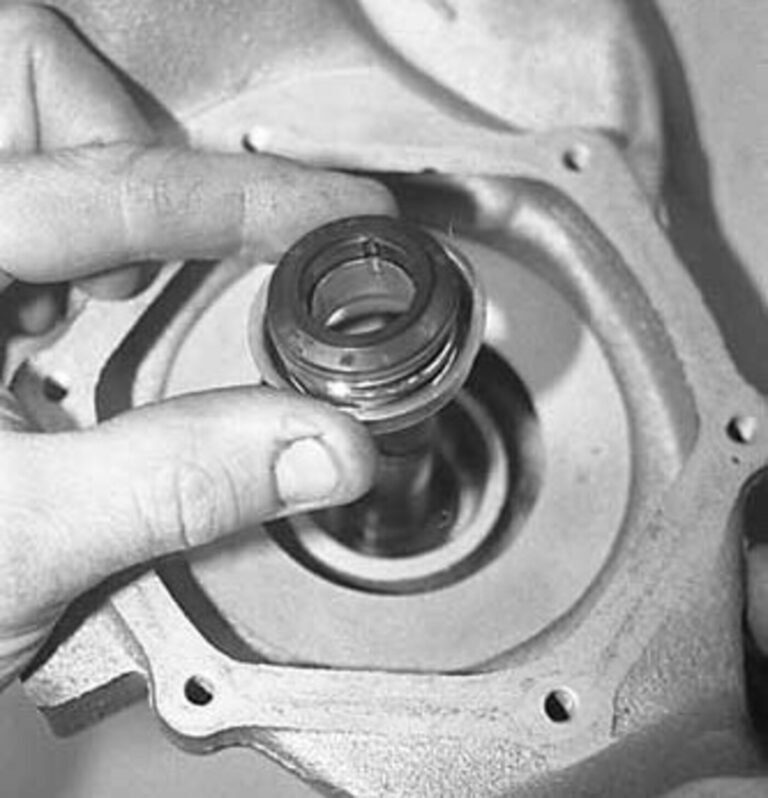
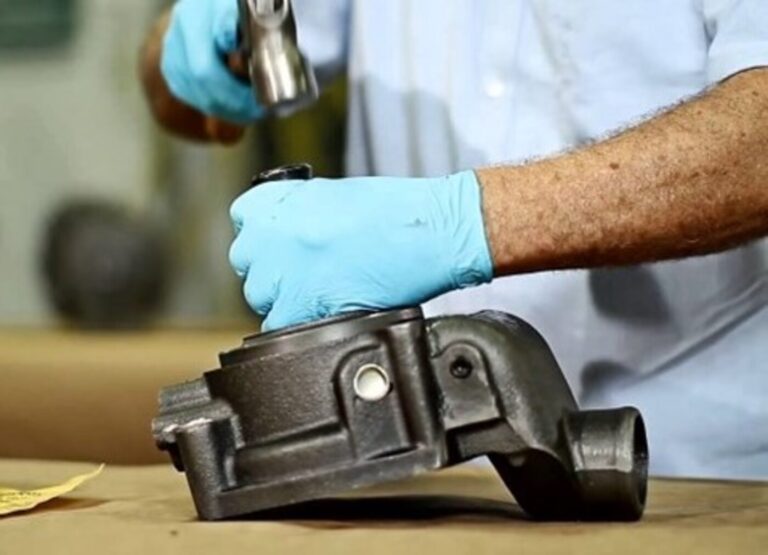
Now install the new seal (as shown) over the shaft at the back of the pump.
Use a socket that will apply pressure to the seal’s outer flange only. Take a hammer and socket and tap the new seal into place. This seal should bottom out against the flange on the water pump housing. Turn the water pump over and check that the shaft/bearing assembly is still in the correct flush position.
Position the fan hub flat against the press plates. Next position the shaft so that you can press it into the fan hub. Now slowly begin to press the shaft into the fan hub. The correct measurement is 5 5/8” ± 1/16”. This measurement is taken from the mounting surface of the fan hub to the block mounting surface of the pump. This picture will show you the easiest way to obtain this measurement. When you are done, the shaft will protrude through the hub approximately 1/4” to 3/8”.
Place the small metal/rubber seal over the end of the shaft. The rubber part of the seal will face toward the pump’s impellers.

Take the new impeller and lay it on a flat surface (a piece of glass works well). Make sure that all of the blades touch the glass and are even. This is especially important when the impeller is installed (our Kit had 2 blades that needed adjusted). If the blades do not touch, bend them until they do. Carefully position the new impeller over the shaft. Use a 5/8” deep well socket to apply pressure to the center of the impeller. Now begin to slowly press the impeller into place. You do not want the blades to come in contact with the housing. There should be anywhere from .010 to .0135 clearance. When the clearance is achieved, spin the shaft, and make sure none of the blades come in contact with the housing.

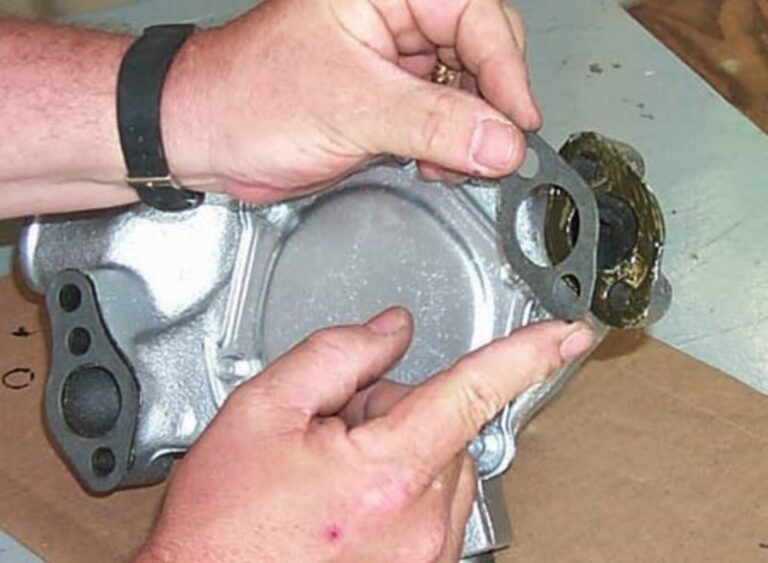
Apply gasket sealer to both sides of the water pump housing gasket and position it into place on the housing. Now select the correct rear housing plate. Pre 60s used the flat plate. 60s up used the stepped plate. Remember the gasket and plate can be positioned in two correct ways. The rounded sides are opposite each other and go on the top and bottom.
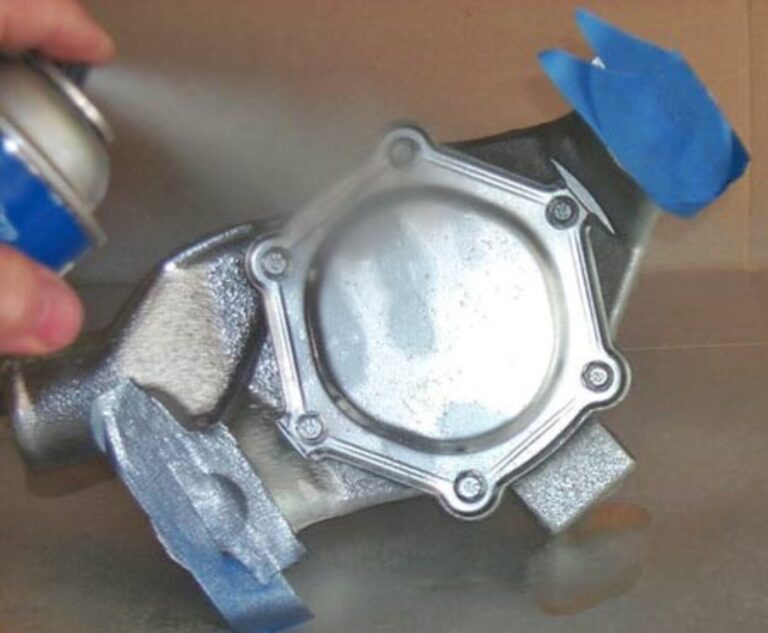
You will want to paint the pump after the assembly. Use masking tape and paper towels to close off all of the openings. Next wash the exterior with lacquer thinner two or three times. Now using Chevrolet Orange, start by spraying 2 to 5 light to medium coats. Allow each coat to tack before you spray the next coat.
Installing The Water Pump
Installing the gasket: Do not try to line up the water pump and gasket — more times than not, it will not work, and you will have to remove the pump and try again. To get it right the first time, apply a thin film of RTV on both sides the gasket and fit the gasket onto the water pump. Be sure that you do not use too much. If so, when the pump is bolted in place it will ooze excess sealant. Keep in mind that what you see on the outside of the pump housing will also be hanging on the inside of the pump and can enter the cooling system resulting in potential contamination. Plus, you do not want it too wet, nor do you want it completely to set up or the gasket will not stick to it.
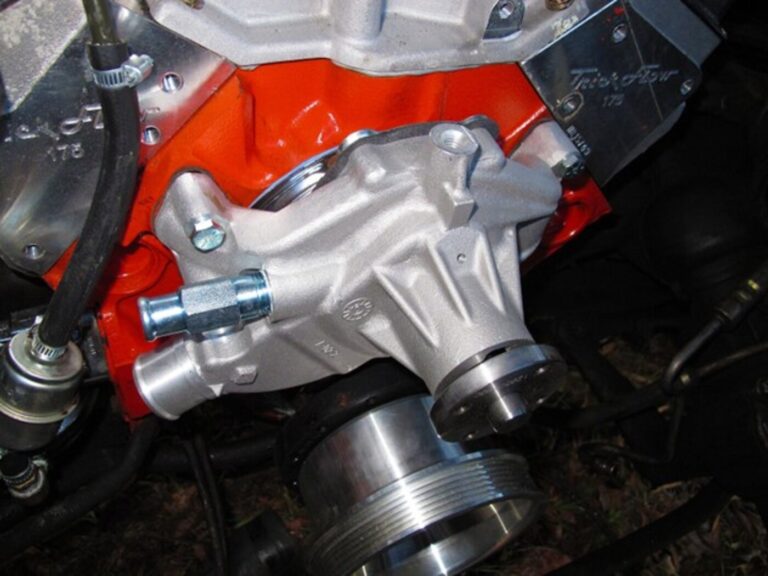
Slide the bolts through the water pump and line them up with the bolt holes on the block. Start each bolt by four or five threads. Alternately screw in the bolts, keeping the water pump even with and against the block. After the water pump is firmly against the block, torque the bolts according to the vehicle’s torque specs.
Timing Belts: If the water pump is in the timing belt cover, you should replace the timing belt when you replace the water pump, the work is almost the same. Furthermore, if antifreeze or other chemicals leaked onto the timing belt, the life of the belt will be compromised. In this case, it is better to be safe than sorry.
Finally
Always make sure you have everything you need prior to beginning water pump rebuilding, as some water pump jobs require special tools. When you follow these tips, rebuilding and replacing the water pump should be much less frustrating. A water pump plays an undoubtedly significant role in keeping your car engine running smoothly. True, we hardly pay any attention to this part of our vehicle, but when it comes to keeping the car engine from overheating, the responsibility of a water pump cannot be overlooked.