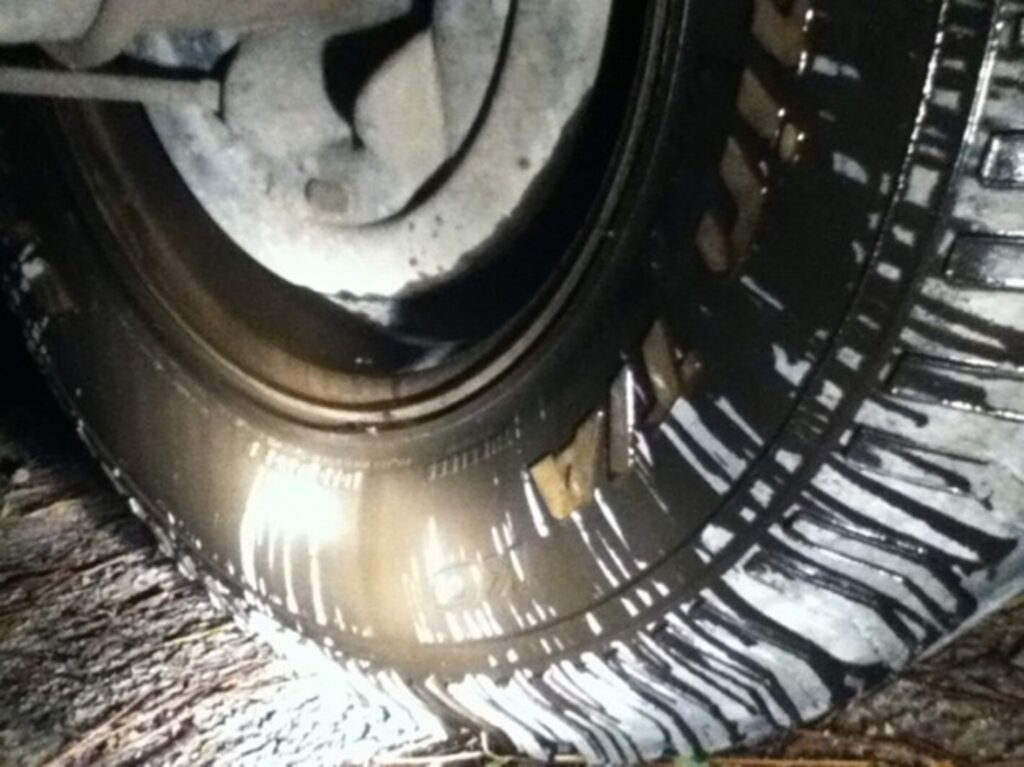
Your classic car has been sitting a while and now you see gear oil leaking from around the rear wheel; or your vehicle making a roaring sound from the rear end that follows the vehicle speed. Do you wonder how difficult it is to change the front or rear differential axle bearings and seals? If you are not going to do the repair yourself this post will show you what you are paying for when you take your vehicle into a repair shop for rear differential axle bearings and seals replacement. Same as with the front bearings it is wise to replace these as a set, since it is likely both side may be worn and the added costs for the second set will be minimal.
Why Do Differential Axle Bearings Fail?
A bearing is made of high-grade steel which has a super hard coating over the rollers, inner and outer races. A bearing goes bad when this coating is worn away due to mileage or extreme load which just leaves the normal steel which then degrades and destroys the bearing components. Also, failures can occur when moisture combined with salt from roads penetrate the seal and contaminate the bearing, or over time the grease used to lubricate the bearing can liquefy leaving it dry causing a failure.
This is what a failed axle bearing looks like. You can see the roller cage is broken and there are pits on parts of the rollers themselves.

Before Beginning Differential Axle Bearings and Seal Replacement
Before you begin, park your car on level ground with the transmission in park. You will need to set up your garage workshop to have the space and tools needed for the project, then raise the car up with a floor jack, and secure it using jack stands for safety to remove the wheels. Remember safety first, never get under the vehicle unless jack stands are in place. We want you to use safety as a normal practice anytime repairs need to be done as you learn automotive repair.
The brake caliper will need to be removed along with the caliper mount and the brake pads.
If you are not replacing the brake pads, then you do not need to open the bleeder or push the piston back into the caliper for this job.
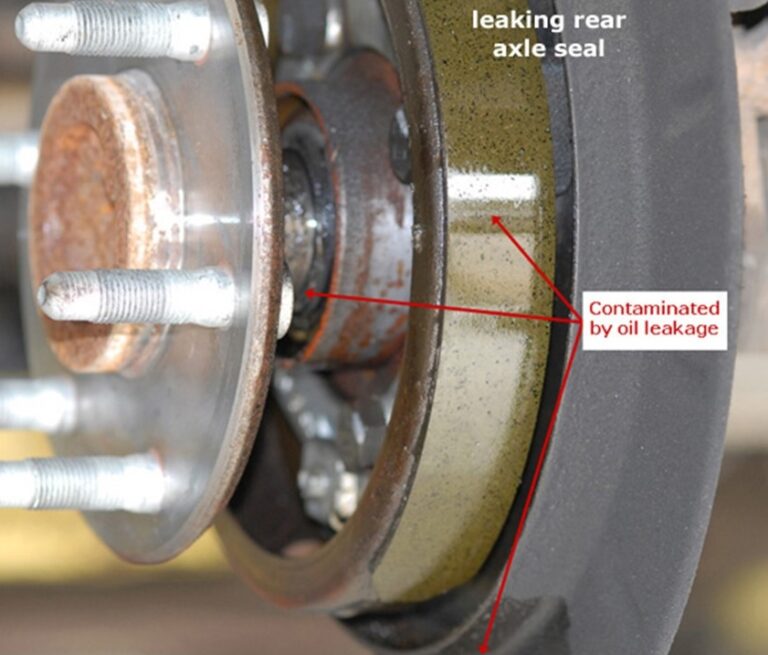
Identify the side of the differential you see the leak or hear the noise on before performing the repair. In this repair you will be dealing with gear oil so have a fluid catch basin ready. Also, if the gear oil has been leaking for a while you will need to replace the emergency brake shoes.
The steps taken below are for GM based differential axles so the process may be slightly different for other classic car manufacturers.
Remove the Rear Backing Plate
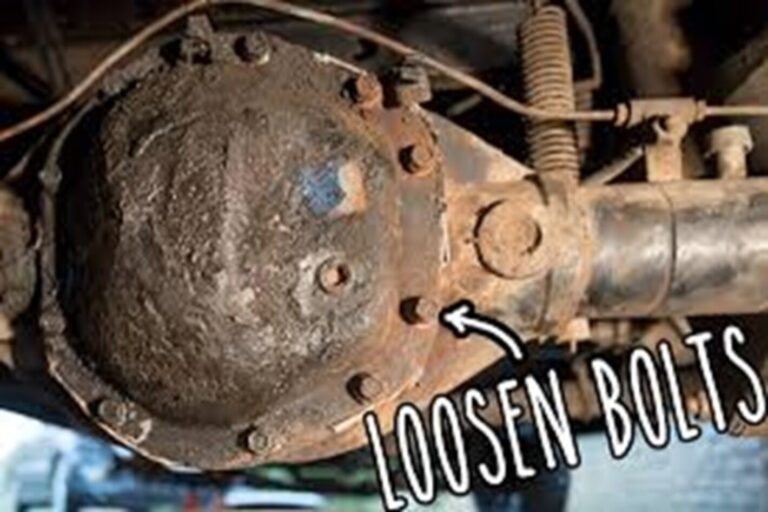
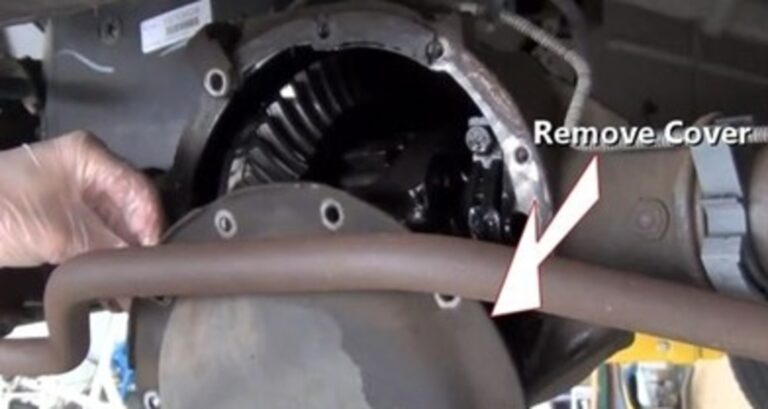
Once the vehicle is safely in the air and on jack stands it is time to get under the rear of it and remove the rear differential cover. Begin by loosening the bottom three bolts, this will hold the cover in place while removing the remainder of the bolts. Have a fluid catch basin ready to collect the gear oil which should start to flow out from the cover. Remove the remainder of the cover bolts and store them in a plastic container so they do not get lost.
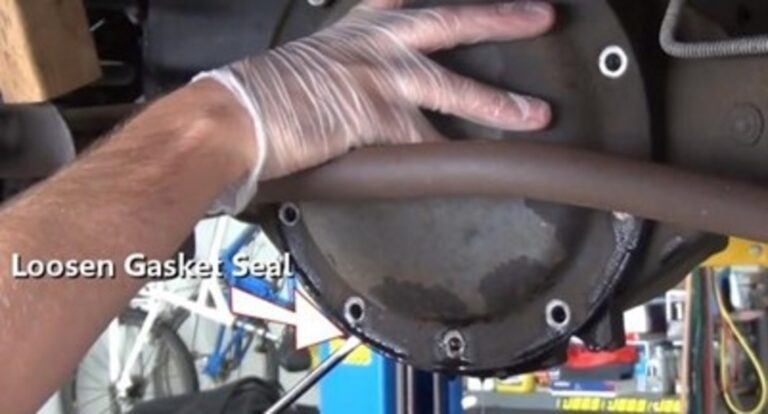
If gear oil does not start to leak you should help break the seal loose by using a flat blade (standard) screwdriver and allow the gear oil to drain out. Once most of the gear oil has drained into the catch basin, remove the remaining three bolts to remove the cover. Use a large screwdriver to continue releasing the seal.
Continue to remove the cover and place it off to the side. This cover will need to be cleaned which will be done in later steps. Once the cover is removed it will expose the inner workings of the differential.
Locate and Remove Pivot Pin Bolt
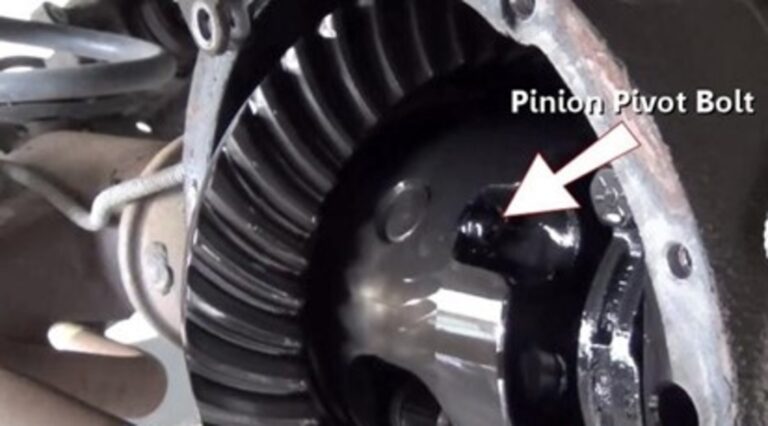
After inspecting the inner workings and while the transmission is in natural, rotate the driveshaft until the carrier pivot shaft bolt is exposed. This can take a few turns of the driveshaft before seeing it. Stop turning when the bolt is near the top of housing. Also, keep your fingers clear while rotating the gear set to avoid injury, these gears can be sharp.
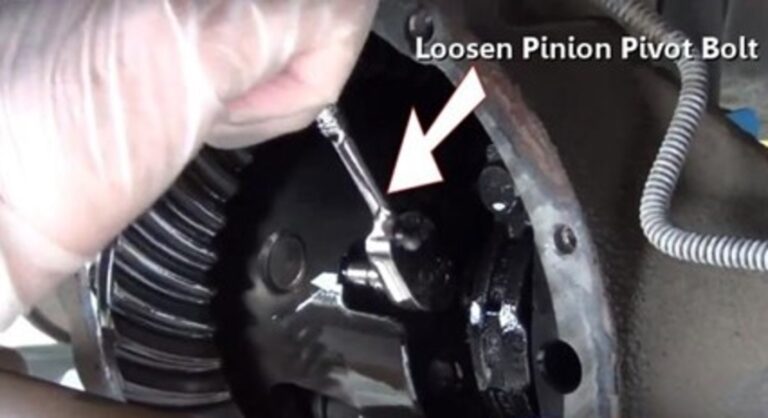
Once the carrier bolt has been located, use a small ratchet or wrench (8mm) to loosen and remove the bolt. This bolt can be snug so make sure your tool is squarely on the head of the bolt to avoid rounding which will make the job much more difficult. If the bolt breaks inside the carrier use an air hammer which can be used to force outward (break downward) the pivot rod through the carrier. The pivot pin will need to be replaced along with the bolt.
Remove the Pinion Pin
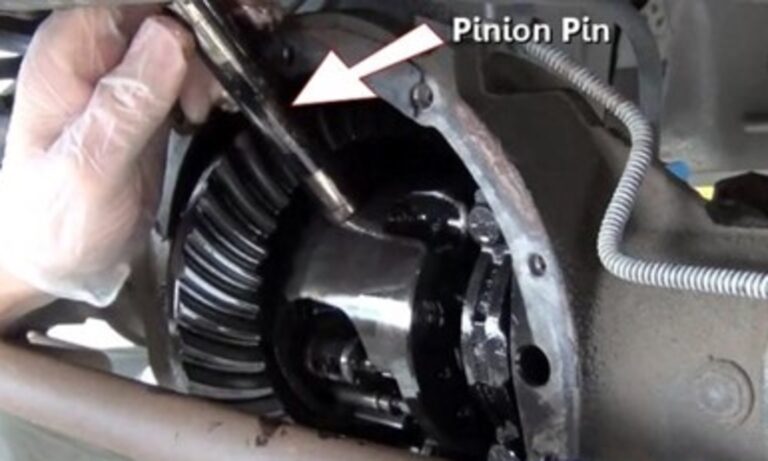
Once the pivot bolt has been removed, reach your hand down around to the bottom of the carrier and use your finger to pop the pin upward while grabbing it with your other hand. You might need to maneuver the driveshaft to gain enough clearance to allow the pinion pivot to slide completely out.
Remove the C Clip and Axle
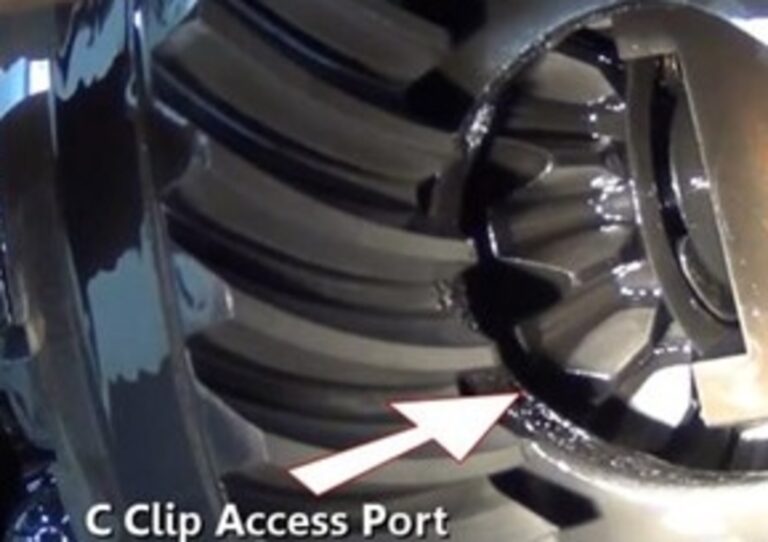
After the pinion pin has been removed, again rotate the driveshaft until the “C” clip access port appears. Watch the unit as you slowly turn it, if the spider gears (small gears) start to move into the port then turn the axle with the driveshaft to keep the gears in their position.
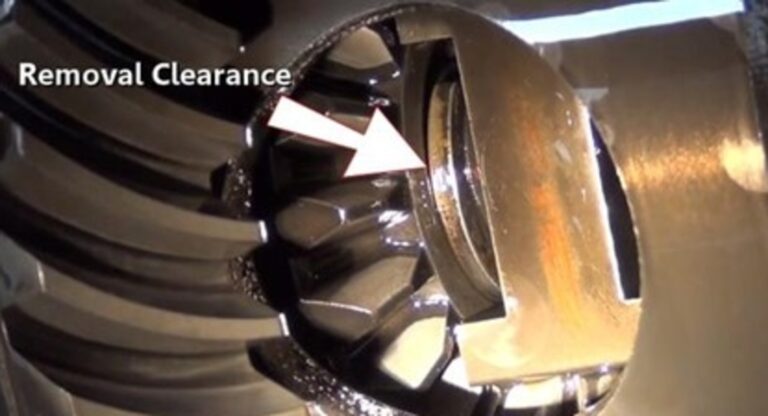
Next, at the axle flange (wheel side) push the axle inward toward the differential, the axle will move inward slightly. This is to allow enough clearance for the “C” clip to be removed which holds the axle into the differential.
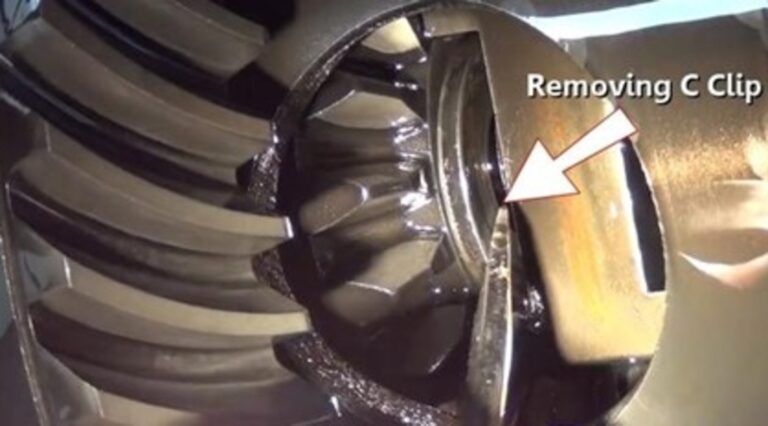
Using a small screwdriver or magnet work the metal “C” clip in a circular motion, this will enable you to remove the clip which will release the axle from the differential. This can take a little time so hang in there.
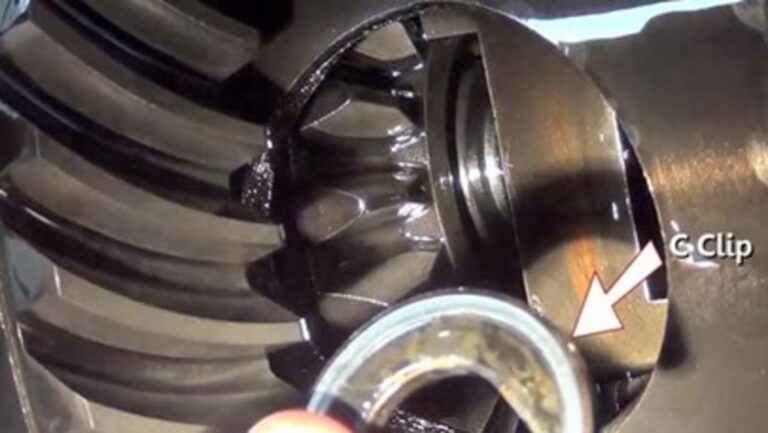
Once the C clip has been removed from the carrier check the clip for wear and scoring and replace if needed. This will be a dealer part.
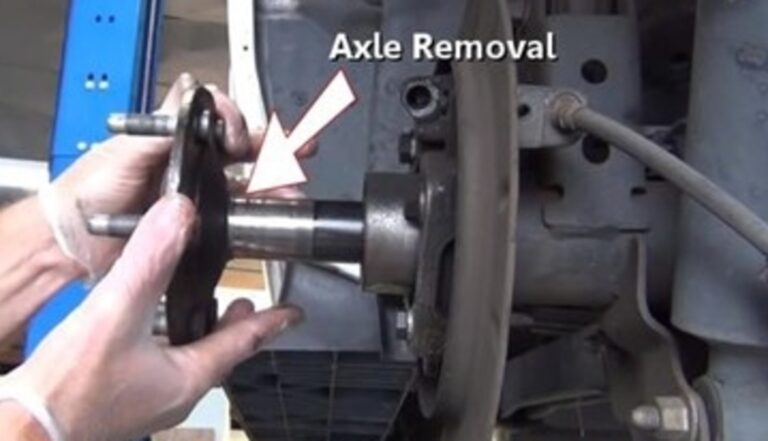
Now that the C clip has been removed grasp the axle at the flange and pull outward, the axle should slide out completely from the differential housing, use a shop towel around the axle as it is being removed to wipe residual gear oil to keep the mess down to a minimum.
In this picture the parking brake shoes have been removed for replacement but if the shoes are okay, you can leave them installed while replacing the bearing and seal.
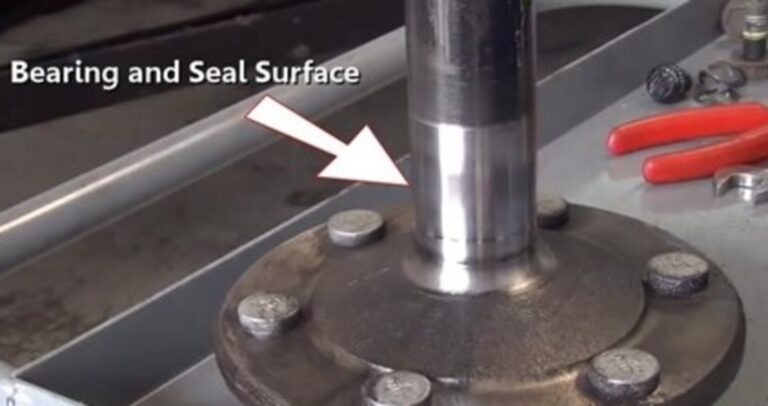
After the axle has been removed inspect the bearing and seal surface to check for wear and scoring and replace if damaged. If this axle is worn you will see an obvious groove in this area. Do not reuse the axle at this point because the new seal and bearing will fail prematurely. These axles are available at the parts dealer for about $200.00 dollars.
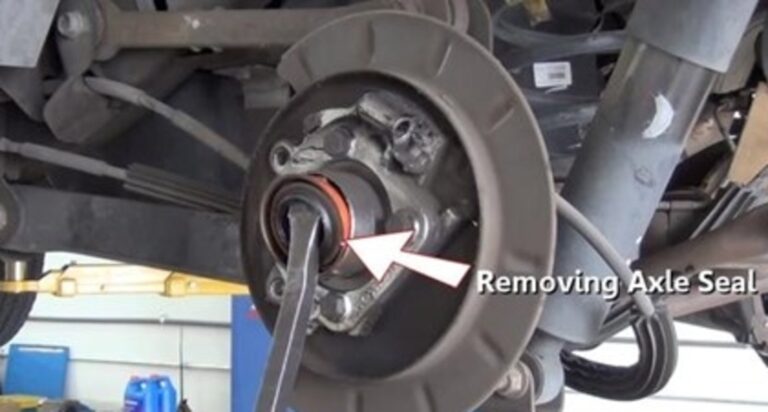
Remove the Rear Differential Axle Seal
Now we are ready to remove the seal. Use a large pry bar to leverage the seal out of the differential housing (in a pinch a hammer claw end may work as well), you can also use a seal puller, but we have found this method works well.
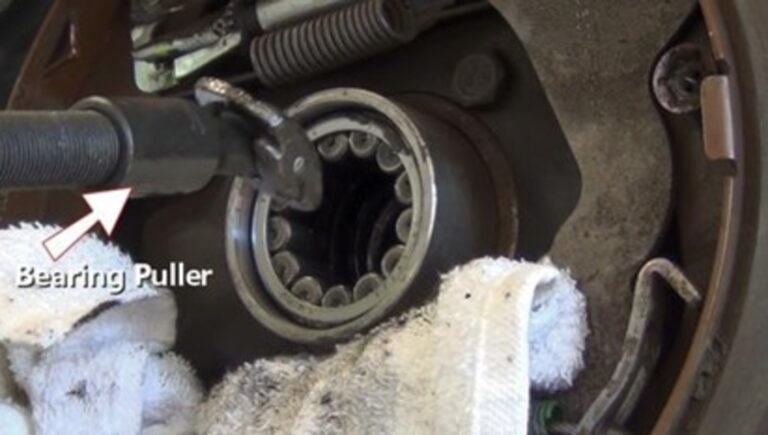
Remove and Install Rear Differential Axle Bearings
Use an axle puller to remove the axle bearing, once installed push the shoe of the puller straight which will help it lock behind the bearing. Then, thrust the anvil outward to start the pulling action, this will take several thrusts to remove the bearing.
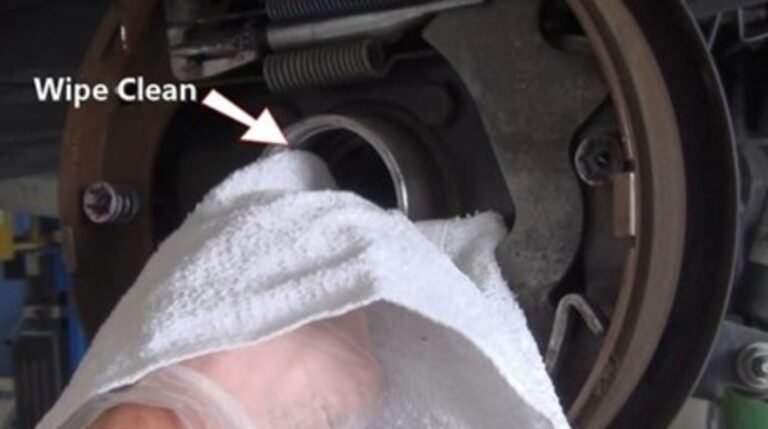
After the bearing has been removed, use a shop towel to wipe the housing clean from oil and dirt. Also check the housing for obvious scoring which can make the new seal leak. If a grove or scoring is present you will need to install the seal using silicone rubber and allow it to fully dry before refilling the differential, preferably overnight.
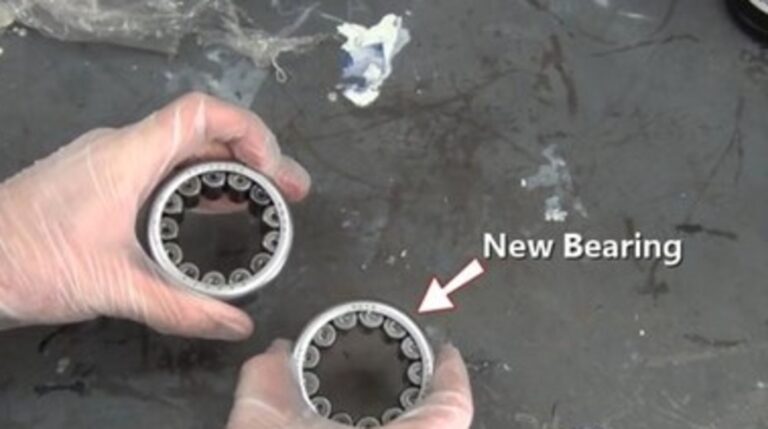
After the bearing has been successfully removed match the old bearing to the new unit, they should be an identical match.
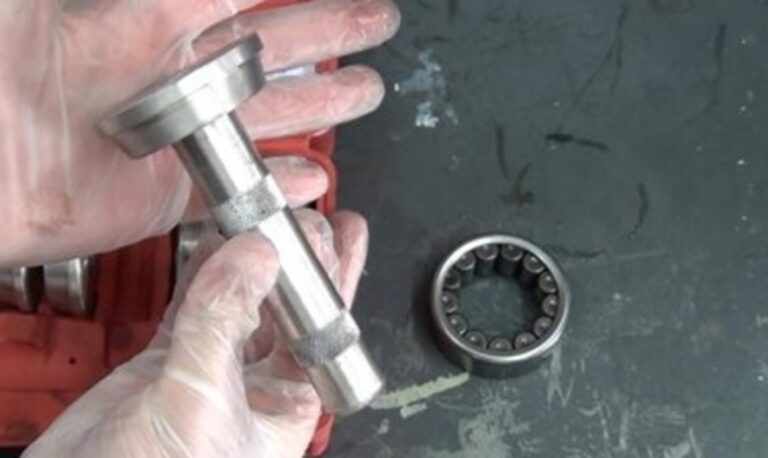
This is a bearing installation tool. Match the size of the tool to be just slightly smaller in size than the bearing. If the tool is larger or the same size it can get stuck inside the housing which will create a problem hammer (if you do not have the bearing install tool then a properly sized socket may be used to install the bearing). You can also use a large punch and work around the bearing to install it, but using the tool is the preferred
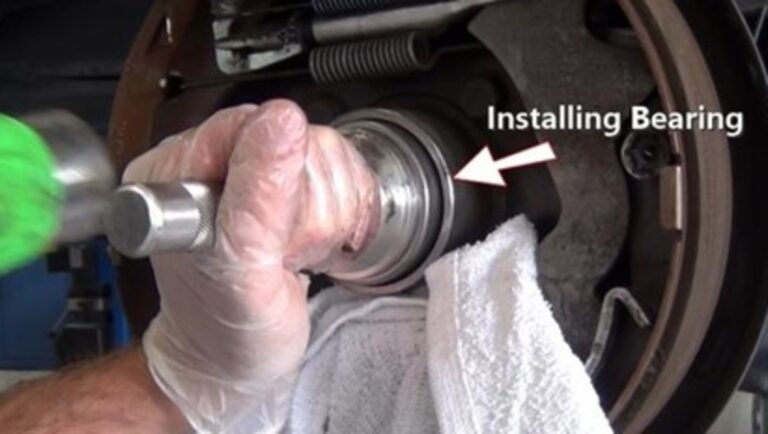
Set the new bearing squarely into the differential housing, then use the tool to install the bearing using a hammer. Once the bearing is fully installed the hammer will have a hard clunk sound and the bearing will not move inward. This is signaling the bearing is completely against the house shoulder.
Install the Rear Differential Axle Seal
Once the bearing has been installed the seal is next. Inspect the seal surface for grooves or scores.

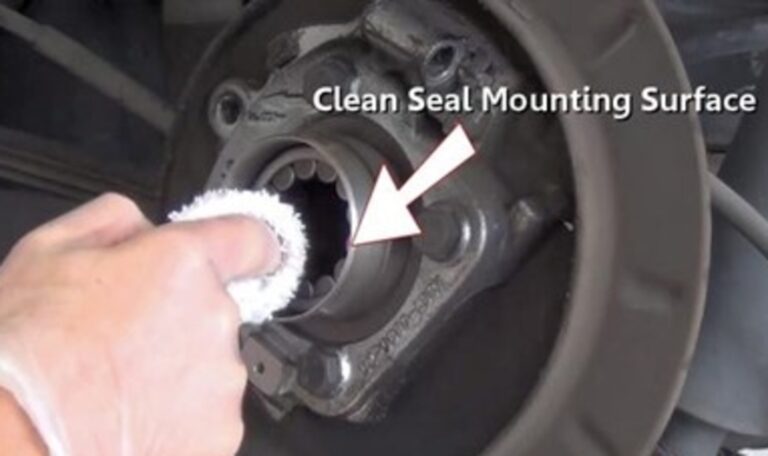
Use a shop towel to clean the seal mounting surface which will ensure the proper installation. Use carburetor cleaner to make sure the surface is clean and dry before you begin reinstalling the seal.
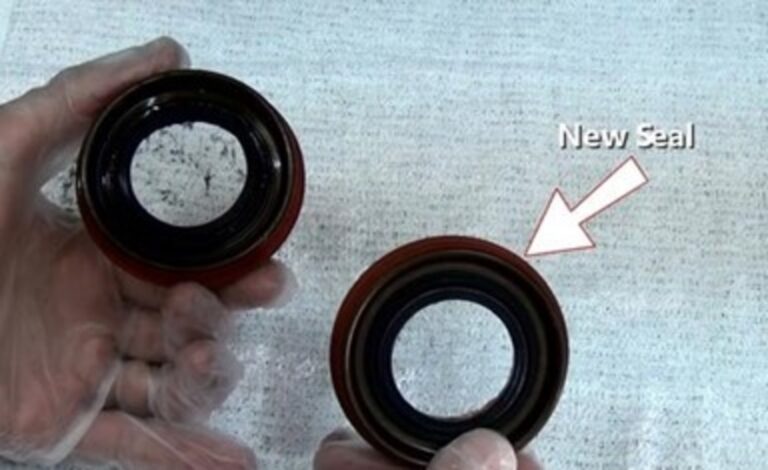
Next, the new seal must be installed, match up the new seal to the old one. These seals have an outer lip so the seal can only be installed one way. The seals should look identical unless they have been updated by the manufacturer.
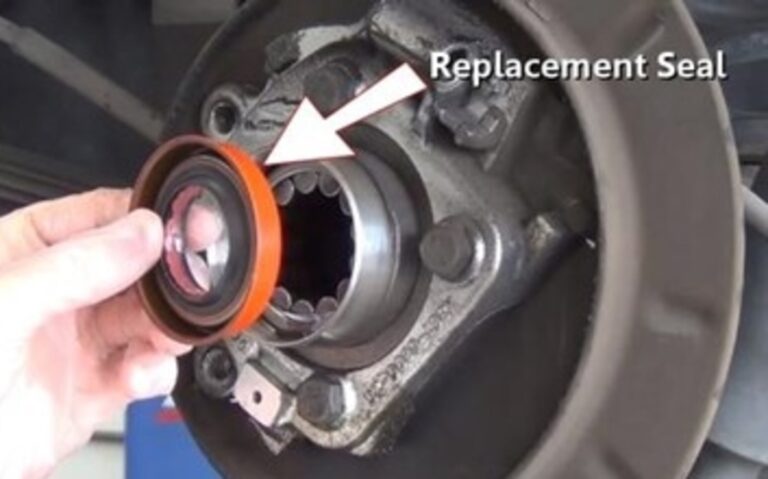
Once the surface has been cleaned, match the new seal to the old unit and apply sealer to the differential housing if needed. Most seals have a sealer allied to them as a thin coating, this seal uses an orange-colored sealer.
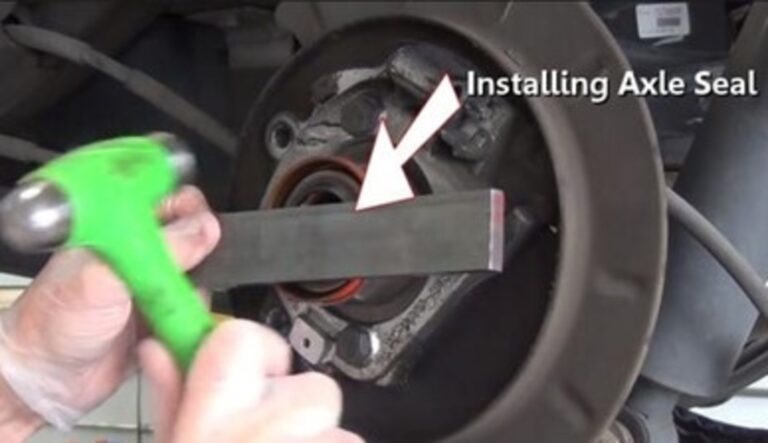
Next, you can use the seal installer which is one and the same to the bearing installer, but we thought we would show you how we did it in the old days in this example. Set and hold the seal in place, then drive the seal into the differential housing using a flat bar to hammer against while installing the seal. Continue this operation until completely installed and flush against the housing and seal lip.
Reinstall the Rear Axle Shafts
After inspecting the axle for damage and you see that it is okay to reinstall, apply a small amount of gear oil to the bearing and seal. This will help lubricate the surfaces and give you a better chance for the new seal not to leak. Then carefully install the axle by holding it up not allowing the weight of the axle to ride against the seal lip which will damage it.
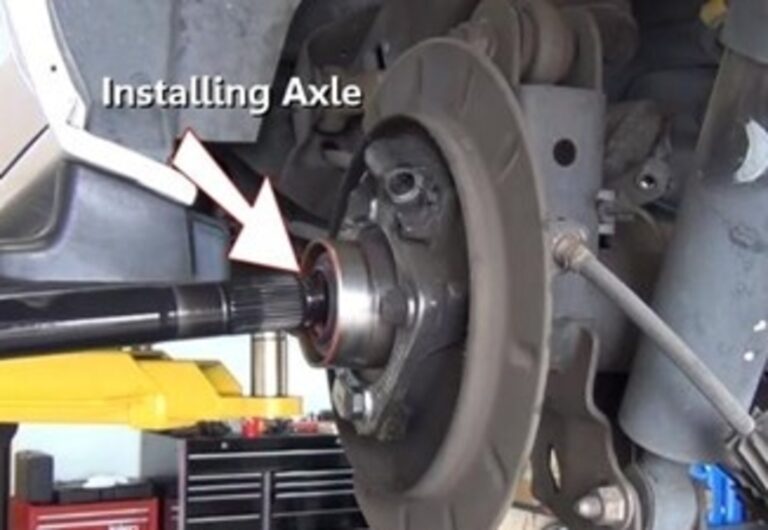
While the axle is sliding inward you will need to push down on the bottom of the flange while pulling outward at the top. This will lift the end of the axle up and into the carrier. Also, turn the axle slightly at the same time, this will allow the axle spline to engage into the carrier. Then continue to push the axle inward until it stops.
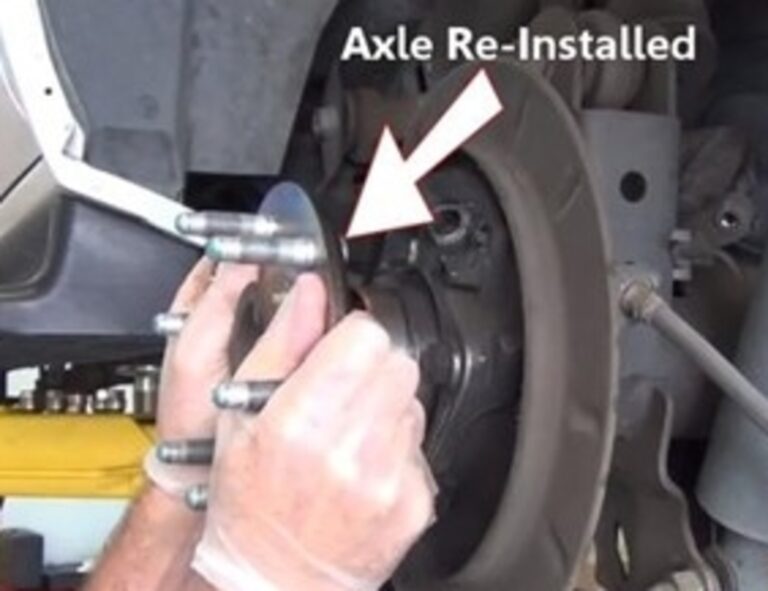
Next, check to see if the axle has been fully engaged into the carrier enough to put the clip into place. Now, reinsert the C clip retainer onto the axle through the access port, you can use a small pair of needle noise pliers if needed.
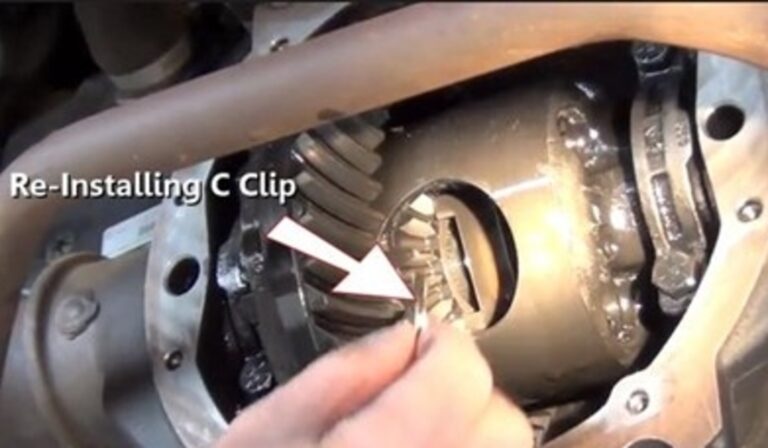
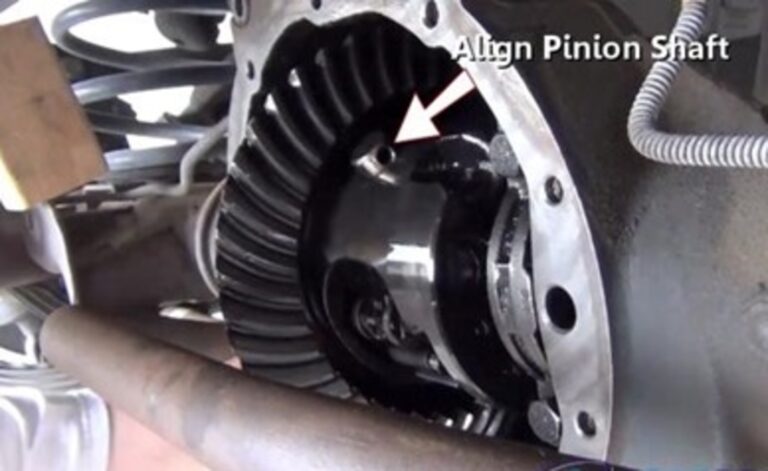
After the C clip installation is complete, pull the axle outward to lock the C clip in place. Then insert the pinion shaft, you might need to rotate the axle to align the spider gears for the shaft to be installed. Take note of the shaft bolt hole so you can reinstall the bolt.
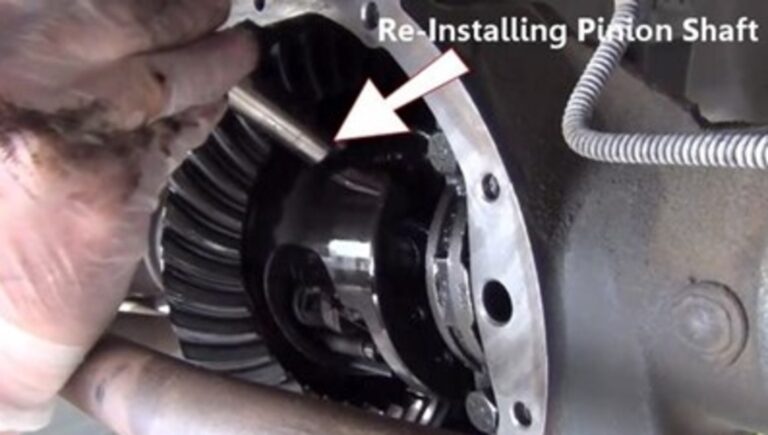
Example of bolt hole orientation before the final installation
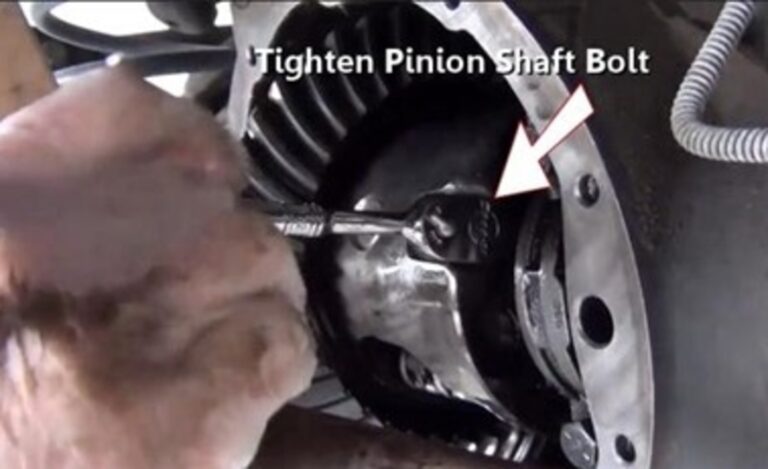
After the shaft has been installed, insert the retainer bolt, and tighten, this bolt needs to be fairly snug.
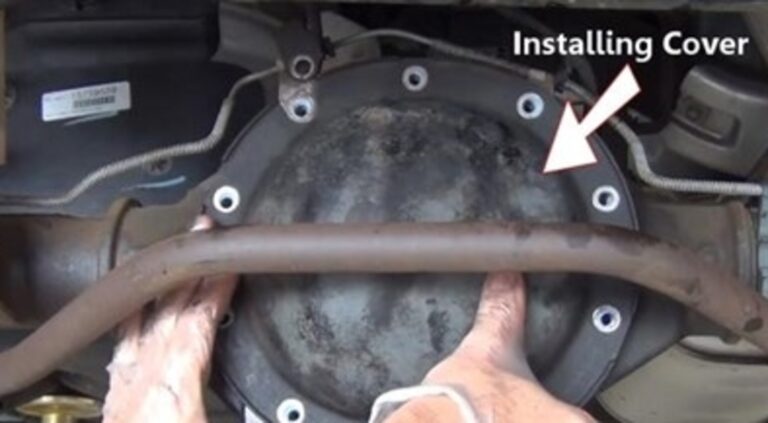
Reinstall the Rear Differential Cover Plate
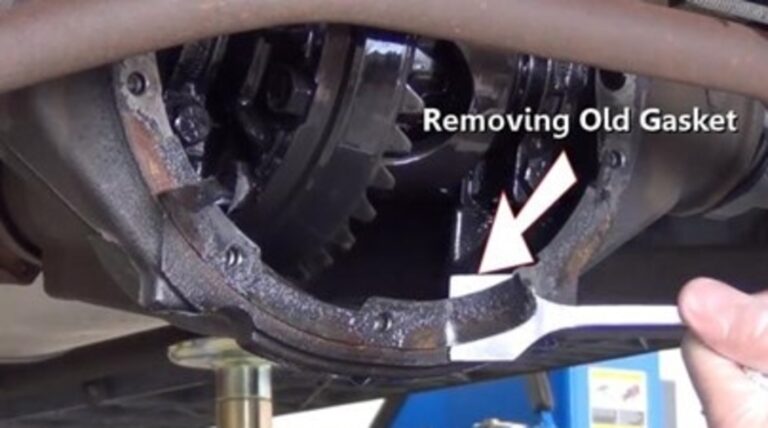
After the axle has been reinstalled use a gasket scraper to remove the old gasket and clean the differential surface. Make sure this surface is clean from gear oil or it will contaminate the sealer and possibly cause a leak. Use a shop towel to wipe out the inner differential housing to help control additional oil.
Next, clean the metal debris from the differential cover magnet and continue to clean the gasket surface with the scraper until free from gear oil. Use carburetor cleaner to ensure no oil is present.

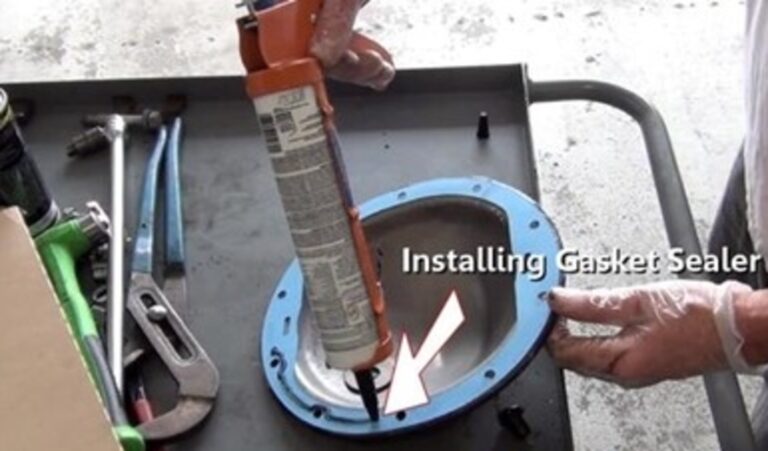
Then, install the new gasket using silicone rubber as a sealer. Create bead inside of the bolt holes to help control leaks. Do not use cheap home grade sealer, you need to get the good stuff which costs a little more but is available from Amazon, Home Depot or Lowes hardware stores.
Carefully install the differential cover as not to disturb the gasket location on the cover. Excessive movement will cause the sealant to be less effective.
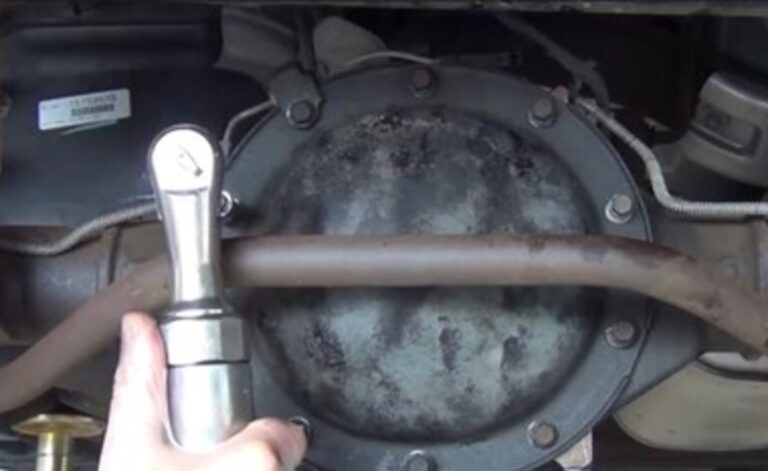
Install the cover bolts and tighten in a star pattern. These bolts do not need be super tight, just snug. You should also revisit these bolts in a few days to give them an extra snug. We have received a lot of questions on how tight these bolts should be which is tough to say because the gasket likes to flatten in time but if you tighten them to manufactures specifications you can spilt the gasket, so it is best to do it in stages. Too tight will spilt the gasket while too loose will allow a leak, it is an art learned like anything else.
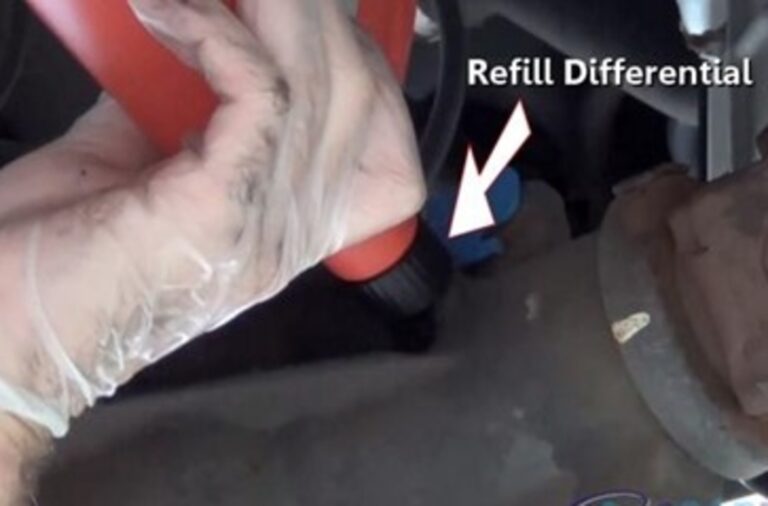
Re-fill Rear Differential with Gear Oil
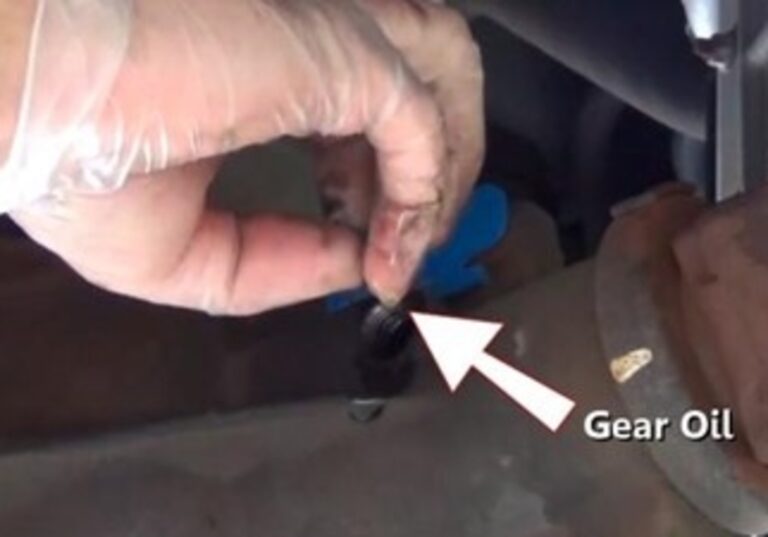
Once the cover bolts are tight, remove the differential fill plug which is located near the driveshaft this will be a 3/8 drive socket extension or ratchet head. Then install the gear oil, if your vehicle has the clutch style (limited slip) unit you will need to pour in an additive which helps lubricate the clutches. Usually there will be a tag near the fill plug that indicates what kind of oil is required.
The fluid level is full when gear oil is dripping from the fill port. To double check the level gentle dip a finger inside the port. Never turn driveshaft or axles when checking gear oil to avoid injury from the pinion gear. Reinstall and tighten the fill plug and you are all set. Double check your work by looking for leaks at the cover.
After reinstalling any brake parts and the wheel. Safely return the vehicle to ground level and take it for a test drive while listening for abnormal noises. Also, recheck the differential for fluid leakage. It is a good idea to tip the vehicle to the side the repair was performed to bath the new bearing in gear oil.
Finally
When a classic car is driven regularly, rarely is it in one spot long enough to detect more than an occasional driveline fluid drip. Only when that car or truck sits for an extended period, and it leaves behind a sizeable puddle do we think to take a closer look. Addressing a rear differential axle bearings and seals leak requires a safe place to jack up the car as well as a better than average set of mechanic skills for a DIY project, but it can be done. Remember to research your classic car mechanics books on the rear differential axel bearings/seals and parts before starting.