Painting a classic car is no small challenge. If you are looking for an award-winning look then certainly do rely on a professional to do your paintwork unless you are truly a talented vintage car painter.
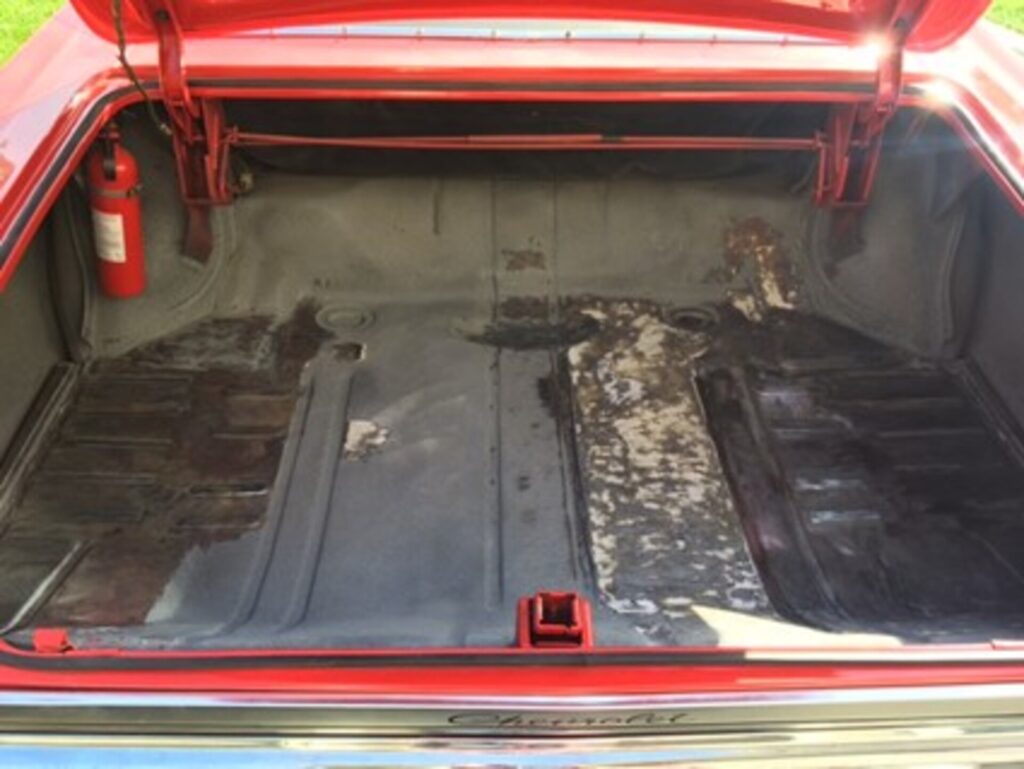
However, there are sections of your classic car that can be properly prepped and painted to look acceptable to most people and especially to yourself. This is a way for people who are on a tight budget to get large sections of your car painted for a reasonable cost. These areas include the interior, trunk, underside, and even the inner fender-wells.
The first step in any project is assessing the damage to understand the work required to bring the area back to its original condition. The next step is researching the proper treatment and paint. If the work area has signs of denting or just surface rust, then the good news is that most of the work can usually be done with hand tools and raddle can paint.
If the area has significant rust, then cutting and welding will be required to property repair the metal area. For this there are welding only shops as well as mobile welding services if needed to help make these repairs in a cost-effective manner.
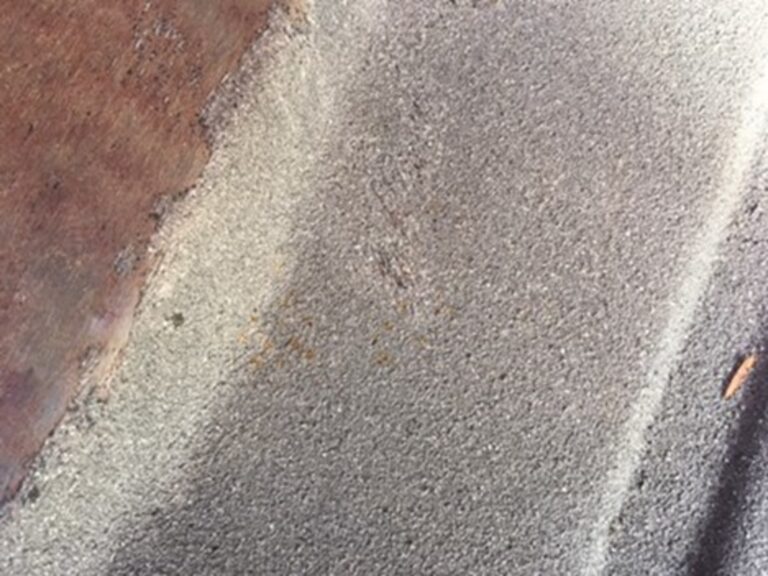
To assess the metal work a good visual inspection will be required; if you see bubbling paint or rust color staining then focus more closely on these areas with light taps with a hammer or screw driver to see if the rust has caused metal failure.
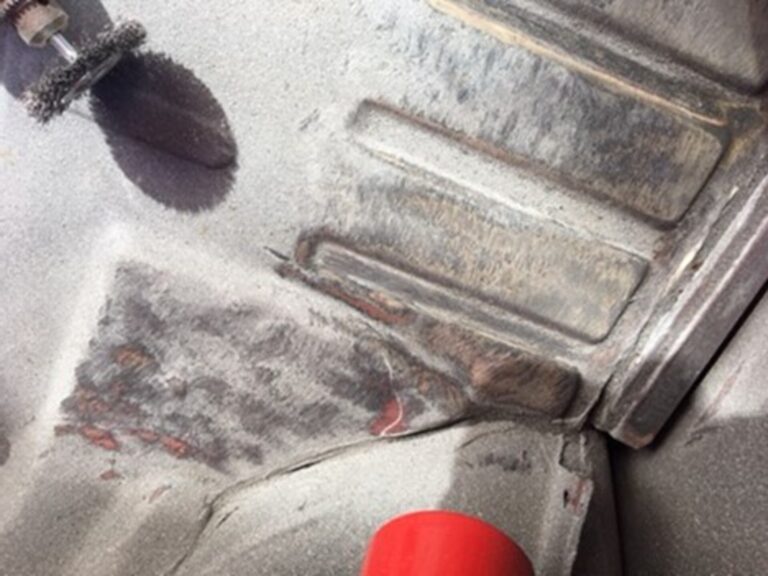
If the sheet metal at this point appears solid, then the next step is to remove the paint and any rust from the metal all the way down to bare metal. Starting in the areas where rust may be under the paint.
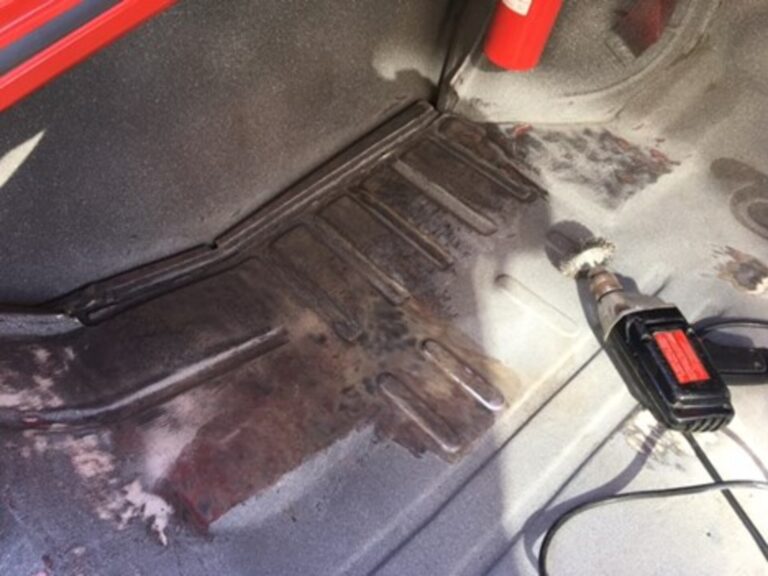
A drill with wire wheel attachments or even sandpaper disks do a great job of paint removal. Make sure that all areas have ALL the paint and any signs of rust removed so that you are working with bare metal.
If you feel comfortable trying some hammer and dolly work to remove dents, then do your best to level the metal.
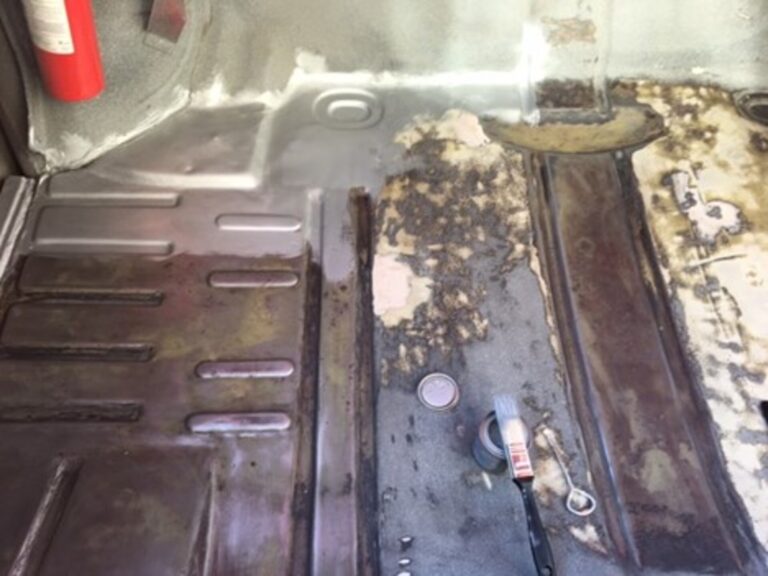
To make sure the rust does not return it is wise to coat all the bare metal areas with a rust inhibitor; there are several quality products on the market. You can brush this on to get a thorough coat and not have to worry about over-spray. If you have some “divots” in the metal from rust, you can smooth some body filler over these areas for a better finish. Make sure these go on in thin coats to minimize sanding.
Next mask off with tape and paper any areas you do not wish to paint to avoid over-spray. Then spray on a coat of good quality automotive primer to all the areas treated with the rust inhibitor.

Give the primer a good day to dry and then inspect the work area for any imperfections that you want to correct before painting the finish coat. You can add more body filler in thin coats to areas you feel do not meet your expectations; sand and then prime the area repaired again.
The best part of these projects is that the paints used are generally thicker hiding some imperfections.

Before doing the paint coat, check all your taped areas and paper coverings to make sure to avoid any over-spray getting on surfaces you do not wish to paint.
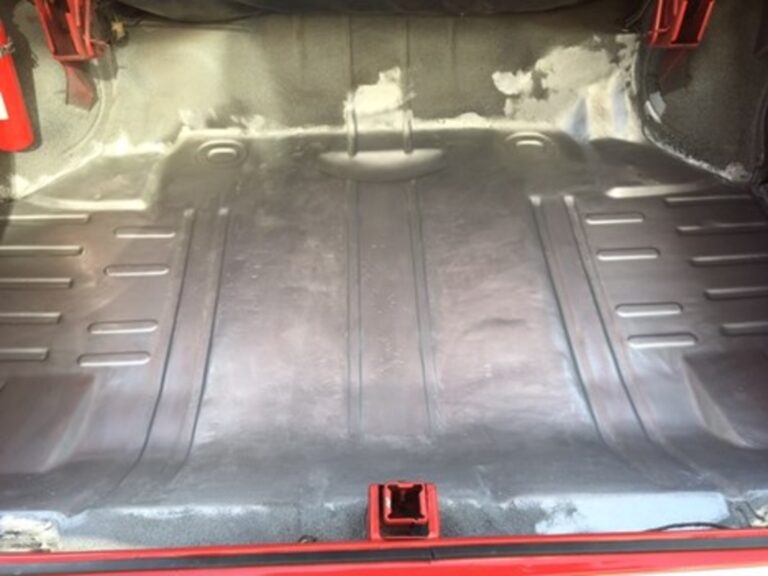
Now with your raddle can spray paint you can give 1 or 2 coats of paint to properly cover the area.
Taking our time with a novice classic car owner we were able to get this trunk done over while spending a few weekends of work.
The key to any of these projects is to take your time, research the tools and parts you need before starting, and know that some bodywork projects can be done at home for those of us on a limited budget.