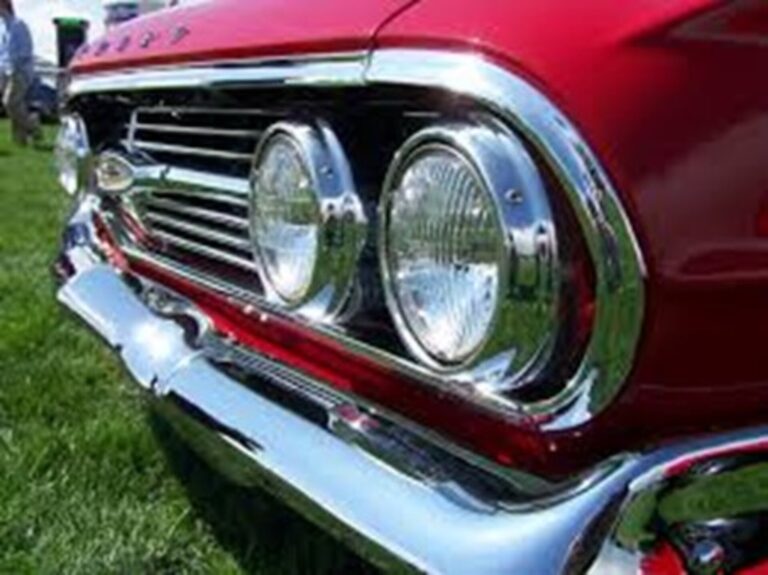
For classic car and vintage car owners shinny chrome is such a focus point on their car. We know that re-chroming can take a big bite out of the budget of any restoration project — but do you really know how much work is required to refurbish those shiny bits?
When restoring a classic car, chrome plating is one component that often causes concern — the processes involved are not only time-consuming but can also throw up several hidden costs. However, once you understand exactly what is involved, it gets easier to see that what you are paying is well justified by the product.
Plating Theory of Re-chroming
Electroplating can be defined as the deposit of a very thin layer of metal onto a base metal to enhance or change its appearance. Unlike painting, where the new deposit is sprayed on, the chrome (and associated materials) is applied using an electrical current, hence the term ‘electroplating.’
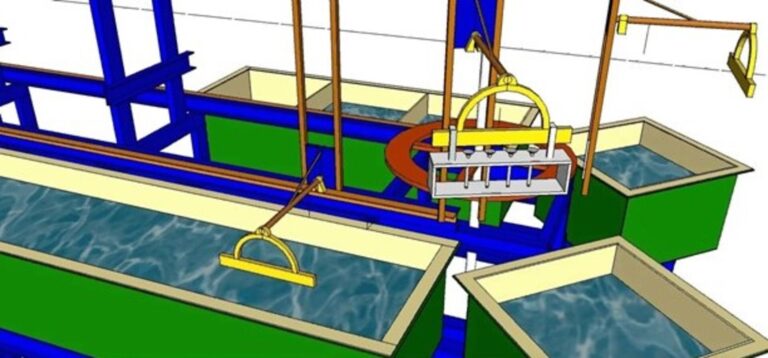
A plating bath is the name for what is essentially a giant tank, many of which are used throughout the chroming process. The baths are filled with a liquid that contains the desired metal dissolved within it — which could be silver, gold, nickel, or another metal. The plating–bath solution serves as a conductive medium, utilizing a low DC voltage. The metal item that is to be plated is submerged in the plating bath, and a low-voltage DC current is applied to the bath.
The electrolytic process then causes the dissolved metal ions to attach to the surface of the metal to be plated. The thickness of the electroplated layer is determined by the time the item spends in the plating bath while the current is being applied, and the amount of current used.
Sometimes the shape and contour of the item can affect the thickness of the plated layer. Metal objects with sharp corners and edges will tend to have thicker plating on the outside corners and thinner plating in the recessed areas. This is due to the corners being more exposed, therefore attracting more particles.
The price of plating and re-chroming
The price of electroplating services is determined by numerous factors such as the type of metal used for plating (i.e., gold, silver, chrome, etc.), the desired thickness of the plating, the base metal (i.e., steel, copper alloys, aluminum), the rough dimensions of the object to be plated, and the number of items to be plated. What many forget, however, is that since the plating process does not hide or mask surface imperfections, plenty of preparation time is required to ensure a flawless finish before the plating process itself has even begun.
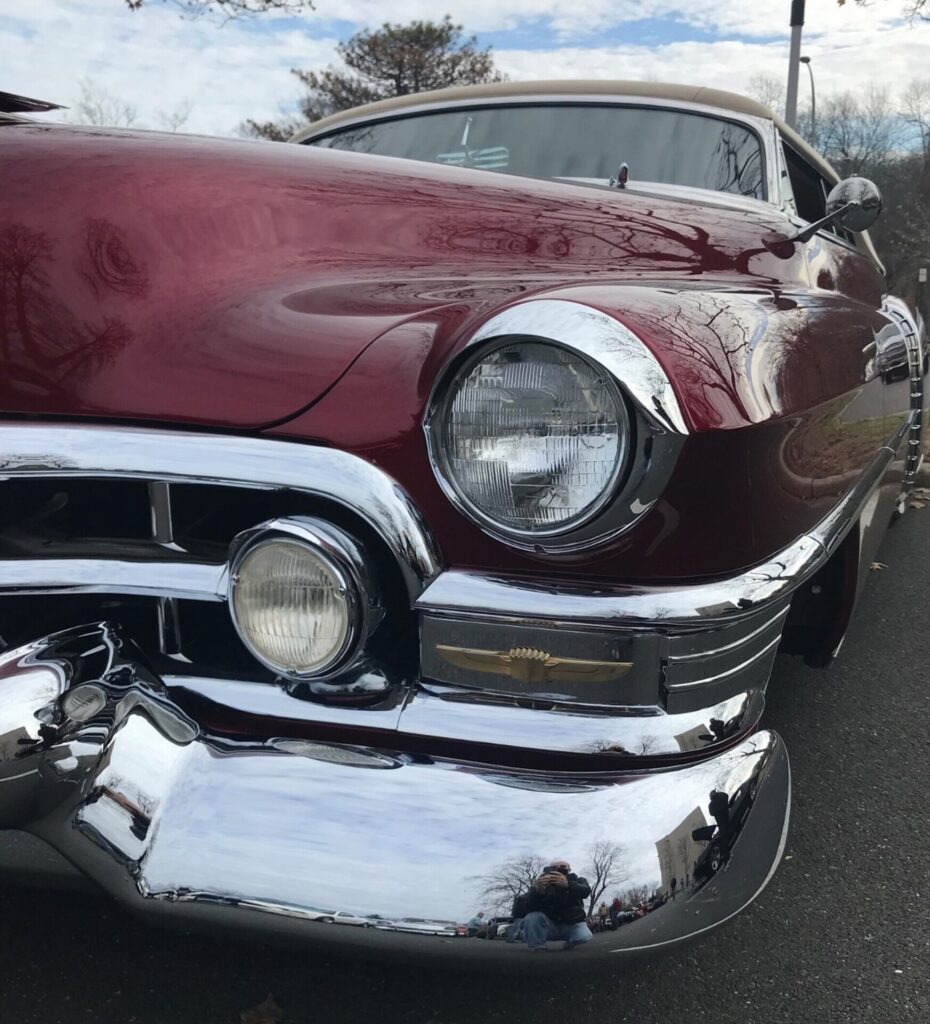
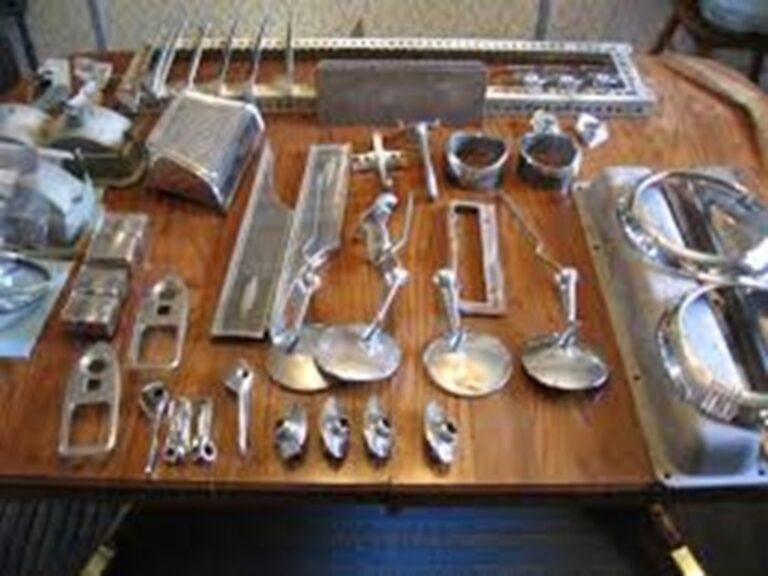
Most vintage cars of the chrome era have more than their fair share of dents and scrapes in the trim-work and removing them is not a straightforward task. Indeed, it is one that involves plenty of skill, and an even greater amount of time — which all adds to the cost involved, in the same way that panel beating, and preparation add to a paint job.
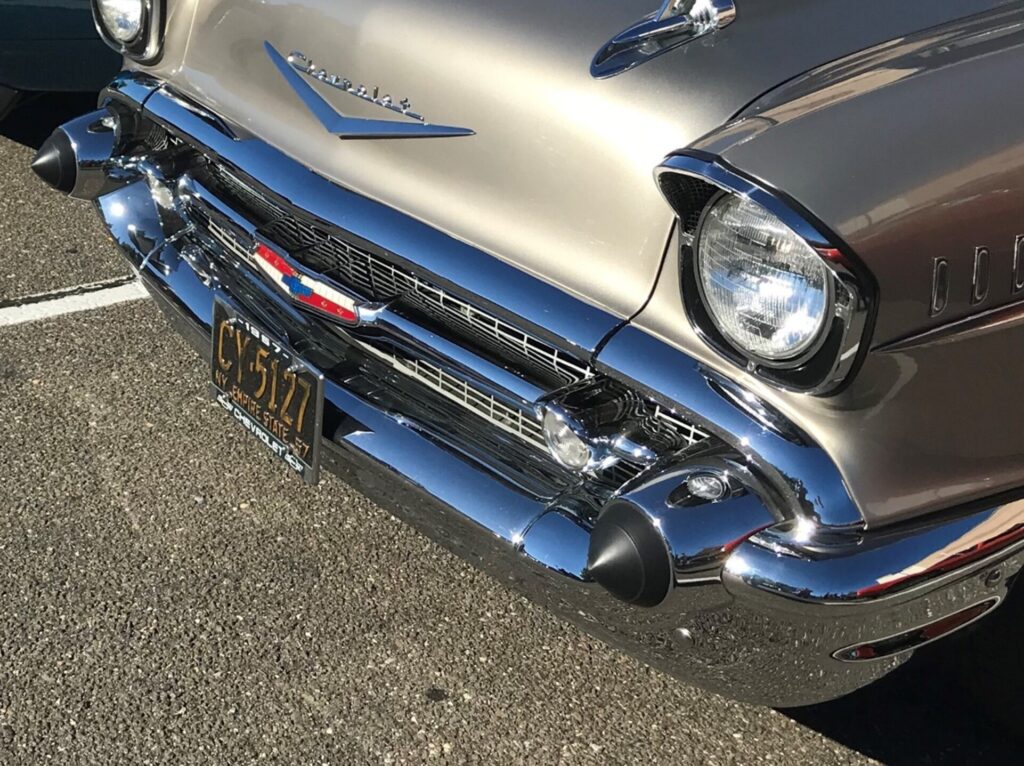
Ask anyone who’s had a bumper from a ’50s classic car chromed how much work was involved in getting the bumper straight and tidy prior to plating, and you’ll soon see where a large proportion of the final cost goes — yet it’s amazing how many seem to forget all about the preparation time when it comes to settling the eventual bill.
The process
It is amazing how trim parts and bumpers can be repaired and returned to a flawless finish by experts possessing the right knowledge and skills.
Step one
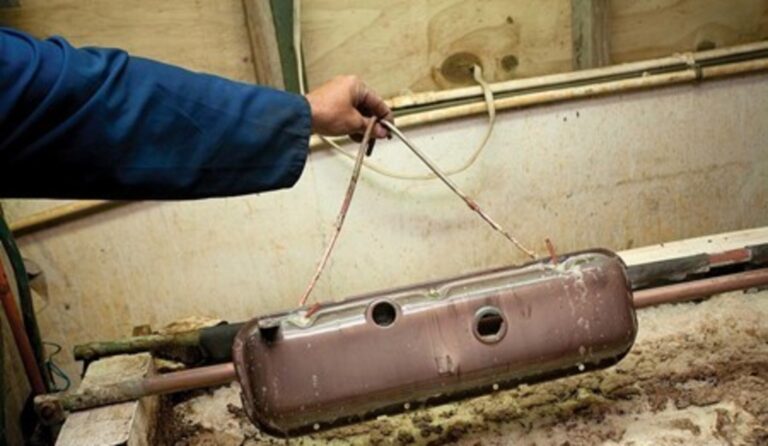
The process starts off with the job being checked in and photographed of every individual piece showing not only the item itself, but any damage on the items, for future reference. With the job logged, all items — cast or steel — that are currently chromed, or are to be chromed, are wired up to copper wire to conduct electricity from the bars that run above the tanks to the part itself.
Step two
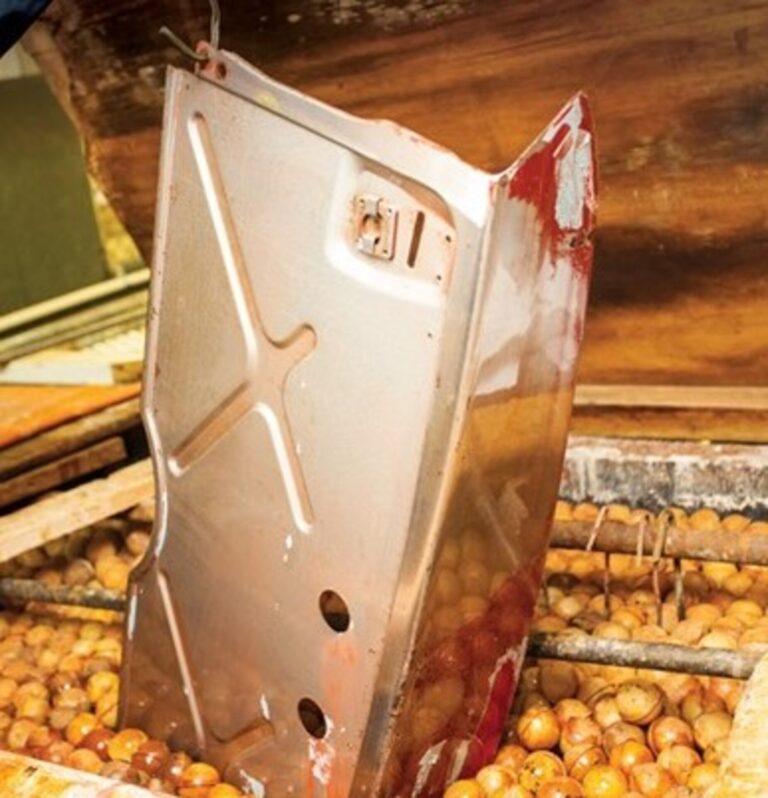
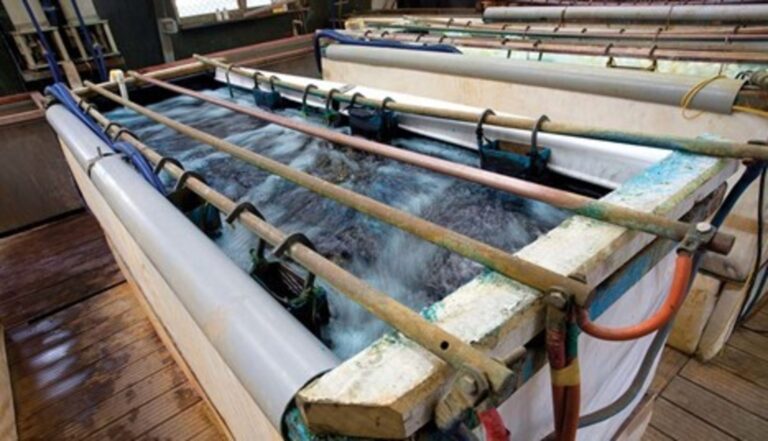
The stripping bath is the first of many tanks into which the part is submerged. This is filled with caustic soda and is kept at 75 degrees. The small round balls you see on top of the tank are simply there to try and keep as much heat from escaping as possible. After a few hours (depending on the amount of paint and grease on the item), the parts are removed, rinsed, and scrubbed in clean water.
Step three
Next the old chrome is removed in a cold caustic bath, this time electrified to 12 volts with a reverse charge. That sees the old chrome come off the item with surprising ease in just 10 minutes. The old chrome and stripped metals are not recyclable. Getting rid of them is a major expense for any electroplating company, and it is controlled by local council by-law requirements (under trade waste consents legislation).
Step four
Next, the item is once again rinsed in a clean-water bath. This process not only takes the caustic soda off the item but stops cross-contamination of the other baths. After all, each one contains a variety of chemicals, all of which must be kept precisely at the required levels. As you will see later in the process, a layer of nickel sits below the chrome, both old and new. It is this layer that must be removed next. Think of it as stripping back the existing primer on a car before paint. If you were to plate straight over the top, you could not guarantee the quality or longevity of the finish.
To remove the nickel, the items are placed into a concentrated 98-per-cent sulfuric acid bath for around 30 minutes. Again, a 12-volt reverse charge is applied, which causes the nickel to reverse-plate off the item. Upon removal, the item is once again rinsed.
Next up any rust is removed, and the steel item is placed in an inhibited hydrochloric acid for a two-hour time. The trim is then again rinsed, and the acid neutralized.
The above steps are taken regardless of whether the item is made from cast metal, as many trim pieces are, or from steel, such as a bumper. If there is any damage to the items in need of repair, this is where the process changes slightly.
Step five
The metal on these old classic car bumpers is thick, it takes a great deal of skill to work it, along with plenty of heat to help soften the metal. Of course, when you bend metal one way (say, up/down), its natural reaction is to shrink or stretch across too, so to get it right, you must know how the metal will react. Straightening the bumpers alone consumed around nine-and-a-half hours, but the result was bumpers as straight as they came from the factory 56 years ago. Unlike traditional panel beating, there is no hiding anything, as there can be no bog, weld lines or imperfections that paint would hide.
Cast items generally do not get damaged, as they are not used in high-stress areas. However, on occasion they can be broken, as was the case for one of the front-quarter window surrounds for the Cadillac. Whilst welding cast parts is not generally recommended, with the right welding rods and expertise, it can be achieved with fantastic results.
What does often happen to cast parts is pitting. Again, with the right knowledge and experience, this is totally fixable. While there are a few hours’ work involved in repairing items like this, it is far cheaper than sourcing a replacement, if that is even possible.
Step six
With repairs taken care of, the next step is the sanding (linishing) stage. Many different grits are used, starting with a course (60 grit) through to a fine (400 grit), with great care to get an even finish across the whole item, no matter how tricky it is. Areas such as the rear side of bumpers do not go through the polishing process, just the faces which will be chromed and visible upon completion.
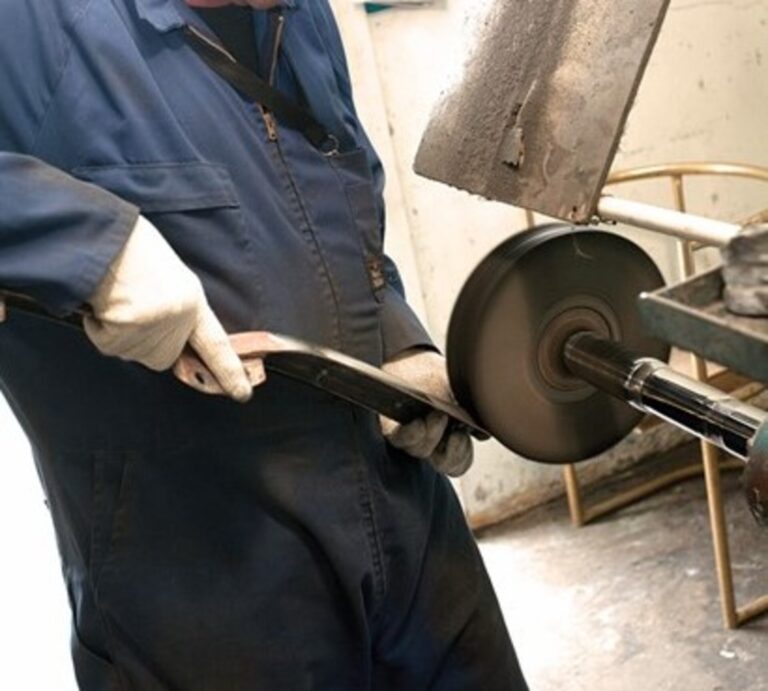
Step seven
With the initial sanding sorted, it is on to another workstation, where a buffing compound is used on a polishing wheel, and the process continues. Three grades of polishing compound are used during this stage (600, 800 and 1200 grit) to achieve a mirror finish. Depending on the size of the item in question, the average polishing time for a ’50s bumper is between six and eight hours! The bumper is held to the machine, not the machine to the bumper.
Step eight
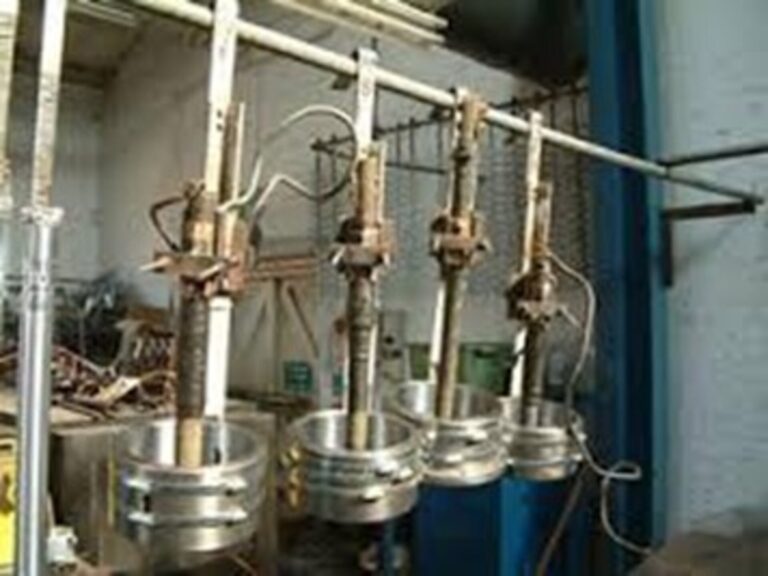
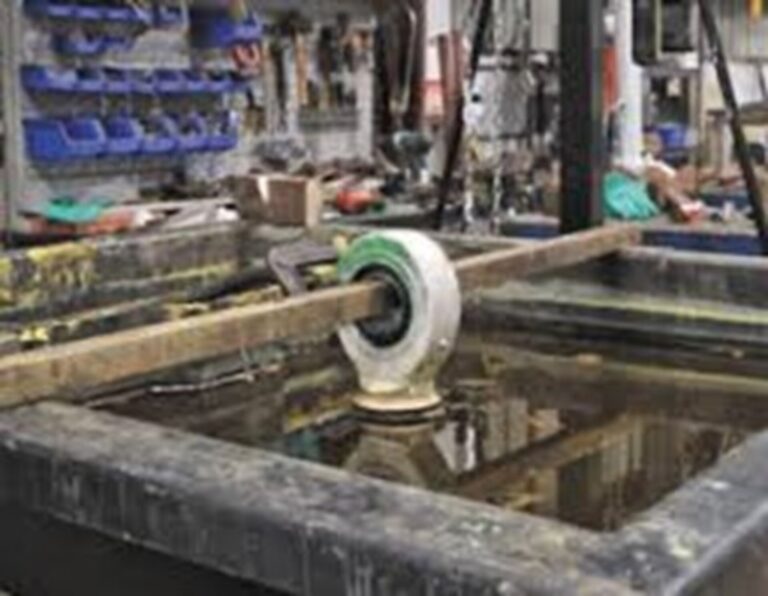
The conductive copper wires, which were removed for the polishing stage, are now refitted, as are non-conductive weights to help keep the items from moving around in the solution due to tank agitation (bubbles).
To ensure all polishing compounds are removed, the items are once again dropped into a hot caustic bath for around 30 minutes. If any compound is still on the items, not only will it contaminate the baths used in the next stage, but it will also cause visual imperfections in the chrome finish. A rinse and a thorough scrub precede the final check before the items are moved to the next bath.
Step nine
That next bath is a two-minute dip in a cold cyanide solution, in which the parts are electro-cleaned by having a reverse charge passed through them. Again, a freshwater rinse is performed prior to the next stage. The items must not dry out before being transferred to that next stage; if they do, blotching will occur, often the sign of a lack of care during the process.
A cold bath of 10 per cent sulfuric acid is then used for two minutes to give the surface a key for the next step to etch to. This is essential to ensure that the cyanide-based alkali copper used next will adhere to the item as much as possible. Attached to the sides of the bath are baskets with blocks of pure copper (anodes). When dissolved in the solution, the particles are attracted to the positively charged item, and soon a thin coat of copper covers the whole thing. The copper is less than one micron thick, and acts as a primer-sealer to key-in the next layer of plating.
Again, the item is rinsed, then dropped into a 10-per-cent acid etch for 10 seconds, followed by a further rinse.
Step 10
The item is next placed in a bath of blue phosphorus copper sulphate solution, which is used to cover the surface and fill any microscopic imperfections. The bath is kept at ambient temperature, and items are in it for 45 minutes, and emerge with a coating of around 30 microns’ depth. Again, the copper (anode) is in baskets around the side of the bath and looks almost like copper ball bearings.
After yet another rinse — that is eight rinses so far, the items are back into the polishing shop, where a further 15 minutes of polishing with 800- and 1200-grit compounds will remove any residual defects.
Step 11
Again, the copper wires and weights are reattached after being removed for polishing due to the risk of being caught in the polishing wheels. The same soaking procedure used above is then done again.
Rather than water, an alkali rinse is completed before the items are dropped back into the cold cyanide at 12 volts for two minutes and rinsed again in water.
Another two-minute dip in the acid etch and another quick rinse is all the items need before they can finally make their way to a 45-degree cyanide copper mix, in which they will sit for five minutes with 12 volts passing through them. During this time, they will form a smooth skin, which once again must be etched by a further two-minute dip in the acid etch, before another rinse.
Step 12
So far, the compounds used in the process are relatively low cost. But the nickel sulphate the items spend the next 60 minutes sitting in is notably more expensive, in fact, it is the dearest consumable of the whole procedure. After 60 minutes with a six-volt current, a 45-micron coating will be applied to the item. This is the most important part of the whole process, as it is the nickel that gives the finished product its shine. Often the difference between cheap chrome and good chrome is the amount of time the items sit in this bath for. The difference is noticeable to the naked eye by the depth of color in the finished item.
A rinse then removes any excess residue and prepares the item for the chrome itself, which is a comparatively cheap and quick part of the whole procedure. Despite being orange, the chromic acid is what gives the bluish look, and after just four minutes in the bath with a 12-volt current, a three-micron coating will be fixed to the item. Again, the balls in the tank are there solely for insulation purposes. The tank itself is tested twice daily for correct chemical levels, brightness, and condition, and is stirred throughout the day. After all, the chrome is a heavy metal, so it tends to sink to the bottom when left for long periods.
Step 13
Once the items are removed from the tank, they are given another quick rinse, and the chrome look that we all know, and love appears from underneath the orange liquid. After a total of 25 steps and around seven hours, the product is nearly ready to be handed back over to the customer, but not before the dedicated quality-control officer has had a good look over it to ensure that it is perfect, and it has had a polish by hand. The items are then checked against the job sheet, packaged, and are ready to be collected.
The time taken for the process varies according to the size, shape, and complexity of the item, as does the amount of voltage used in various stages. Whether the job is a 1950s bumper or a safety pin, it still must go through all the plating processes, there are no short cuts.
Step 14 (stainless trim repair)
As stainless trim repair is often lumped under the umbrella of ‘chroming’ when vehicles are being built or restored, we thought it worth mentioning the process involved here, too. Like repairing steel bumpers, the process of fixing dented and scuffed trim is a time-consuming one, requiring a great amount of skill. Each individual dent is pressed out, and slowly the metal is massaged back into shape. The perfect example of what can be achieved is the trim on these wheel spats.
Once repaired, the items are polished using the same techniques as in the chroming process, with finer and finer compounds used towards the end of the process. The result is an almost mirror-like finish, which is as good as (if not better than) new.
Re-chrome your classic car parts is an expensive process, but well worth it in the long run as your will see the difference in the shine as well as the durability of the restored part.
Hello classicautoadvisors.com admin, Your posts are always well written and informative.
To the classicautoadvisors.com webmaster, You always provide clear explanations and step-by-step instructions.
Dear classicautoadvisors.com webmaster, Your posts are always well-supported and evidence-based.
Hello classicautoadvisors.com owner, Your posts are always a great source of knowledge.
Hello classicautoadvisors.com owner, Your posts are always well organized and easy to understand.
Dear classicautoadvisors.com owner, You always provide useful information.
To the classicautoadvisors.com owner, Thanks for sharing your thoughts!
Dear classicautoadvisors.com admin, Your posts are always well-written and easy to understand.
Hi classicautoadvisors.com owner, Your posts are always well written and informative.
Hello classicautoadvisors.com administrator, You always provide great examples and case studies.
Dear classicautoadvisors.com owner, Well done!
Dear classicautoadvisors.com admin, Your posts are always informative.
Dear classicautoadvisors.com admin, Nice post!
Hi classicautoadvisors.com administrator, Your posts are always well structured and easy to follow.
Hello classicautoadvisors.com administrator, Your posts are always interesting.
Dear classicautoadvisors.com owner, Your posts are always well-written and easy to understand.