
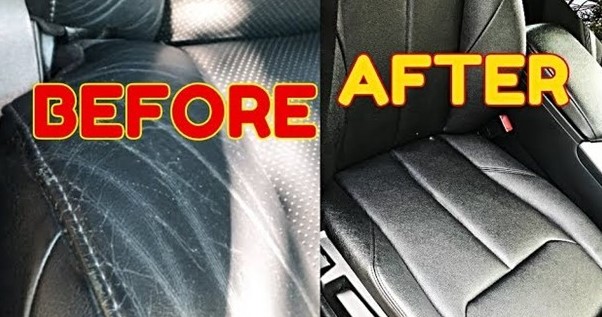
Car vinyl can tear, peel, and fade, just like other fabrics or seat materials. Luckily, there are many ways to repair the damage. When your car vinyl seat tear, it can be frustrating, but you need to act without much delay. As durable as it is, vinyl can and will continue tearing if not attended to.
Restoring car vinyl seats can greatly improve their appearance and extend their lifespan. Here is a step-by-step guide on the best way to restore car vinyl seat:
What is the Difference Between Car Vinyl and Upholstered Seats?
Vinyl is made from plastics and other materials and is frequently used as vehicle upholstery. Vinyl is upholstery, but not all upholstery is vinyl. Got it? Vinyl rose to popularity in the 1950s as plastics technology improved and has evolved into a material that today is better in some ways than real leather. It is easy to clean and durable but does not perform as well as natural materials in hot temperatures, as it tends to feel sticky and uncomfortable.
Materials and Tools You Will Need:
- Vinyl seat cleaner
- Soft bristle brush or soft cloth
- Vinyl seat repair kit (if seats have minor damage)
- Vinyl conditioner or protector
- Soft microfiber cloths
- Vacuum cleaner with an upholstery attachment
- Optional: Vinyl dye or paint (for more extensive repairs)
Step-by-Step Car Vinyl Seat Restoration:
Preparation and Safety:
Working on your car vinyl seat can be messy and will put you in contact with chemicals that can cause burns or worse.
- Wear gloves and eye protection. Nothing says a tough guy like chemical burns.
- Work in a well-ventilated area. We’re fixing holes in seats here, not trying to add some to your lungs.
- Take care when using scissors or cutting tools to avoid cutting your undamaged vinyl seats or yourself.
- If you do not have a garage, park in a quiet lot or away from traffic. You will need to be able to work without worrying about being run over.
Remove Loose Debris:
Begin by vacuuming the seats thoroughly to remove any loose dirt, crumbs, or debris from the surface and crevices.
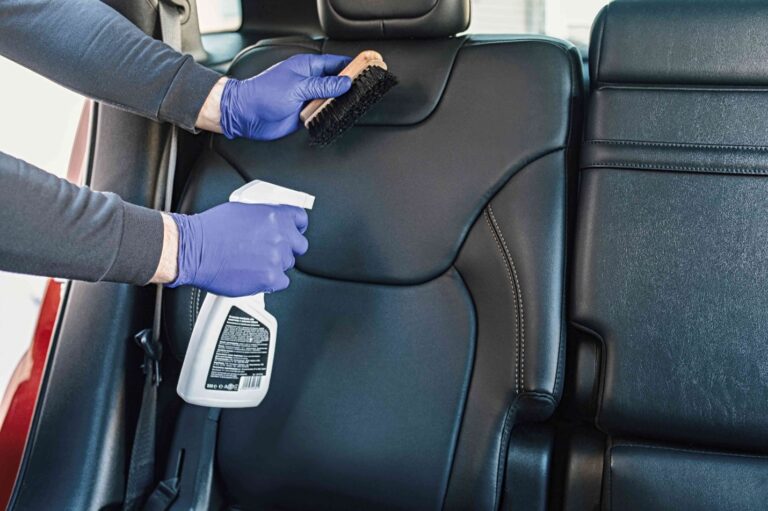
Clean the Seats:
Use a vinyl seat cleaner that is suitable for automotive vinyl. Apply the cleaner to the seats according to the manufacturer’s instructions. Typically, you will spray it onto the seat or onto a soft cloth.
Scrub Gently:
Use a soft bristle brush or a soft cloth to gently scrub the vinyl. Pay special attention to areas with stains or built-up grime. Be careful not to scrub too hard, as excessive pressure can cause damage to the vinyl.
Rinse and Dry:
Wipe the seats clean with a damp cloth to remove any remaining cleaning product. Dry the seats thoroughly with a clean, dry microfiber cloth.
Assess and Repair Damage:
If your seats have minor damage such as small cracks, tears, or punctures, you can use a vinyl seat repair kit to patch and repair these areas. Follow the kit’s instructions for the repair process.
Using A Vinyl Repair Kit
First, it is important to remember that every kit is a little different, and note that many offer color matching, so you will need to find one that is close to your car’s interior color scheme.
- Clean the area and seat thoroughly. Use a mild cleaner and towel to scrub the seat clean. Get rid of any staining, dirt, and crumbs you can see. Let the seat dry. Feel free to vacuum, if needed, to remove crumbs and other dirt. This is especially useful if you have kids who love to leave Cheerios behind.
- Inspect the tear. If it is ragged, uneven, or frayed, you will need scissors to trim the edges and make it as straight as possible. Take care not to trim away so much material that the tear becomes unmanageable.
- Most vinyl repair kits come with a backing cloth or padding material that needs to be placed inside the torn area to act as an interior anchor. Cut the material so that it is slightly larger than the tear in all directions and glue it in place.
- Do not try to pull the edges of the tear together at this point.
- Allow the glue to dry completely before moving on to the next step.
- Your kit should include a filler paste or compound. Using the included applicator or an old butter knife or small spatula, spread the compound over the tear.
- This process may take a few coats. Be patient and let each coat dry before applying a new one.
- Repeat the application process until you have a cover that is just slightly raised over the seat material.
- Once it is completely dry, sand the filler until it is flush with the seat cover. Try to avoid sanding the non-filler seat vinyl.
- Clean the area with water and a towel and apply coloring to the cover.
- You will not need soap for this job.
- When applying the coloring solution, you will likely need more than one coat, especially for darker-colored seats. Let each coat dry before reapplying.
- If your kit came with a sealant, make sure to apply it before using the seat. Some color solutions require a sealant to stay in place, so they do not rub off on clothing.
- Once the fix is complete, keep in mind that you should not just jump in and drive off. Give the solution, adhesives, and other pieces time to dry and set in place before you hit the road.
Peeling Vinyl Repair:
Here are some steps you can follow to repair car seats with peeling vinyl:
- Clean the affected area: Use a clean cloth and a mild detergent solution to clean the area around the peeling vinyl. Let it dry completely.
- Apply a vinyl repair solution: There are various vinyl repair solutions available in the market. Choose one that is suitable for the type of vinyl used in your car seats and follow the instructions on the product label.
- Patch the affected area: If the peeling is extensive, you may need to cut a patch from a piece of vinyl material and apply it to the affected area using the repair solution as an adhesive. Make sure the patch is the same color and texture as the rest of the seat.
- Smooth out the patch: Use a soft cloth or your fingers to smooth out the patch and ensure that it is level with the surrounding vinyl.
- Let it dry: Leave the repair solution to dry completely. This may take several hours or overnight, depending on the product used.
- Sand the area: Use fine-grit sandpaper to gently sand the repaired area until it is smooth and even with the rest of the seat.
- Clean and polish: Use a clean cloth and a leather or vinyl conditioner to clean and polish the repaired area.
Note: If the peeling is extensive or if you are not confident in your ability to make the repair, it may be best to seek professional assistance. A professional auto upholstery repair specialist will have the tools and expertise to repair the seat effectively and restore it to its original condition.
Apply Vinyl Conditioner or Protector:
Once the seats are clean and dry, apply a high-quality vinyl conditioner or protector. This helps restore moisture to the vinyl, provides UV protection, and keeps the material supple.
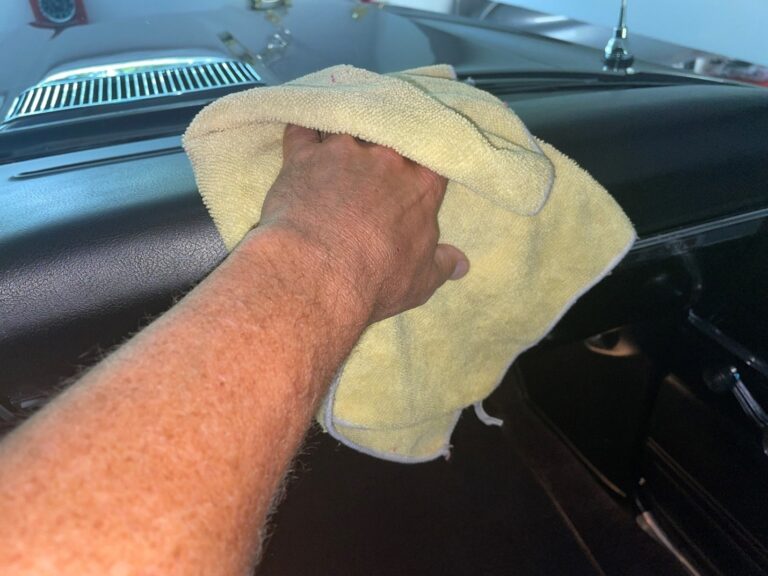
Buff and Polish:
Use a clean, dry microfiber cloth to buff and polish the seats after applying the conditioner or protector. This step helps ensure an even finish and a nice shine.
Optional: Vinyl Dye or Paint:
If your vinyl seats have significant color fading or damage that couldn’t be repaired with a vinyl repair kit, you might consider using a vinyl dye or paint to restore the color. Follow the product’s instructions for application.
Maintain Regularly:
To keep your vinyl seats looking their best, clean and condition them regularly, ideally every few months or as needed. Avoid harsh chemicals that can damage the vinyl.
Protect from Sunlight:
Whenever possible, park your car in the shade or use a sunshade to protect the seats from prolonged exposure to sunlight. UV rays can cause vinyl to fade and become brittle.
Pro Tips for Fixing Tears in Car Vinyl Seats
- Many liquid vinyl solutions and fix kits contain adhesives and chemicals that don’t work as well in extreme temperatures. Try working in a shady spot or park in a garage, if possible, to allow the seats to cool off.
- It is better to apply a little colorant or sealant to your seat and add more later than it is to go full bore with the product at first. Do not go crazy and ruin your seats.
- Even after drying, liquid vinyl may need time to set up completely. Be ginger with your seats until they have had time to dry out all the way.
- Be sure that your seats really are vinyl before trying to fix them with a kit or other method. Newer synthetic leathers may require special attention.

Finally
By following these steps and maintaining your car’s vinyl seats, you can help restore their appearance, extend their life, and ensure a comfortable and visually appealing interior.
Before you dive into fixing your vinyl seats, decide how you want to approach the project. Do you want a seat that looks as close to perfect as possible, or do you just want to fix the tear? Are you into using an expensive kit, or do you only care about the bare minimum? Fixing the seat to return it to its former glory will take more money, time, and effort than just repairing a hole. Because there are a few avenues to achieving the fix, our recommendations for tools and parts are mostly optional, depending on the method you choose.