
There comes a day in every home mechanic’s life when it is time to step up to that next level. That something is ground-up car engine rebuilding. Cranking over an engine you built yourself for the first time is a moment that separates the amateurs from the serious home DIY mechanics. If you have never built an engine before, it can seem like an almost impossible task.
It is a job that requires a careful eye for detail and a strong ability to follow directions. Rebuilding an engine may not be hard work, but it is precise work. Every part that goes into your engine must be mated squarely with the others. The clearances will be less than a few thousandths of an inch, so there is not much room for sloppiness or shortcuts.
Car engine rebuilding is a complex and intricate process that requires skill, attention to detail, and the right tools. Here is a step-by-step guide to help you succeed at car engine rebuilding:

Plan Ahead In Car Engine Rebuilding
Car engine rebuilding may not be difficult, but you will need a good selection of tools and supplies before you start. If you are an experienced DIY mechanic, you probably have most of the necessary hand tools already. However, some more specialized tools will come in handy: a quality micrometer or two—metric or standard depending on the engine you’re rebuilding—and an accurate torque wrench. A first-rate straightedge is a useful item, as are expanding bore gauges.
In addition to a proper workspace, you will also need to rent or borrow an engine hoist to pull and install the engine. Once the engine is out of its bay, an engine stand will hold it at a working height. Engine stands are cheap enough that buying one should not rob you of your project budget.
Once you have put together your parts list, check around and see if you can order them all at the same time. Most suppliers will give you a discount when placing a large order, but if not, at least you will save on shipping.
Buy a complete gasket and seal kit even if you think you will not need the entire thing—it is better to have extra parts than to be short one critical seal. And about seals, try to buy OEM, if at all possible, unless you have a good reason for going with aftermarket. OEM seals and gaskets are almost always better quality than what you can order from the local chain parts store, and if you shop well, they won’t cost much more, either.
Gather Information for Car Engine Rebuilding
Begin by researching and obtaining a workshop manual or a detailed guide for the specific make and model of the engine you plan to rebuild. This manual will be your primary reference throughout the process.
Assemble the Right Tools and Equipment
Collect the necessary tools and equipment, including wrenches, sockets, ratchets, pliers, a torque wrench, engine hoist, engine stand, gaskets, seals, and cleaning supplies. Having the right tools is essential for a successful rebuild. Beyond that, you will need basic hand tools and a clean surface to lay out freshly machined and purchased parts. As for supplies, get used to wielding plenty of blue shop towels, carb cleaner, and cleaning solvent. Low-VOC (Volatile Organic Compound) paint thinner, while not as cheap as “real” solvent, is easier to acquire in many areas.
Create a Clean Workspace
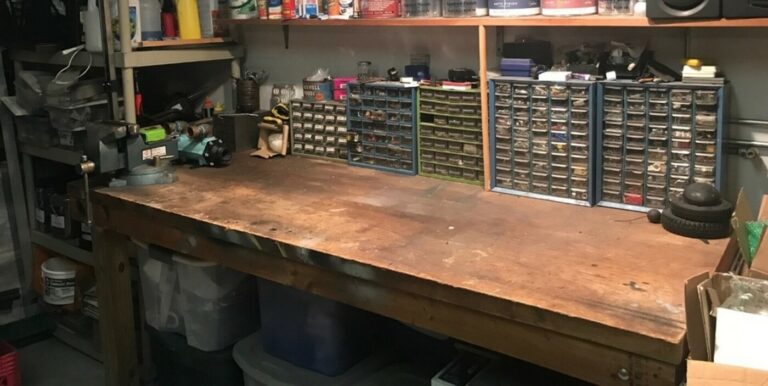
Set up a clean and organized workspace. Keep all parts, tools, and equipment organized to prevent confusion and minimize the risk of losing or damaging components. You will also need a place to work. You can build an engine in the living room and install it outside by the curb, but that certainly is not the best way to go about it. A garage is best. Do not have one? See if you can borrow or rent one. It will make your life much better.
Engine Disassembly
Begin by carefully disassembling the engine, following the instructions in the workshop manual. Label and organize the removed parts for easy reassembly.

Inspection and Evaluation
Thoroughly inspect each component for wear, damage, or signs of malfunction. Measure critical components like cylinder bores, pistons, and bearings to assess their condition.
Cleaning
Clean all engine parts meticulously. Use appropriate cleaning solutions and tools to remove dirt, oil, and carbon deposits. Ensure that all parts are free of contaminants before reassembly.
Here is a goal for you: Every tool, part and chemical that touches your engine must be as clean as humanly possible. The slightest bit of dirt will score bearing journals, plug oil galleries, or possibly chew up oil pump rotors.
Use blue shop towels instead of cloth rags and throw them away once soiled. Cloth rags tend to collect grit that can last through washing. If you have got the budget for it, get lint-free cloths from an industrial supply shop since they are even cleaner than blue shop towels and will not leave behind any paper fibers.
As each part comes back from the machine shop, clean it first with fresh solvent, including running solvent down every oil passage. Next, spray carb cleaner down the oil passages and check the entire part for grit or chips left over from the machining operations.
When you are done cleaning a part, hit it with WD-40 or other water displacement spray to prevent flash rusting. Then wrap the entire engine with garbage bags to keep out the dust. Just before you install or assemble a part, hose down the whole thing with carb cleaner one last time to remove any residual dust or fibers.
Replacement and Machine Work
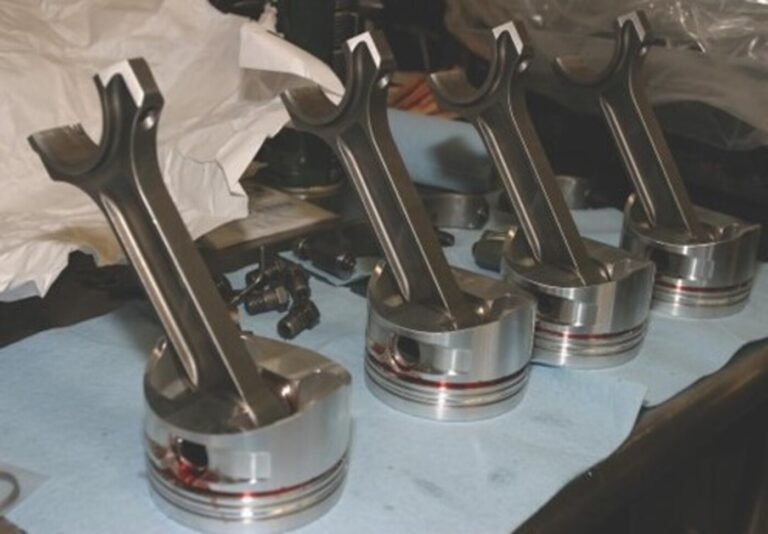
Replace worn or damaged parts with new ones. Send components like cylinder heads, crankshafts, and connecting rods to a machine shop for inspection, machining, and balancing as needed.
Choosing A Machinist
Unless you have got a cylinder hone, milling machine and valve seat cutter in your garage, you are going to have to farm out the machine work on your engine. If you have all this equipment, there probably is not much we can teach you about choosing a machinist. For the rest of us, choosing a machinist is a very important part of a rebuild project.
More important than the actual parts used, the machinist will have control over how those components fit together. A good machinist is almost never the cheapest one. A good machinist is also never—never—the fastest one. An honest machinist is worth the rate charged. He will take the time to properly check every part handed over and will know what questions to ask before starting the work.
In a way, a good machinist will be like an advisor on your project. He will probably have an opinion on many of the parts you plan to use, and he will be able to steer you away from pitfalls like a conflict between some pistons and your combustion chambers. The machinist should be able to suggest less expensive, more precise, or stronger alternatives to parts you want to use.
He is probably seen dozens of failed engines like yours and might even know how to fix some of the shortfalls that plague certain engines—like how to survive broken Miata crank snouts and “wiped” Mitsubishi thrust bearings. Compared to the cheaper machinist, the broken parts and aggravation that the more expensive guy will save you down the road will cover the cost difference.
Ask around and find out who all the racers use. Every town has one or two shops that do the bulk of the local high-performance work. Drag and circle track racers seem to be especially good at finding quality machine work, probably because they are such frequent customers.
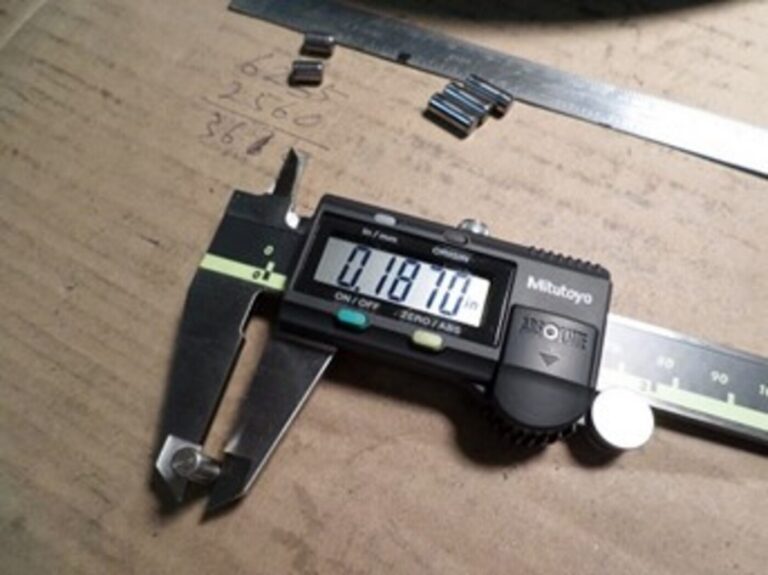
Measure Twice, Cut Once
The first rule of car engine rebuilding is the same as the first rule of carpentry: Measure twice, cut once.
As the engine builder, it is your responsibility to check every dimension of every part that goes into your engine. Even the best race machinist in town is still human and can make mistakes. Check everything twice before you send it to be machined and check it twice when it comes back from machining. Note both sets of numbers in a notebook that won’t be misplaced.
Before you install the rings onto your pistons, measure the ring gap in the cylinders. Check the fit of the rings in their grooves and the pin in its bores and the rod. Make sure the bore marked on the piston is, in fact, the bore that you expected. Measure them and measure the cylinders. Do a “dry build” of one or more cylinders to make sure that you have sufficient valve-to-head, valve-to-piston, piston-to-head and valve-to-valve clearance.
Measure deck height, combustion chamber volume and rod length. Check each crankshaft journal for proper dimensions and check the bearing clearance of each journal for proper clearance. Check the crank thrust clearance with the main bearings in place. Also check cam and balance shaft bearing clearances.
Measure rod bolts for stretch or, better yet, throw them away and get new ones. Same goes for head bolts or studs: Check them out, and if they don’t measure up or you cannot check them, throw them away and order fresh ones.
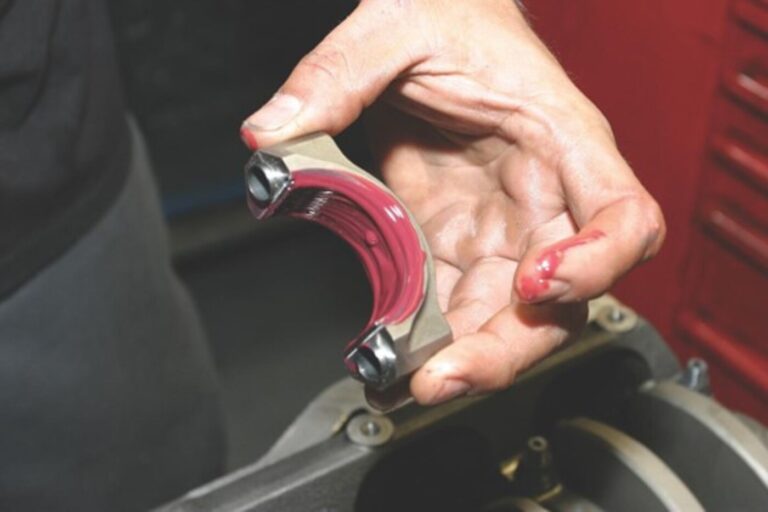
Finally, use a paint marker to indicate that each critical fastener—main bolts, rod bolts and head bolts—has been tightened to the proper spec. Check them all again before bolting on the oil pan and valve cover. Check and set valve clearances before buttoning up the head, too, and make sure that cam timing is spot on.
All these tasks sound tedious and time-consuming, but if something is out of spec, all the time and money you’ve spent on that rebuild are wasted. If your machinist makes a mistake or there is miscommunication between the two of you, it can be remedied before you go to the trouble of bolting the short block together and dropping it in the car. Once that engine is started, all bets are off.
Engine Reassembly
Reassemble the engine, following the workshop manual’s instructions. Use proper torque specifications and lubricants for all fasteners. Pay close attention to timing marks and clearances.
Timing and Alignment
Ensure that all timing marks, timing belts or chains, and other components are correctly aligned. Misalignment can cause engine damage.
Engine Lubrication System
Verify that the lubrication system is functioning correctly. Replace the oil pump and filters if necessary.
Cooling System
Check and replace the radiator, hoses, thermostat, and water pump as needed to ensure proper engine cooling.
Fuel and Ignition Systems
Inspect and replace the carburetor or fuel injectors, spark plugs, wires, and distributor components. Ensure the ignition system is correctly timed.
Compression and Leak down Testing
Perform compression and leak down tests to verify that the engine is sealing properly and has good compression in all cylinders.
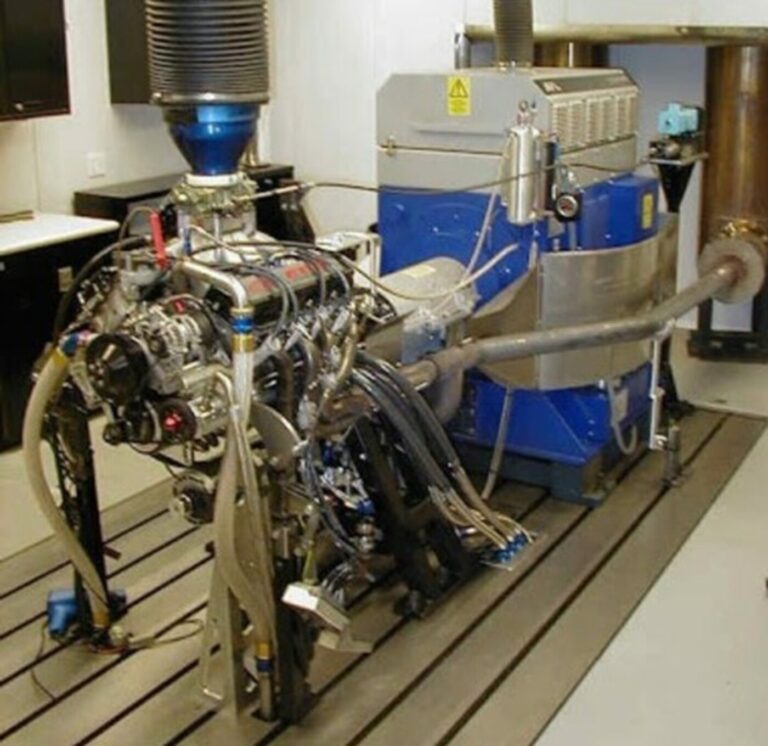
First Start-Up
Before reinstalling the engine in the vehicle, perform a bench start-up to check for any issues, such as leaks, unusual noises, or abnormal operation.
Installation and Final Checks
Install the engine back into the vehicle, connecting all components and systems correctly. Double-check all connections, hoses, and electrical connections.
Initial Break-In
After installation, perform an initial engine break-in, following the manufacturer’s recommendations. This typically involves running the engine at varying RPMs to allow components to seat properly.
Before you start your engine for the first time, pull out the plugs and squirt some oil in the cylinders. Then turn it over with the starter until you get a few psi of oil pressure on the gauge, or at least until the oil light goes out. This ensures that every part of the engine has a coating of oil and will not be starting “dry.” Put the plugs back in and make sure that you have spark and fuel—avoid flooding the engine and multiple attempted starts at all costs.
Once it starts, get it warmed up right away; do not let it idle for longer than absolutely necessary at first. Keep the revs up for the first few minutes—somewhere between 1000 and 2000 rpm is best since that will make sure you get maximum oil and coolant flow right away.
Get the engine nice and warm but watch the oil pressure and coolant temperature like a hawk. Shut it down after it is warmed up and check the coolant and oil levels. Change the oil to flush out the assembly lube.
Engine Testing and Tuning
Finally, test and tune the engine for optimal performance. This may include adjusting the carburetor, ignition timing, and other settings to achieve the desired power and efficiency.
Documentation
Keep detailed records of all work performed, including parts replaced, measurements, and any adjustments made. These records are valuable for future reference and potential resale.

Finally
Remember that engine rebuilding requires patience and precision. If you are not experienced, consider seeking guidance or assistance from a professional mechanic or engine builder. It is also a good idea to start with a less complex engine if you ae new to engine rebuilding to gain experience and confidence.