We all know the sinking feeling when the car starts acting up. The check engine light flickers, the radio cuts out, and the power steering goes haywire. In most cases, these electrical issues are caused by a short circuit somewhere in your car’s wiring. But finding that electrical short circuit can be a challenge. In this blog post, we will share a basic guide to help you locate an electrical short circuit in your car. With a bit of patience, you will find a solution.
What Is an Electrical Short?
In a nutshell, a “short”, or short circuit, is a fault in the wiring harness of your car—the wiring harness shunts or shifts electricity between different circuits before it reaches its final destination.
Short circuits are best understood when contrasted with open circuits, which do not allow current to flow whatsoever. Both are electrical issues, but short circuits have distinct signs and cause different problems.
How Do Electrical Circuits Work in A Car?
To fully understand short circuits, you will need to know how electricity flows through your car in the first place.
Your car’s electrical system can be broadly divided into sensor and actuator circuits. Sensor circuits are those that handle oxygen sensors, light sensors, speed sensors, and so on. Actuator circuits are those for motors or lights, for example.
While this all sounds very technical, do not worry. The bottom line is this: your car’s electrical system only works properly so long as the wiring is intact and uninterrupted. When a short circuit crops up, electricity cannot flow properly, meaning that the electricity goes somewhere else (potentially causing damage) and/or that certain components will not work correctly.
What Does an Electrical Short Circuit Look Like?
Short circuits are categorized into two types:
- Short-to-ground circuits occur when a current flows from the circuit to your car’s body. This can happen if a wire sheds its insulation or chafes, allowing electricity to transfer from the wire to your vehicle. When a short-to-ground circuit occurs, you might see blown fuses, inoperative components, or lights, and so on.
- Short-to-power circuits occur primarily in the wire harness, where there are numerous circuits grouped close together. When a cut or chafed wire contacts another, current can flow where it is not intended to. This can cause the headlight switch to send power to the car horn unintentionally, for instance, or even cause your headlights to illuminate when you step on the brakes.
It goes without saying that both types of short circuits are undesirable. But understanding the difference between them will help you identify what type of short circuit you’re facing and assist you in locating the problem more quickly.
How to Find an Electrical Short in a Car
An electrical short in a car creates an unintended path for current and can manifest in different ways:
- Blown fuse
- Burned fusible link
- Open circuit breaker
- Burned wires
- Burned components
- Wires or harnesses with melted insulation
- Inoperative component(s) (such as a light, sensor, or motor)
- Components operating in unexpected ways
Any of these conditions may be caused by a hot (current carrying) wire that:
- Makes contact with the car’s chassis (ground) due to damaged insulation.
- Contacts another wire due to damaged insulation.
- Is pinched between two parts.
- Becomes frayed.
- Has been incorrectly connected when installing an accessory.
- Has become loose and found its way to ground.
- Has the wrong gauge for the intended application.
In most cases, you will be dealing with simple electrical shorts that you may diagnose using a test light or a digital multimeter and the vehicle repair manual for your particular vehicle make and model.
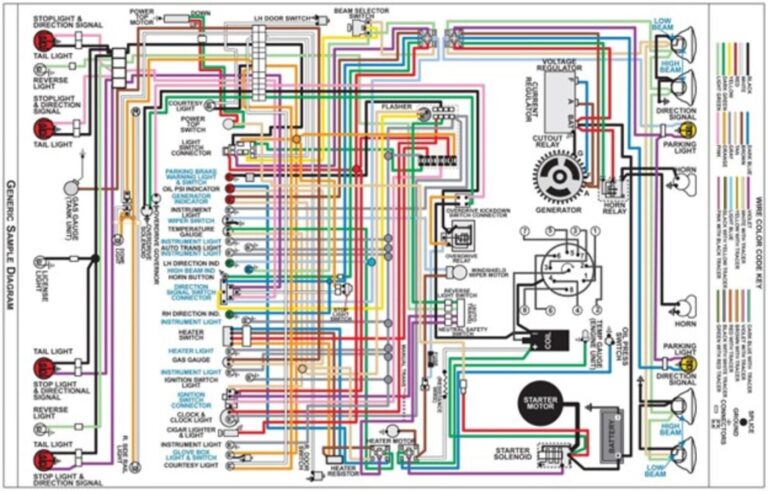
The electrical wiring diagrams in most aftermarket manuals usually show the color of the wires (sometimes gauge size), connectors and components in the circuit. However, they do not have the exact location of wires and components. But for most cases, this will be enough.
If you do not have this manual yet, you can buy an inexpensive aftermarket copy through Amazon. Haynes manuals come with step-by-step procedures for many repairs, maintenance, and troubleshooting procedures. So most likely you will keep using the manual and recover your small investment soon.
How Do You Locate an Electrical Short in Your Car?
Here are the troubleshooting methods I will be covering in this post:
- Preparing to Troubleshoot the Circuit
- Finding a Short Circuit
- Using a Short Finder
- Short Circuit Diagnostic Made Easy
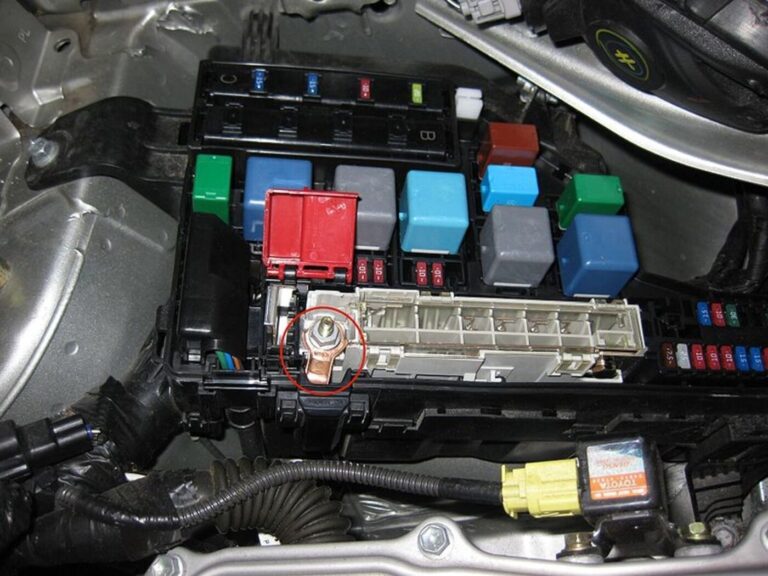
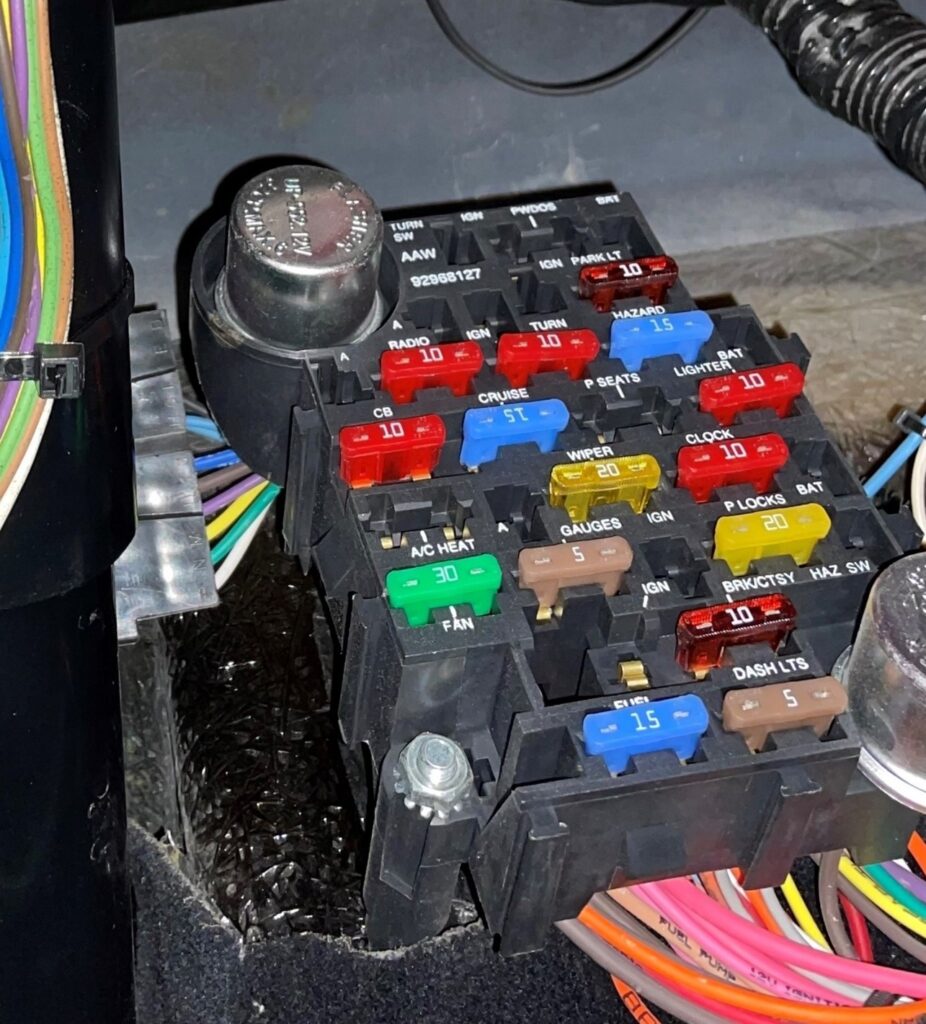
Locate your car’s power distribution or fuse box.
I. Preparing to Troubleshoot the Circuit
Before you start troubleshooting the circuit, identify the circuit you need to troubleshoot. For example:
- If a particular fuse blows whenever you replace it, look up the fuse number in your car owner’s manual or vehicle repair manual.
- Then look up the electrical diagram for that circuit in the manual.
- Identify the wires, connectors, switches, or components in the circuit feeds.
- Locate the power source and ground.
Keep in mind that not all short circuits will blow a fuse, but they can discharge the battery over time or make one or more circuits behave in unexpected ways.
A circuit can be affected intermittently if a loose or bare hot wire touches ground (chassis) only when the car is moving.
A quick analysis of the diagram can tell you how the circuit is supposed to operate, what points in the circuit you can access for testing, components you may disconnect, connectors you can unplug to isolate portions of a circuit, and switches and splices you may access for testing.
Look for the most likely problem sources. This may include connectors (usually power and ground wires in the same connector that may have become loose), splices, and components.
This will save you time and help you develop your troubleshooting strategy.
For example, if one or more lights do not work and you cannot trace the wiring, maybe you could check the wiring and connections at the switch, power feed, and load.
If the diagram says ground is shared by more than one component, check the operation of those components. If they operate correctly, you know the problem lies in the part of the circuit that works directly with the affected component; otherwise, see where those components share a connector.
Sections of the circuit can be isolated this way for easier troubleshooting.
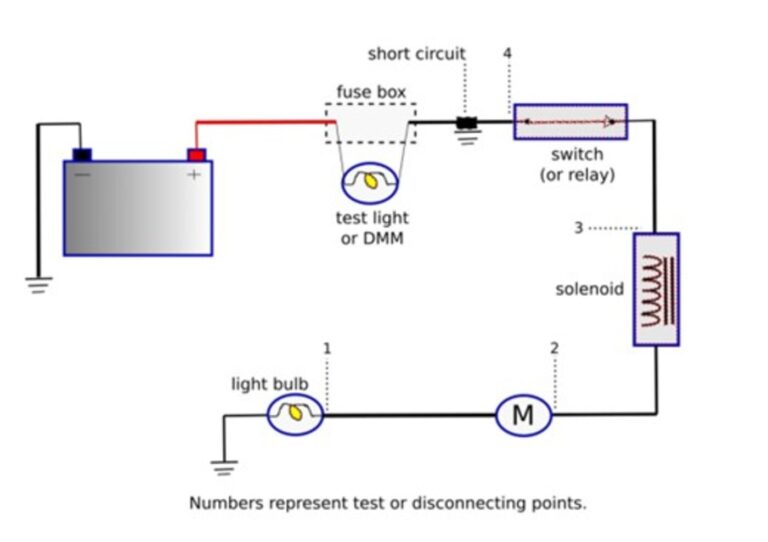
Simple wiring diagram with an electrical short.
II. Finding a Short Circuit

When possible, before you start, inspect the part of the wiring in those sections of the circuit that you have access to, and check for burned wires, wires with melted insulation, or loose wires. Wiggle wires to make sure they are connected.
- Remove the fuse or protective device from the circuit with the electrical short.
- Check your repair manual and see if you need to turn the ignition key to the “On” position to activate the circuit. Also, turn on any switches in the circuit, if flipping the switch “On” blows the fuse. This pretty much tells you the short is in the leg of the circuit the switch powers “On”.
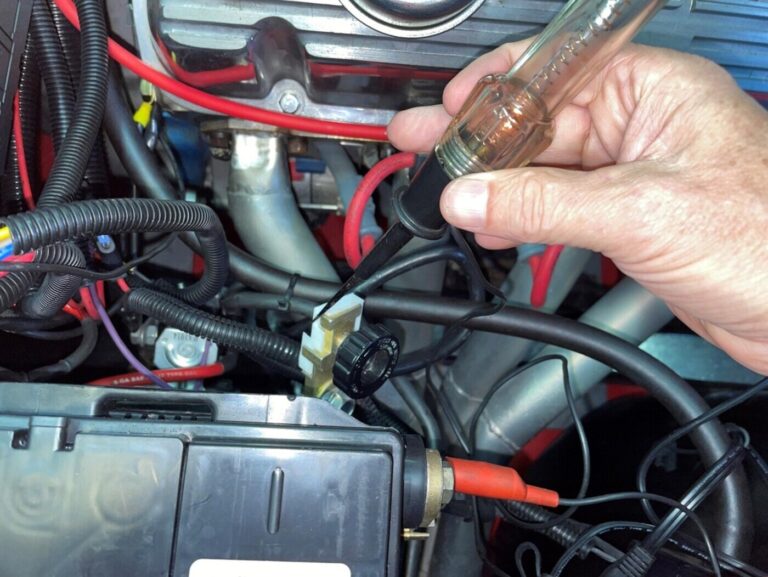
- Set your voltmeter to the DC voltage scale, at around 20 volts, and connect your meter across the fuse holder. If there’s a short in the circuit, your meter should read some voltage.
If you are using a test light, you can also connect the light across the fuse holder. When there is a short, the light will illuminate.
- Now remove the load from the circuit and check your digital multimeter (DMM) again. For example, in the example diagram above, we could remove the light bulb first and then the solenoid.
- If your meter still reads voltage, the short circuit is located between the load and the fuse holder or protective device.
- If our meter doesn’t read voltage, the short is located either in the load itself (perhaps a bad motor) or in the section of the circuit after the load.
- Turn off the switch and check your meter.
- If the meter reads O volts, the short is located between the switch and one of the loads, or the switch itself.
- If the meter still reads voltage, the short is located between the switch and the fuse holder or protective device.
Removing loads, disconnecting switches, or unplugging devices is a practical way to isolate the section of the circuit where a short circuit is located.
However, there will be times when you will not have access to a load or a connector in a circuit for this purpose.
In a situation like this, you could use a jumper wire to connect a meter lead to the input and output voltage side of a component or device, or probe a section of a wire close to the load, switch or connector.
Use any combination of strategies to help you isolate sections of a circuit as you gradually move towards the power source from the suspected trouble points.
III. Using a Short Finder
A short finder is another practical method to locate shorts in a circuit. This device includes a circuit breaker and a compass or Gauss gauge. However, some car manufacturers recommend not using a circuit breaker in place of a fuse when testing for short circuits. While both fuses and breakers are used to protect an electrical circuit from overload, fuses are quicker to react (melt) to the presence of unwanted high electrical current. Still, a short finder is a popular and practical tool in use today.
To operate the short finder:
- Plug in the circuit breaker into the fuse holder that protects the circuit with the electrical short.
- When you activate the circuit, the breaker will cause the circuit to cycle on and off.
- As the circuit is activated, follow the hot wire’s path in the test circuit with the compass. The high current in the hot wire will create a strong magnetic field, causing the needle in the compass to fluctuate.
- When the needle stops fluctuating, you have passed the short in the circuit.
The advantage of this method is that you do not have to dig through a harness or remove panels to follow a hot wire in a troubled circuit. As long as you can move the compass close to the wire with the short, the needle will keep deflecting, even if the wire is located behind a firewall or panel.
The only problem with this method is that, depending on the circuit and the location of the short, it may be difficult to trace all sections of a circuit using the compass. A wire may suddenly go into a path buried under engine components that you can’t reach.
Still, you may find a circuit finder useful in combination with the methods described in the previous section. It certainly can be of help.
Check the operation of the circuit and locate loads and connectors using the wiring diagram for your vehicle make and model.
IV. Short Circuit Diagnostic Made Easy
Using the electrical wiring diagram for the circuit you intend to test and understanding how the circuit is supposed to operate are the keys to finding a short circuit.
Finally
The strategies described in this post can help locate shorts faster. Even if you do not have access to every point in the circuit, you still may learn what section of a circuit is affected. Remember to isolate a circuit in sections: disconnect components, unplug connectors, and use jumper wires as necessary. Knowing how to quickly find a short circuit can save you a lot of headaches and ensure that you maintain a safe, fully functional car. While it can be tedious, using the guide referenced above should equip you with the information you need to identify and repair any short that occurs in your car.