
No matter whether your classic car is a regular driver or just coming out of storage getting clean fuel to your engine is critical for a properly operating vintage car. The fuel tank is an often-overlooked part of the car as it is sort of “out of sight-out of mind” in the functionality of your classic car.
Depending on the classic car or truck that you own, finding a replacement gas tank that does not cost an arm and a leg can be a daunting task. Popular models are readily available, but the rarer your classic car or truck is, finding parts can be very difficult and costly.
Fuel Tank Basics
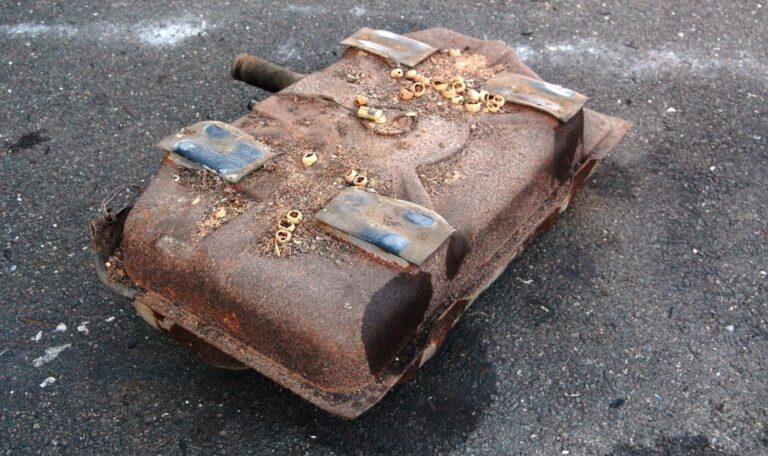
Almost every classic car in existence left the factory with a metal gas tank. Over the years, condensation can build up inside the tank causing some form of corrosion. Many classic car are stored with fuel left in the tank; and if stored improperly with untreated fuel that can breakdown into varnish causing damaged to the tank as well as unusable fuel. Even the type of fuel left in the tank can become an issue in deteriorating the fuel tank itself. If it becomes severe the rust may have even created small pinholes. Rust and leaks in a gas tank can be very hard on a vehicle’s fuel system and need to be repaired or have the tank replaced.
Depending on the condition of the fuel tank you have a few options. It is best to remove the fuel tank from the vehicle before undertaking any repairs to first visually inspect the entire tank to assess its condition as it may just need a thorough cleaning as there are products on the market to clean out the internal residue left inside the tank. If the tank requires a repair your first and possible most cost-effective means is to simply replace the fuel tank. When a replacement tank is not available or reasonably priced; testing and repairs can be completed by many radiator repair shops for a reason fee so that may be your second choice. If all else fails and the tank’s condition can be repaired then there are products available to make the repairs yourself; otherwise, you may need to have a replacement tank built for you.

DIY Fuel Tank Repairs
Fortunately, there are some DIY options available if you are short on cash or cannot locate a replacement tank. The repair method in this article uses a repair kit made by Eastwood. There are other kits like ones from KBS Coatings and its Gold Standard Tank Sealer kit.
Before you start this DIY project you need to acquire some supplies. You will need the fuel tank sealer kit, a half-gallon of muriatic acid, one quart of acetone, and a garden hose. The Eastwood kit contains metal wash, rust remover, and gas tank sealer. If your tank has holes larger than the kit can fill on its own, you may need to do some patch work using steel and body filler. This kind of prep work does beyond the scope of this post.
For the sealer to work correctly the process must be followed closely. It is highly recommended that you perform the actual sealing task outdoors regardless of any ventilation system you may have. Make sure you do not attempt this wearing any valuable clothing as there is a good chance they will be ruined.
Steps In a Fuel Tank Repair

The first step is to make sure the fuel sending unit is removed from the tank. Using the garden hose, thoroughly rinse out the tank with water. A high-pressure nozzle on the hose will give the best results. The goal is to remove as much debris and rust as possible. We suggest setting the tank on two sawhorses with the sending unit opening facing the ground and allow the water run in the filler opening and straight through. Do not be too surprised to see a fair amount of rust flakes and loose pieces flowing out. You may have to rinse it several times until the flakes stopped coming out.
Now you need to seal one end of the tank. A common method is to tape a few shop rags around the opening. The next step requires the use of muriatic acid so use caution! Be careful not to get the acid in your eyes, as it can cause blindness. You should wear gloves for this step. The acid will burn a little if it comes in contact with the skin. It can also cause skin discoloration.
Fuel Tank Cleaning
Pour one quart of the acid into the tank and then close off the other opening. Carefully rotate the acid so that it reaches every side and corner of the tank. After several minutes you can open the tank and properly dispose of the acid. Once you have removed the acid you will need to thoroughly rinse the tank again. To be safe, rinse it at least two times to make sure it is clean.
Next you will use the rust remover from the kit. Cover one opening with a fresh shop rag, pour in the rust remover and then cover the other opening. Again, you will need to slosh the liquid around inside the tank for about 15 minutes. Then you will need to rinse out the tank two or three times and then allow it to completely air dry.
Agitate the tank by tipping and rotating it for several minutes, then pour it out and rinse with water. Repeat the process until the rinse water is clear. Heavy varnish and deposits might require soaking overnight.
Now add about half of the acetone, seal the openings, and slosh the liquid around again for several minutes. I am sure your arms are getting tired by now, but don’t give up! Empty the tank, add the rest of the acetone, and repeat the process again. Once you are done with this step you need to empty out the acetone, but do not rinse the tank.
The tank needs to dry completely before proceeding. Ours was still wet inside, even after sitting overnight. Many manufacturers recommend drying the tank with compressed air or even a hair dryer.
The tank is now ready for the final stage of the repair.
Fuel Tank Sealer

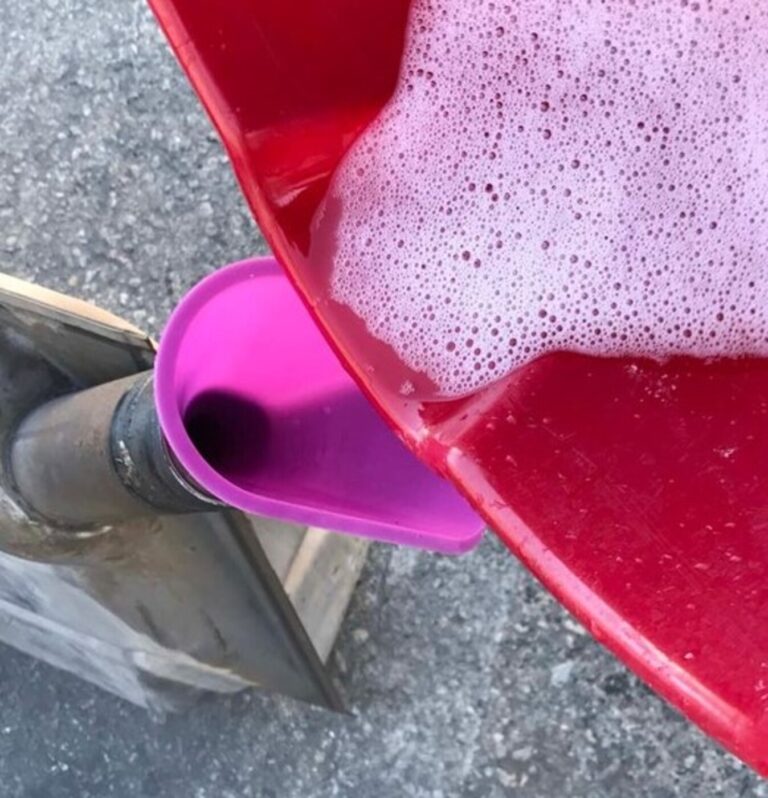
Add both bottles of sealer to the tank. This time instead of sloshing the liquid around you will want to slowly rotate the tank so the liquid can evenly coat the inside of the tank. You might find that holding the tank in one position allows the excess sealer to gather on one side of the tank. The sealer is applied similarly by pouring it into the tank, taping off the filler neck and sending unit openings, and tipping and rotating the tank at regular intervals for a period of 30 minutes. This will ensure the entire inside of the tank is coated with the sealer. Pour out any remaining sealer after the allotted time.
Once you feel that the sealer has been able to evenly cover each side of the tank you can then start setting the tank on each side for around 3-5 minutes to help it start drying evenly. Be sure you rotate it every 5 minutes max to avoid the sealer drying too thick on one side. You want it to evenly coat the inside of the tank. You should be able to peek inside the tank and see that it is being coated evenly. If the inside of the tank looks like it all has a nice white layer of sealer, you can drain any excess back into the original bottle. A larger tank should barely have any excess sealer. Consider yourself warned… leave excess sealer on one side for too long and it will set up as a nice plastic puddle. The sealer needs to air dry uniformly to adhere properly to the tank. As it cures, the sealer forms a strong but flexible bond to the tank. Leave the tank alone for a few days to allow it to fully dry.
Coating Fuel Tank Exterior
The final touch is to coat the exterior of the tank while you have it out of your classic car. Before painting use a wire wheel to remove all rust and debris; do not use a grinder wheel as there is a chance that you may take off too much metal and compromise the fuel tank integrity. A zinc based coating for the tank that can be easily sprayed on to give it a nice finish or using a metal primer and paint to match the OEM look. The result is a repaired gas tank that will not leak or have any rust that can flow through your fuel system. If you need your car to win awards you might want to consider a professional replacement, but for less than $60 you can restore your tank back to perfect working condition.

Finally
With the fuel tank out of the can this is a great opportunity to replace the fuel pickup tube with a new strainer sock as well as any fuel sending units, and a new O-ring to seal its lock ring to the tank. *Each fuel tank sealer kit has its own set of instructions and may differ from the ones above so make sure you read all the directions carefully before proceeding with the fuel tank repair process.* Although the process took several days, mostly due to the sealer’s cure time, this was a simple job.