
It is nice to know that owning and maintaining a classic car does not always need a paid mechanic to keep your car on the road especially with light maintenance like an oil and lube DIY project.
Some of the easiest maintenance is keeping your car’s mechanicals well lubricated. I have kept most of my daily drivers on the road for at least 10 years and over 200,000 miles each as well as my classic cars is with regular maintenance and repairs while keeping my ears open for those unusual noises, and my eyes open for any signs of wear and leaks. As part of that process is regular oil and filter changes, and chassis lubrication commonly referred to as an oil and lube job.
Oil & Filter Changes
When draining the oil typically I like the engine to be warm (not hot) so that the oil flows more quickly and is able to remove any contaminants from the pan and engine more readily. After running the engine up to temperature, I will wait 20 to 30 minutes to get the motor down to a reasonably warm level.
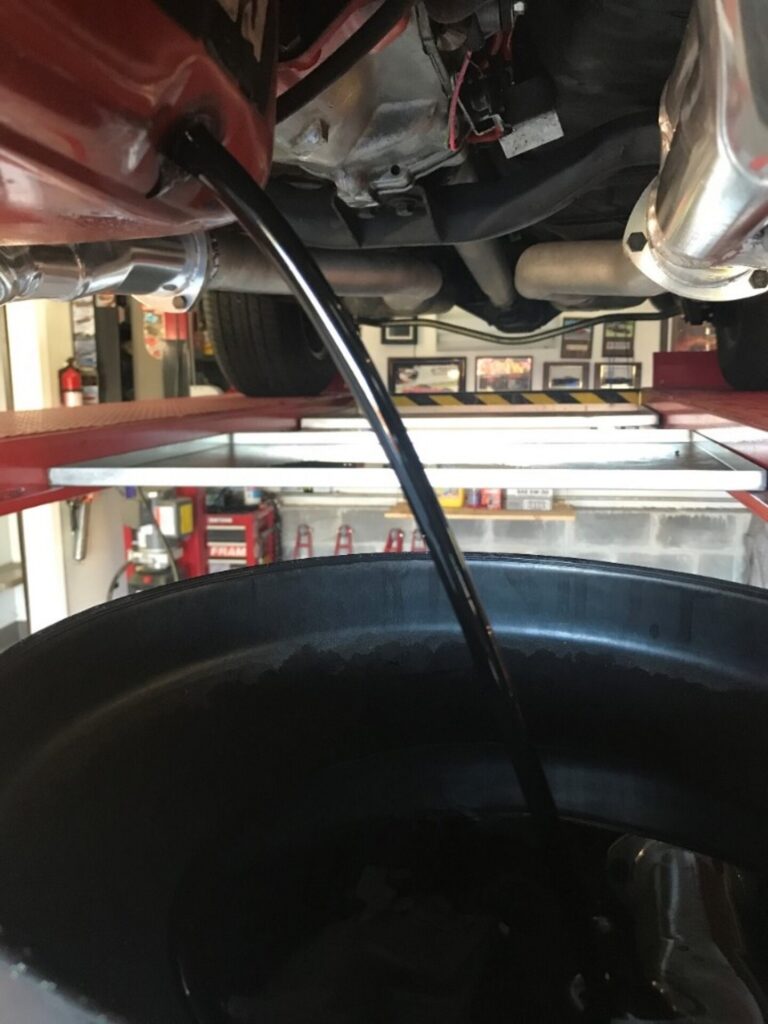
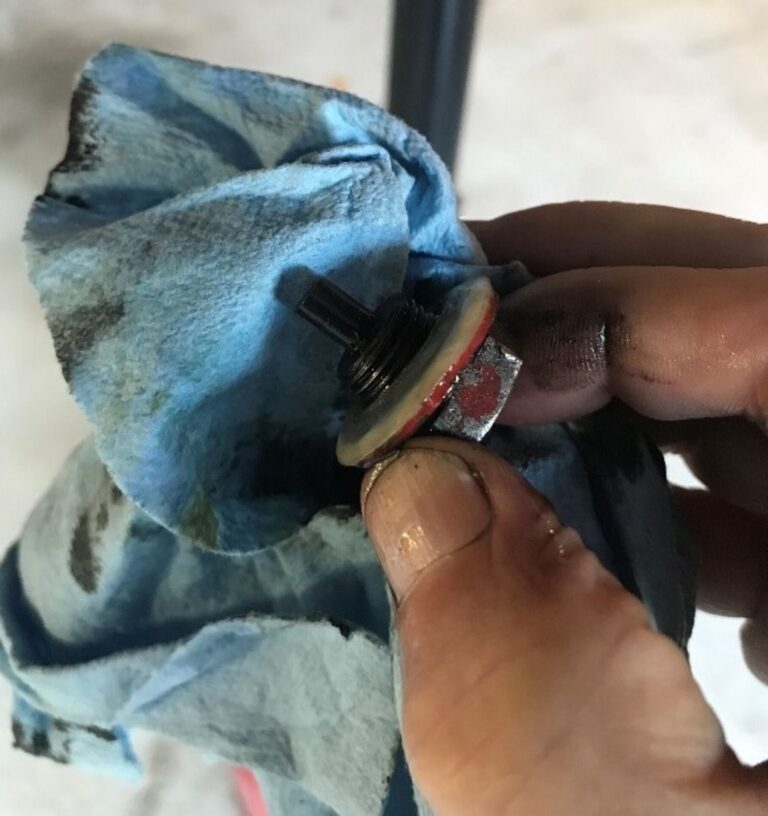
When I remove the train plug carefully, I inspect the end which most motors have a magnet on the drain plug. I look to see any shiny particles and well as I feel the end to see if I feel any grit on the plug to let me know if there is any unusual wear. If I do there may be some deterioration of the engine internals that require more investigation.
Then I will remove the filter from the engine or external adapter. Before installing a new filter, I fill the new filter with oil. You will see how much air is held in the new filter element.
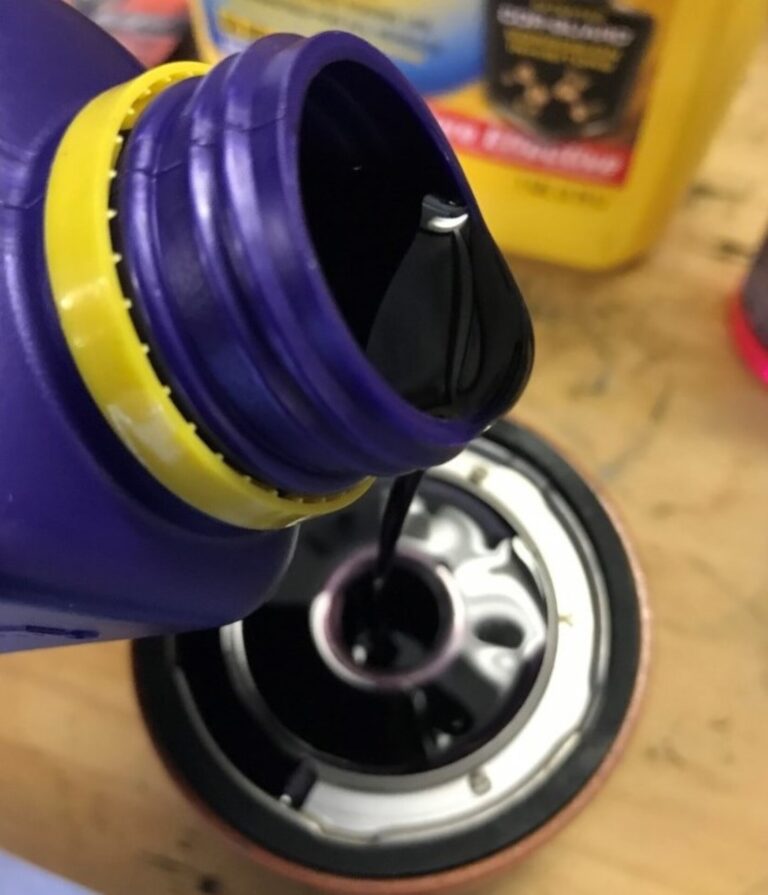
This also allows me to get the threads and gasket well coated with oil before installing the new filter.
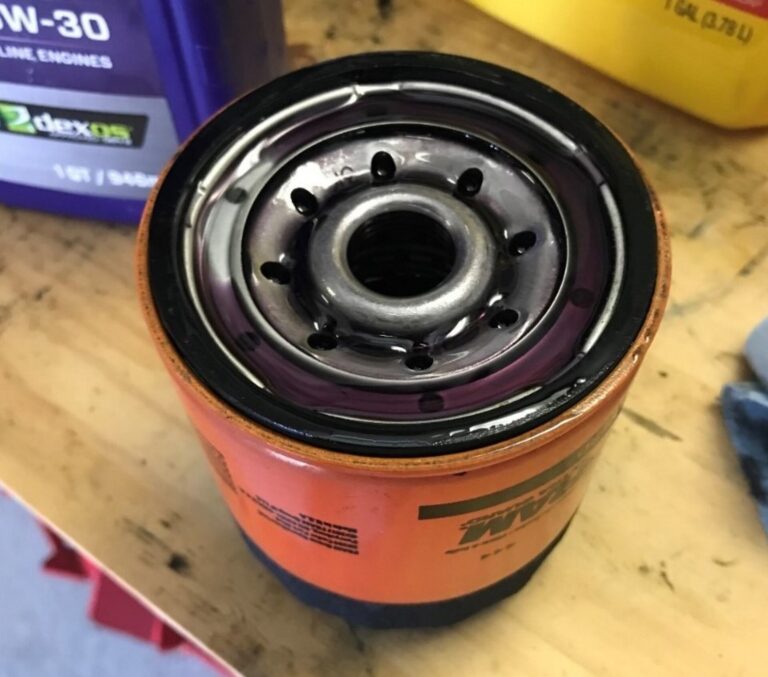
The process of pre-filling the filter is certainly easier when the filter is installed vertically on the motor such as Chevrolet engines. It is a bit harder when the filter goes in at a 45-degree angle as in some Fords or horizontally as in some Chryslers. Even with these I pre-soak the filter and drain the excess oil out before installing. This method gets oil flowing quicker into the engine internals when re-starting.
Then I hand tighten the filter to the tightest I can get with my hands. Then refill the motor with oil. Start the engine and check for any leaks. Turn off motor and recheck oil level.

Gear Oils
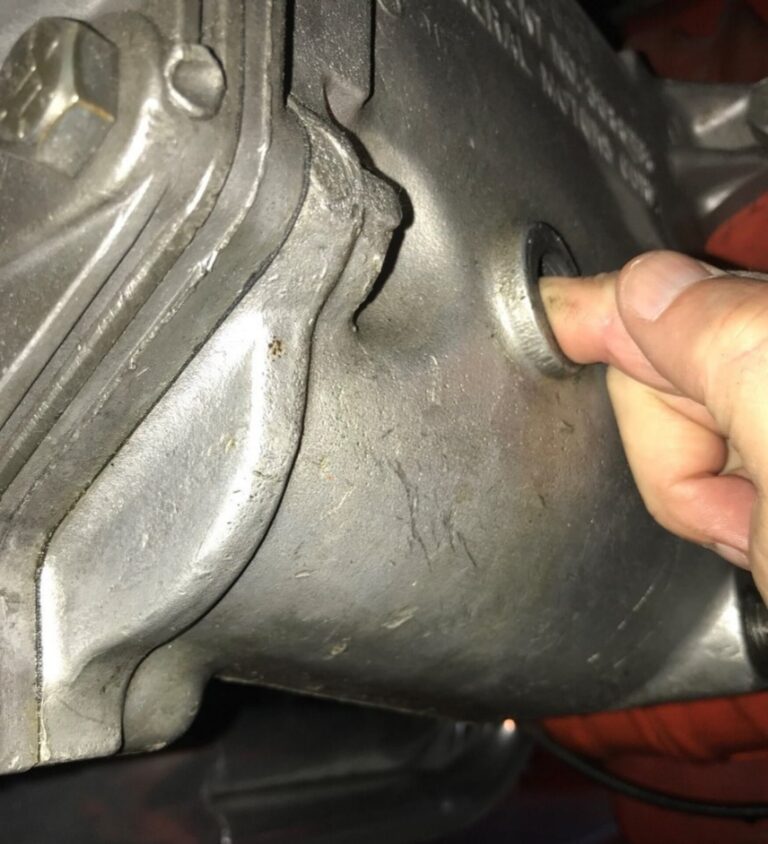
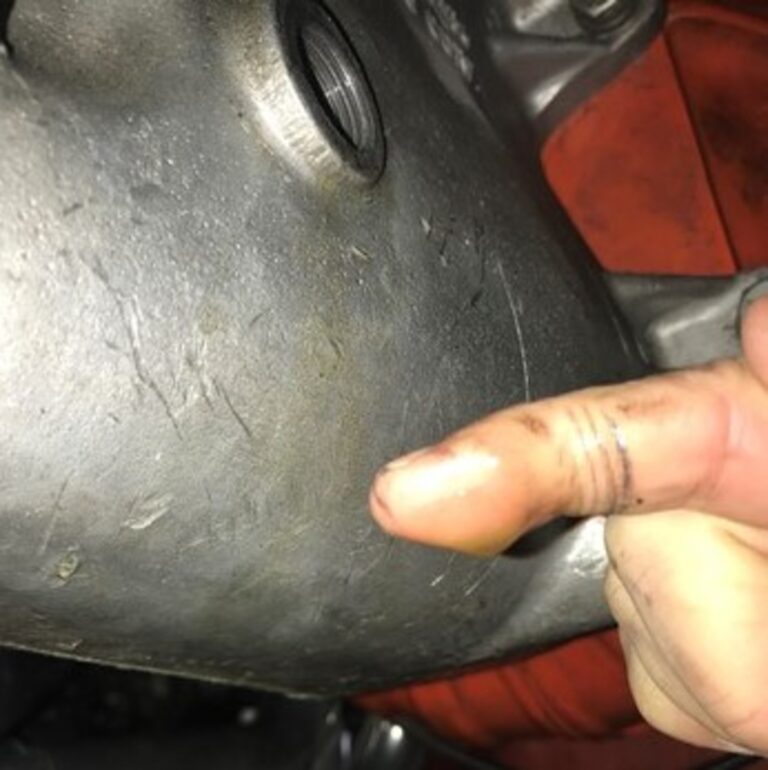
Checking fluid levels is the first step; make sure the transmission, axel, or drive case is level so that you are checking at the right point. Take out the drain plug and simply put your index finger in straight at the bottom of the threaded open; remove and see if there are any signs of fluid on your finger. If not; reinsert your finger while bending down slightly and remove to see any signs of fluid; repeat bending finger until fluid show on your fingertip. Now you know the level of the fluid inside the case. The fluid level should be right at the bottom of the threaded fill opening.
Adding fluids to these cases can be a bit tricky; so, my method is to put the oil into a container that I can easily fit in the area next to the fill opening. The container has a screw on nozzle to attach a hose.

I put the container of gear oil into a bucket of hot water for about 15-20 minutes to warm up the oil so that it will pour easier.
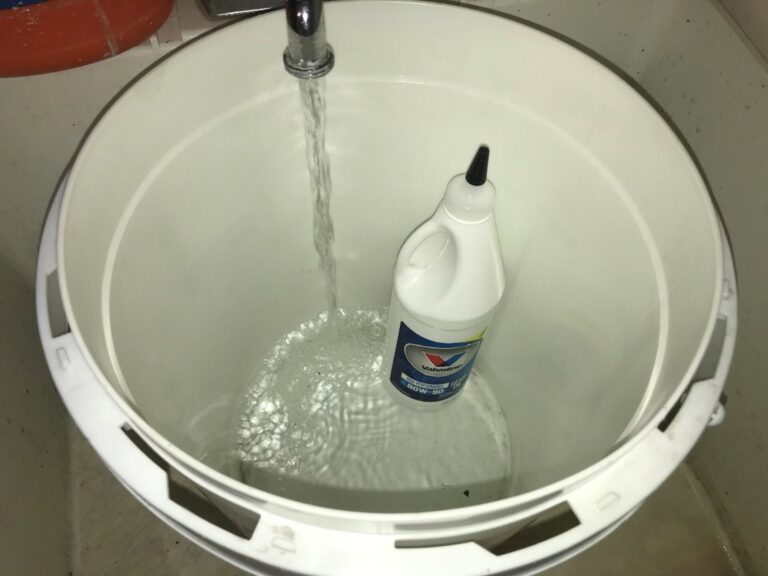
Once the oil is warm I then take the whole container with hose and insert the hose in the fill opening and the container either next to or above the opening (if possible) and squeeze the oil out of the container into the case. It is a good idea to hold the hose with your other hand to avoid the chance of getting an eye full of gear oil. Warm oil is easier to squeeze from a container than cold. Periodically check the level so you do not overfill and make a mess on the floor (Even though I frequently do). This method works even if you cannot get the container above the fill opening. This method works in any part of your oil and lube project where the fill opening is in a difficult location.
Make sure you reinstall fill plug when finished.

Lubrication
The first step to lubricating the chassis, suspension, and steering is to inspect the condition of the rubber dust covers. If they are damaged or rotten/cracked then repairs are needed before add any grease.
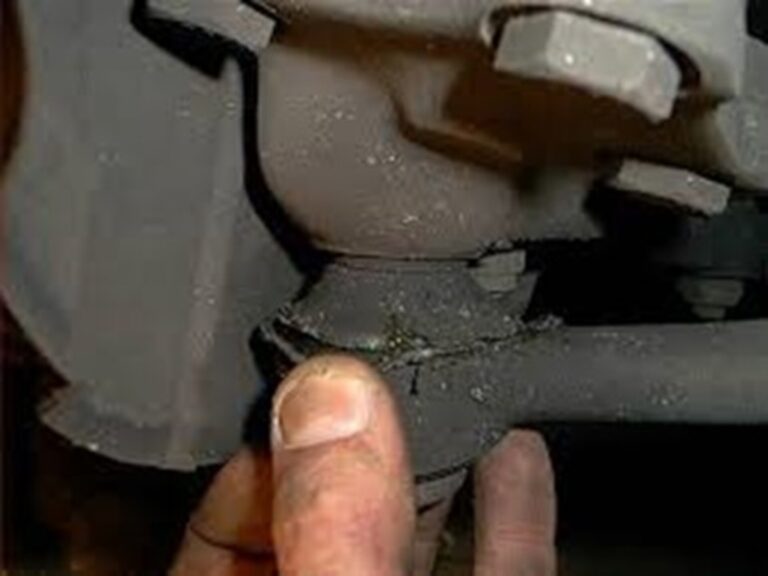
Take your time, clean around the dust covers, and check both front and rear for fittings.
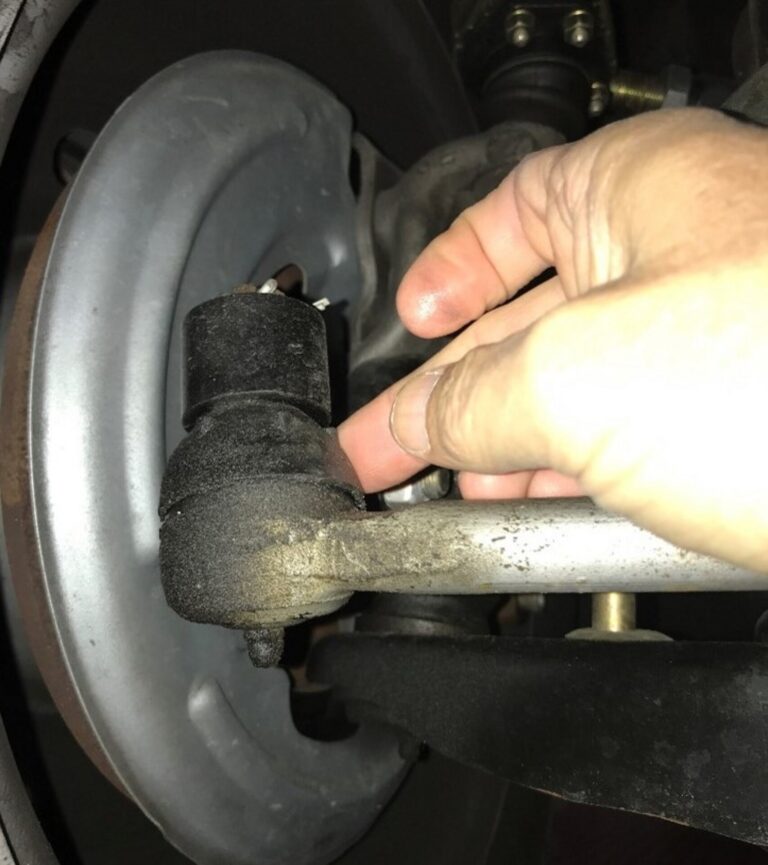
The next step is cleaning the grease fittings (zerks) to remove any dirt and grime to avoid contaminating the grease going into the fitting as well as avoiding damaging the fitting itself which may cause premature failure.

Adding grease via your grease gun should only take a few squeezes of the trigger. When attaching your grease gun make sure you feel/hear it click into place for a good connection to apply the grease. So, watch and listen for grease coming out from around the dust cover. Do not over fill and clean up any grease outside of the dust cover to avoid grease getting onto other parts or your brakes.
A little oil and lube work goes a long way toward keeping your classic car on the road for miles to come.